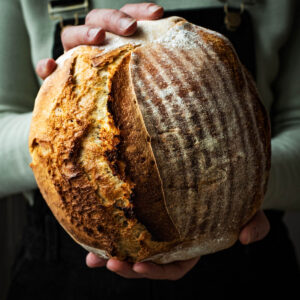
Spelt Sourdough Bread
Prep Time: 10 minutes
Cook Time: 40 minutes
Resting Time 12 hours
Total Time: 12 hours 50 minutes
Servings: 10 slices
Description
100% spelt sourdough bread, made with only spelt flour. This lower hydration bread is easy to make, even for sourdough beginners.
Ingredients
- 300 grams (10.6 oz) water room temperature
- 100 grams (3.5 oz) active sourdough starter
- 550 grams (19.4 oz) light spelt flour also called sifted or white spelt
- 10 grams (0.35 oz) fine sea salt
Instructions
- Add the water and starter to a large mixing bowl and whisk to combine.300 grams (10.6 oz) water, 100 grams (3.5 oz) active sourdough starter
- Add the flour and salt to the bowl, and use a wooden spoon or spatula to mix until a shaggy dough forms. Finish mixing with your hands to fully incorporate the flour.550 grams (19.4 oz) light spelt flour, 10 grams (0.35 oz) fine sea salt
- Cover the bowl and set aside to rest for 30 minutes.
- Once the dough has rested, begin your stretches and folds. Do three rounds of stretches and folds over the course of an hour, once every 20 minutes.
- Form the dough into a ball or boule by placing it onto a clean surface and using your hands to rotate until surface tension forms.
- Line a proving basket with a tea towel and sprinkle with flour. Place the dough upside-down into the prepared basket.
- Cover and set aside to rise at room temperature for three hours. The dough should visibly rise during this time. If it hasn't, let it rise for longer at room temperature (see pictures 6 and 7 in the step-by-step section above).
- Place the dough into the refrigerator overnight, or for at least eight hours and up to 24 hours.
- Place a heat-safe dutch oven into the centre rack of your oven and preheat the oven to 240°C (465°F). The oven must be this hot and the dutch oven preheated for the bread to turn out properly.
- Turn the dough out onto a piece of parchment paper and score with a sharp knife.
- Carefully remove the dutch oven and place your loaf into it, using the parchment paper as handles to lift the bread.
- Bake for 20 minutes with the lid on, then remove the lid and reduce the temperature to 220°C (425°F) and bake for another 15-20 minutes, or until browned to your desired degree.
- Remove from the oven and cool in the pot for ten minutes before carefully removing the bread and cooling fully on a wire rack. It must be completely cool before slicing.
- I recommend storing it in the pot you've baked it in, or freezing individual slices and toasting to thaw.
Video
Notes
Important: only use light spelt for this recipe, especially the first time you make it. Sprouted spelt will not work and whole grain spelt, while it can be added up to a point, will also make the dough more difficult to work with and requires a different process.
Note that the dough will be quite stiff immediately after mixing. You'll probably need to stretch with both hands for the first round of stretches and folds, and then as the gluten relaxes, the following rounds will be easier and more like white flour bread. See video for a visual of this.
You may need another 50g or so of water - see how your dough looks and compare it to the step-by-step photos. Different types of flour (mostly depending on where the grain is from) will absorb water at different rates and may need to be adjusted slightly. I've made this loaf dozens of times with German, Dutch, Swedish, and French-grown spelt flour and my mum and a couple of colleagues have successfully tested with Canadian spelt flour, but there will be some variation.
Update 01/23: I tried doing the cold method for this bread (not preheating the pot in the oven) and it's okay, but not nearly as good. If you want to try this, bake the bread for 30 minutes with the lid on before removing and baking until brown, but I'd recommend just making a pan loaf instead.
Update 01/25: in a kitchen set at 18°C, the bread needed almost six hours to rise as much as it should before being refrigerated. This step is extremely important to ensure the loaf is correctly proved so I recommend going by the step-by-step photos to make sure your loaf looks as it should before refrigerating, or it will be under-proved. You could prove in a warm place, like the oven with the light on, to mitigate this if your home is also cold.
Nutrition
Serving: 1 | Calories: 229kcal | Carbohydrates: 42g | Protein: 8g | Fat: 2g | Sodium: 391mg | Potassium: 1mg | Fiber: 7g | Calcium: 1mg | Iron: 3mg
Nutrition is provided as a courtesy and is an estimate. If this information is important to you, please have it verified independently.