

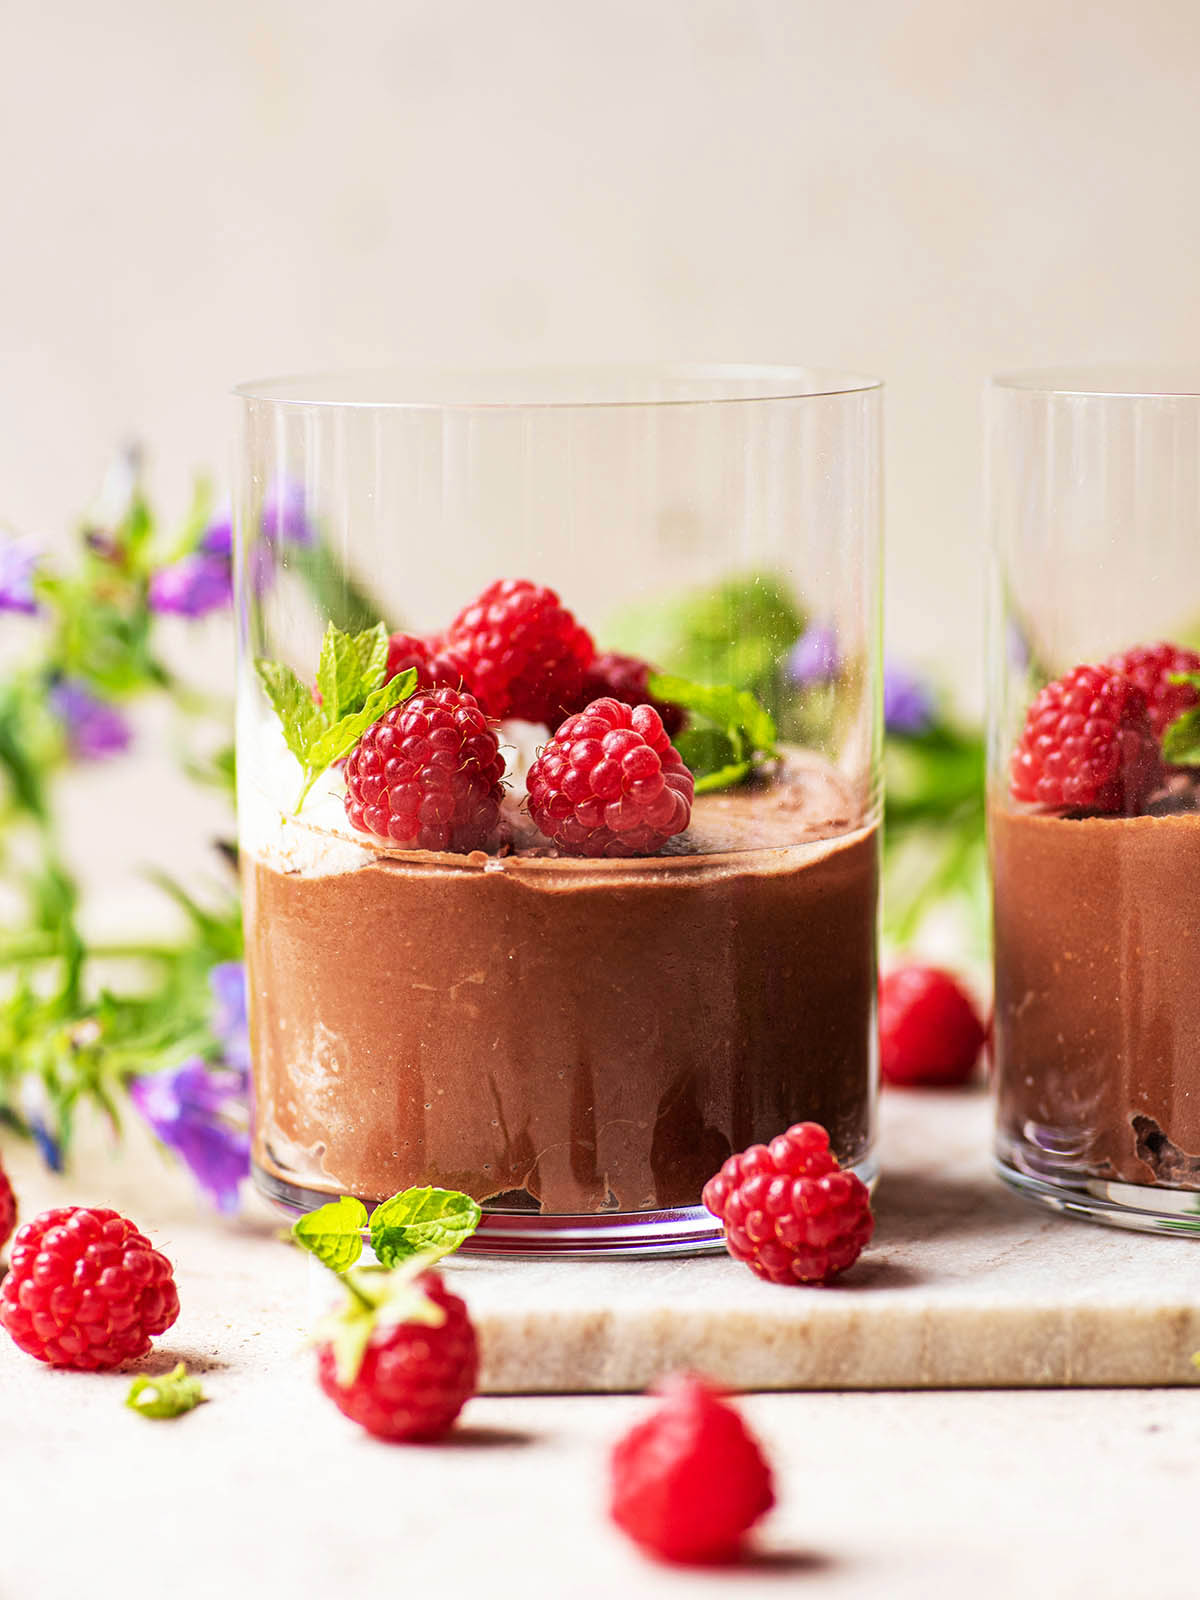
Chocolate Mousse Without Eggs or Aquafaba

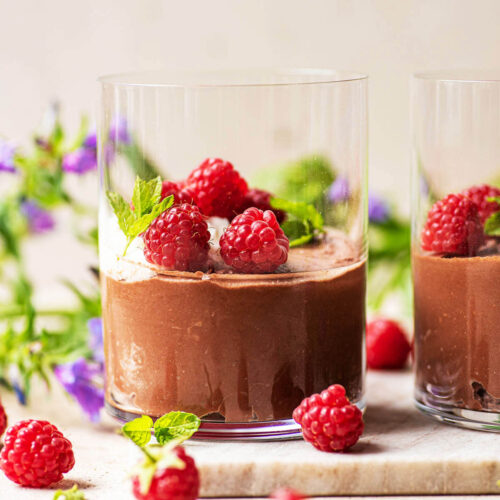
Although a vegan chocolate mousse will never exactly replicate a egg-based chocolate mousse, this one comes pretty close, and you don’t need to worry about eating raw eggs. Plus! You need less time and less ingredients. A win win, really. It’s also a no-heat recipe with no stove top time.
You only need five ingredients and about five minutes of active time, too. This recipe is all about shortcuts and uses some great tricks for the best results. Topped with some berries or other fruit, it makes a really nice light and fresh dessert, but still chocolate. The only caveat is that the coconut milk needs to be cold before starting.
I love a good chocolate mousse but am always looking for good dairy-free alternatives due to my milk allergy – this is my favourite to date. A bit like vegan chocolate ganache, this is lighter as it’s made with cocoa instead of melted chocolate. Once refrigerated, the texture is surprisingly similar to classic mousse and absolutely delicious. While this version uses coconut milk, you can make a water-based version. Try this chocolate orange mousse, made with only chocolate and orange juice (it’s such a neat technique).

I first shared this recipe in 2015. It’s been updated with improvements to the recipe instructions and slight improvements to the recipe, new photos, including step-by-step photos, and more helpful information.
I don’t use affiliate links. Any links you see here are to other recipes or related information, not paid links.
One reader, Alex, commented: “Super easy and delicious recipe! It was so creamy and rich. Now I keep a can of coconut cream in the fridge all the time! One trick I figured out is after chilling the coconut cream overnight, open the can from the bottom to drain the coconut water first, then open the top and push out the cream.“
Ingredients You’ll Need and Why
You really do just need five ingredients, including salt and vanilla. The trick is to use a good cocoa and a coconut milk brand that you know isn’t grainy. These are my notes from recipe testing and you can find the full recipe card below with complete measurements and instructions.
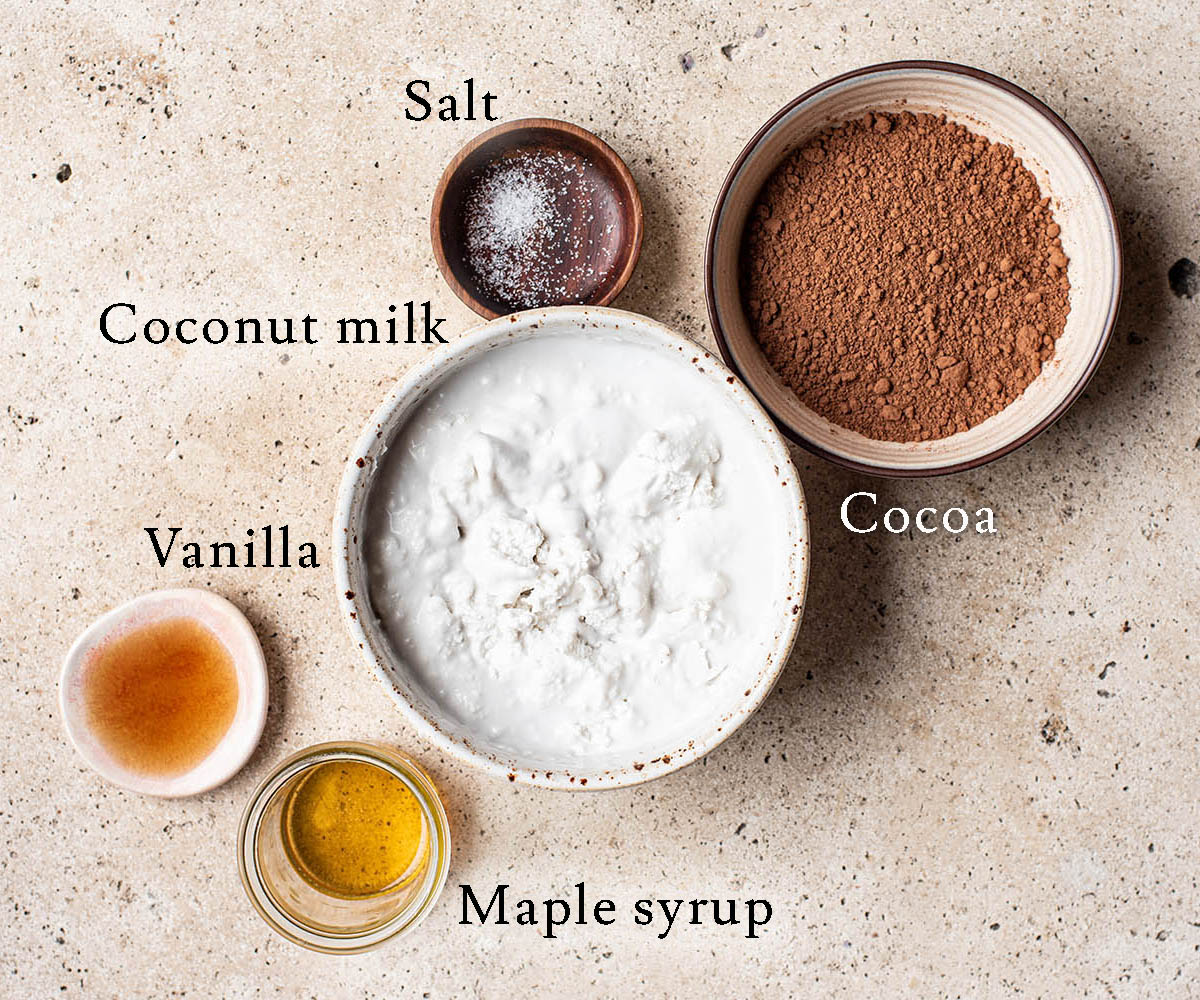
- Coconut milk: any full-fat canned coconut milk should work, but some aren’t great for whipping. It depends on the brand (and sometimes they change with no warning!). Generally speaking, if you shake the can and it doesn’t slosh around much, it should have the cream separate from the water, which is what you’re looking for. Some are grainy and unpleasant, though. If you can get the coconut cream that’s marketed specifically for whipping, use that.
- Cocoa: raw cacao and regular cocoa powder can be used interchangeably here. Don’t mix this up with cocoa drink powder (which has added sugar and usually milk powder). If you prefer a sweeter mousse, use Dutch process cocoa, which is a little smoother and milder than natural cocoa powder.
- Maple syrup: the darker the maple syrup, the better. The letter grading is no longer a concrete way to know which type of maple syrup you’re getting, so look for colour. Honey can be substituted for maple syrup if the recipe doesn’t need to be fully vegan. I recommend a runny honey here. Note that honey is sweeter than maple syrup and you should add to taste.
- Vanilla extract: spices and flavourings can be changed up to suit you. I like adding cinnamon, or a mix of warm spices like cardamom, nutmeg, and cloves in the winter. You can also add orange zest.
- Salt: a tiny pinch of salt brings out the chocolate flavour more effectively.
How to Make Chocolate Mousse
It really is extraordinarily simple, just whipped coconut cream with cocoa and a couple add-ins. It’s important to sift the cocoa to avoid lumps and you will want an electric mixer for this recipe.
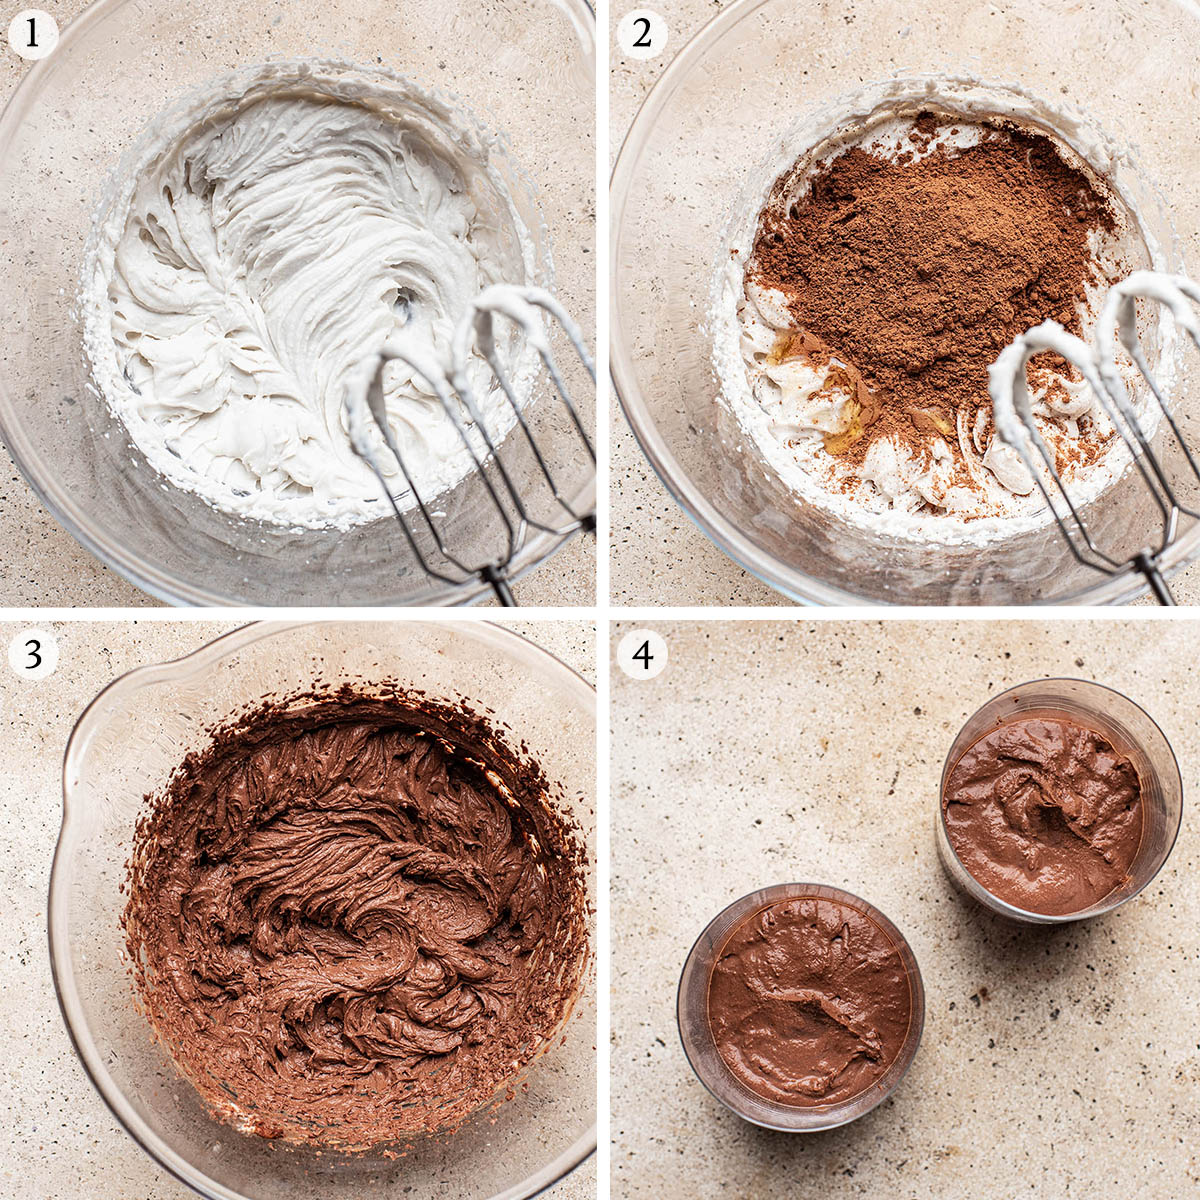
Step 1: add the chilled coconut cream to a bowl and whip until fluffy. It won’t increase in volume as much as dairy whipping cream will but should still whip into soft peaks. This is the same process as for coconut whipped cream, so if you need more guidance on this step, see that post.
Step 2: add the cocoa, maple syrup, and vanilla extract. Any other spices or citrus zest should also be added at this point.
Step 3: mix again until just combined, but don’t take it too far now, or the cream can split. You’ll notice that it thickens slightly from the cocoa. Try the mousse at this point and add more maple syrup or vanilla to taste. As written it’s not very sweet.
Step 4: spoon into serving dishes and chill before topping and serving. They only need half an hour in the refrigerator before serving so you don’t have to wait too long!
Expert Tips
- Chill the milk: for best results, refrigerate the cans of milk the night before you plan on making the mousse. You can keep a couple in the refrigerator rather than pantry just in case.
- Don’t omit the salt: while it might seem superfluous, salt boosts the chocolate flavour and shouldn’t be left out.
- Use a hand mixer: standing mixers are generally too large for a smaller amount of cream like this, and don’t mix it very effectively. You can use a whisk and elbow grease but be prepared to mix for a long time.
- Choose a good cream: as with coconut whipped cream, some brands of coconut milk may work less effectively for this, though I haven’t often run into that. As long as the coconut cream is solid when you take it out of the can it should be fine. I’ve never tried ultra-processed vegan whipped cream alternatives in place of coconut milk for this recipe.
- Chill before serving: it’s possible to serve vegan mousse immediately after mixing. It has more of a pudding texture in that case, and sets into more of a mousse when chilled. Both are good!
More No-Bake Chocolate Recipes
Vegan Chocolate Pudding – a vegan chocolate pudding made without any starch, flour, or eggs, this recipe uses an old-fashioned, tried and true method to make a cooked pudding that has an excellent creamy texture and rich taste.
Chocolate Chia Mousse – if you want to have chocolate mousse for breakfast, try this blended chia version instead.
Raw Chocolate – with just a few ingredients, you can make honey-sweetened raw chocolate and keep it on hand for any sweet cravings.
Vegan Chocolate Truffles – I’ve been making these every year for the past 15 years and they are always perfect. Not too sweet, creamy, and with minimal ingredients.
If you make this Vegan Chocolate Mousse recipe or any other dairy-free dessert recipes on Occasionally Eggs, please take a moment to rate the recipe and leave a comment below. It’s such a help to others who want to try the recipe. For more OE, follow along on Instagram, Facebook, and Pinterest, purchase the Occasionally Eggs cookbook, or subscribe for new posts via email.
Vegan Chocolate Mousse
Description
Ingredients
- 500 ml (2 cups) coconut cream, from two cans of full-fat coconut milk*
- 6 tablespoons cocoa powder
- 3 tablespoons maple syrup
- 1 teaspoon pure vanilla extract
- 1 pinch sea salt
Instructions
- Chill the cans of coconut milk overnight before you plan on beginning the mousse, the same way you would for coconut whipped cream.500 ml (2 cups) coconut cream, from two cans of full-fat coconut milk*
- Place the cream into a large bowl and whip on high speed with electric beaters until fluffy and increased in volume.500 ml (2 cups) coconut cream, from two cans of full-fat coconut milk*
- Add the cocoa, maple syrup, vanilla, and salt, then mix carefully by hand (with the beaters, just not turned on) before whipping to combine. This helps to prevent cacao from flying over the sides of the bowl.6 tablespoons cocoa powder, 3 tablespoons maple syrup, 1 teaspoon pure vanilla extract, 1 pinch sea salt
- Scoop the mousse into glasses or small dishes and refrigerate for half an hour. Serve chilled topped with whipped cream and fruit, if desired.
Notes
Nutrition
Nutrition is provided as a courtesy and is an estimate. If this information is important to you, please have it verified independently.
Super easy and delicious recipe! It was so creamy and rich. Now I keep a can of coconut cream in the fridge all the time! One trick I figured out is after chilling the coconut cream overnight, open the can from the bottom to drain the coconut water first, then open the top and push out the cream.