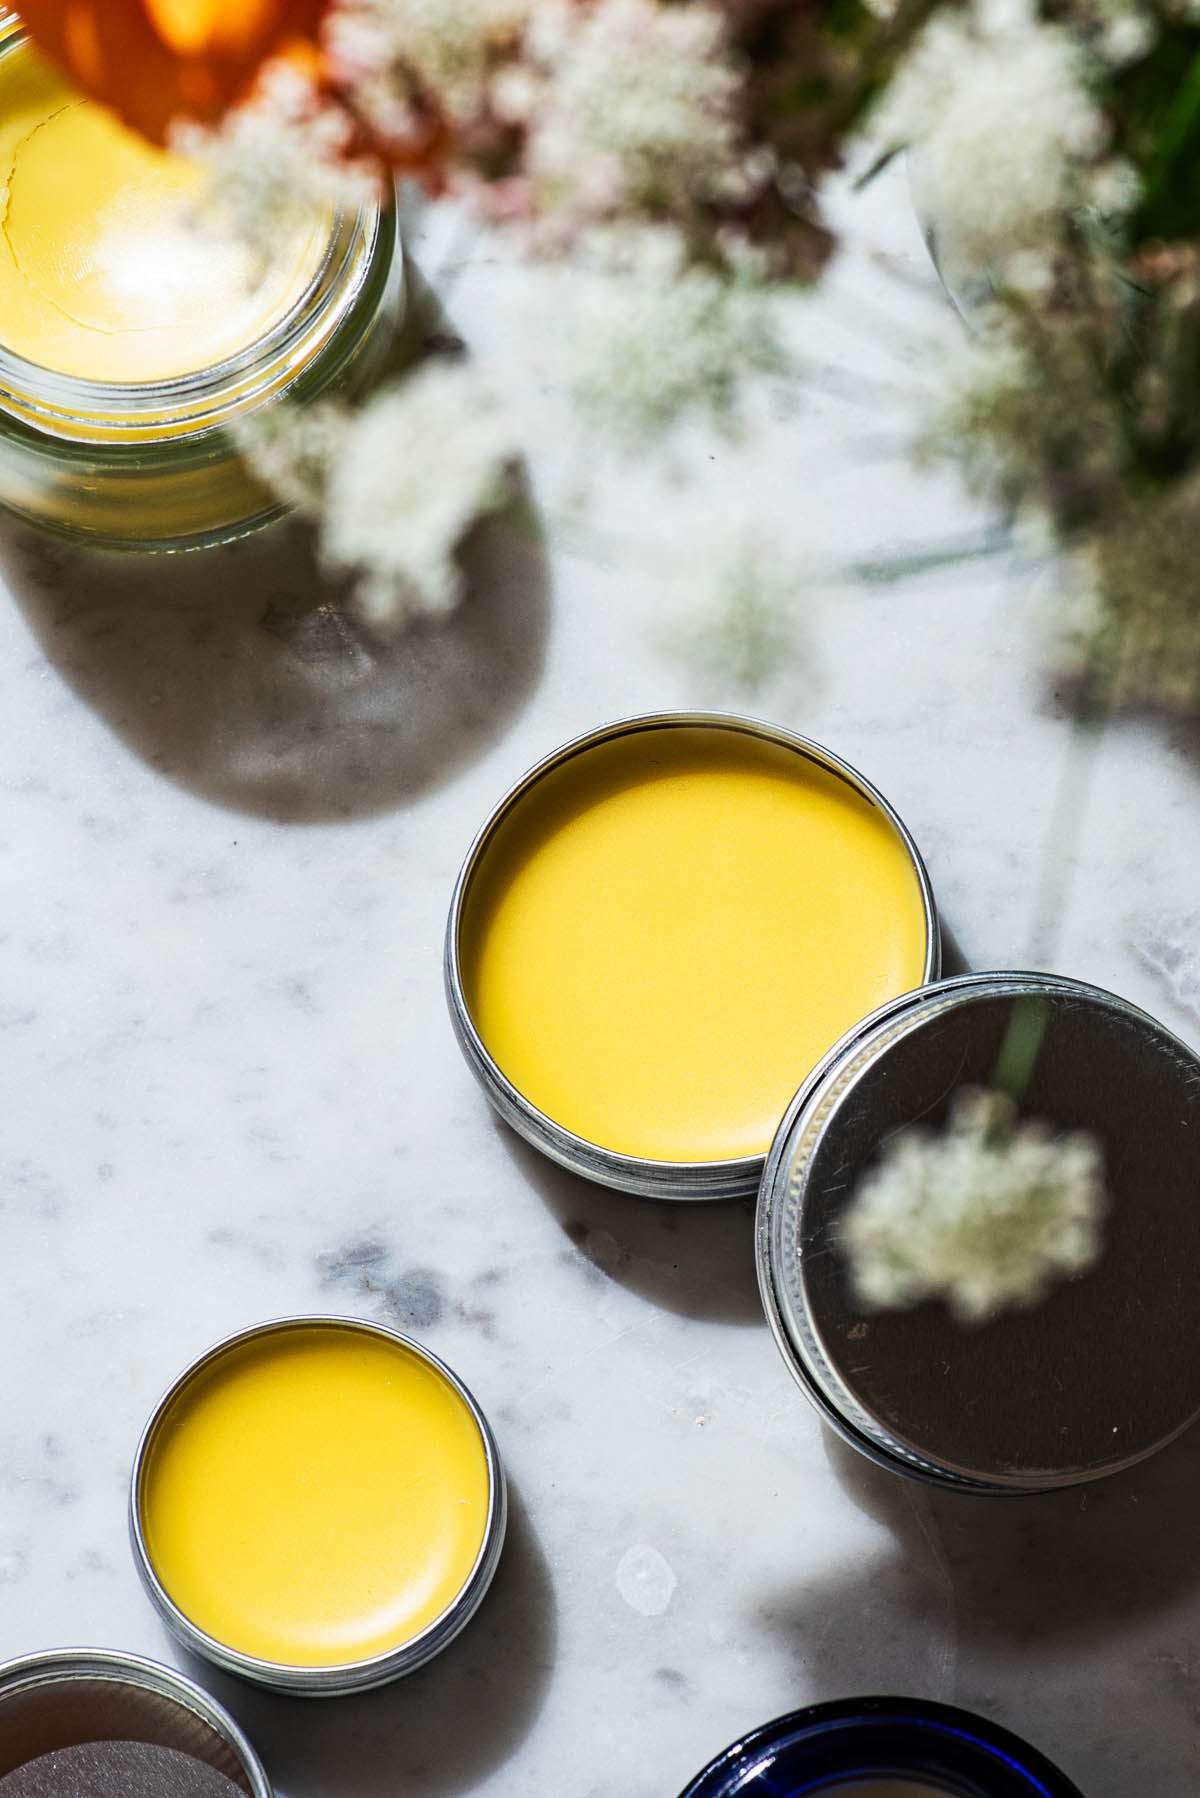
This easy beeswax lip balm has been a staple item for me for well over a decade now – I used to sell it at markets, and have been making my own lip balm at home since I was about 16. It’s a well-set balm that can be used even in warm weather and won’t melt in your pocket.
With just beeswax, olive oil, and shea butter, it’s a simply recipe and makes enough to last for a long time or to give as gifts. I love including a little tin in a gift package, and it’s a useful gift. You can always use more lip balm and this makes a good hand salve too.
If you like this recipe, you might also like to try my homemade face cream made with similar ingredients.
One reader, Margaret, commented: “This couldn’t have been easier to make, and it feel wonderful on my lips & skin already. Thank you for sharing your recipe!”
Ingredients
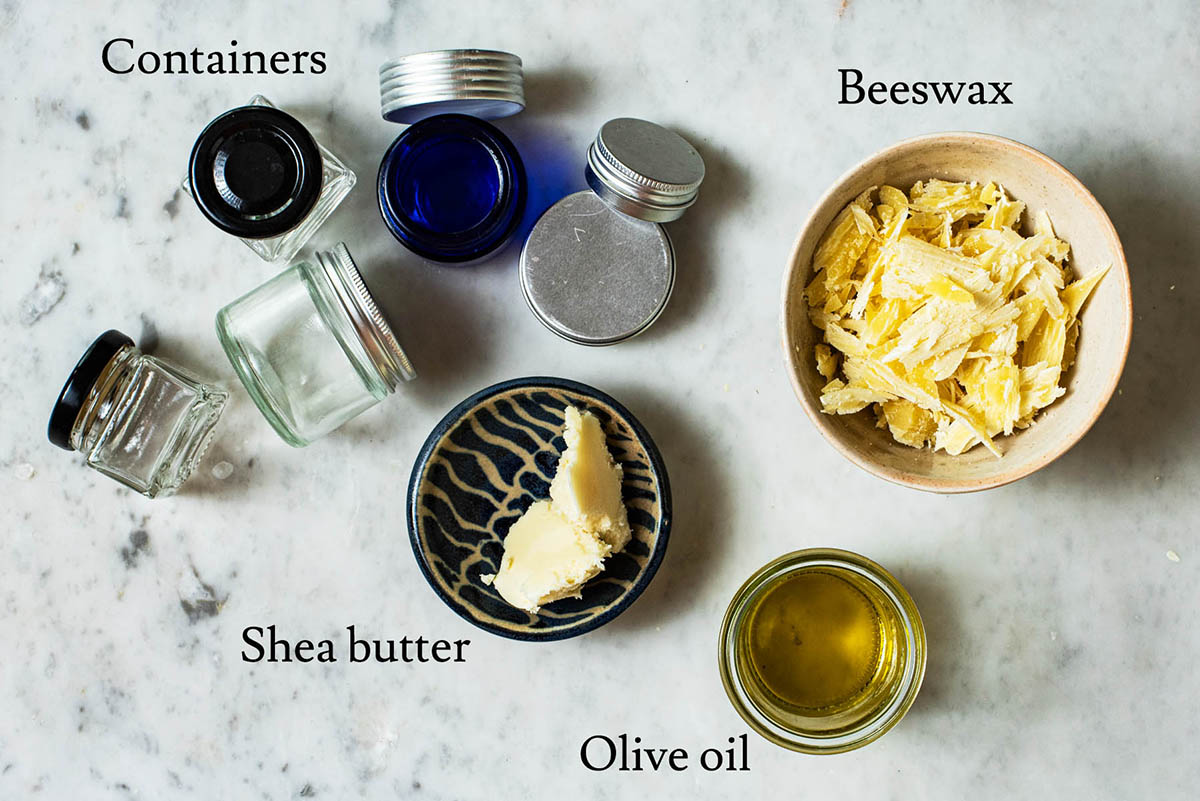
Ingredient Notes and Substitutions
- Olive oil: to make this even more nourishing, you can use herbal oil in place of the olive oil. I’m sure another oil type could work, like sweet almond, but I’ve never tried it.
- Beeswax: the mini pellets are easiest to use. I have 1 kilo blocks that I buy and then kind of shave bits off of with a knife until it reaches the necessary weight. You can grate it but note that the grater will forever be covered in wax.
- Shea butter: I prefer unrefined shea butter – it smells so good – and just get it from the grocery store. I’m not sure where to buy it in North America now but I’m sure it’s available online.
Step by Step
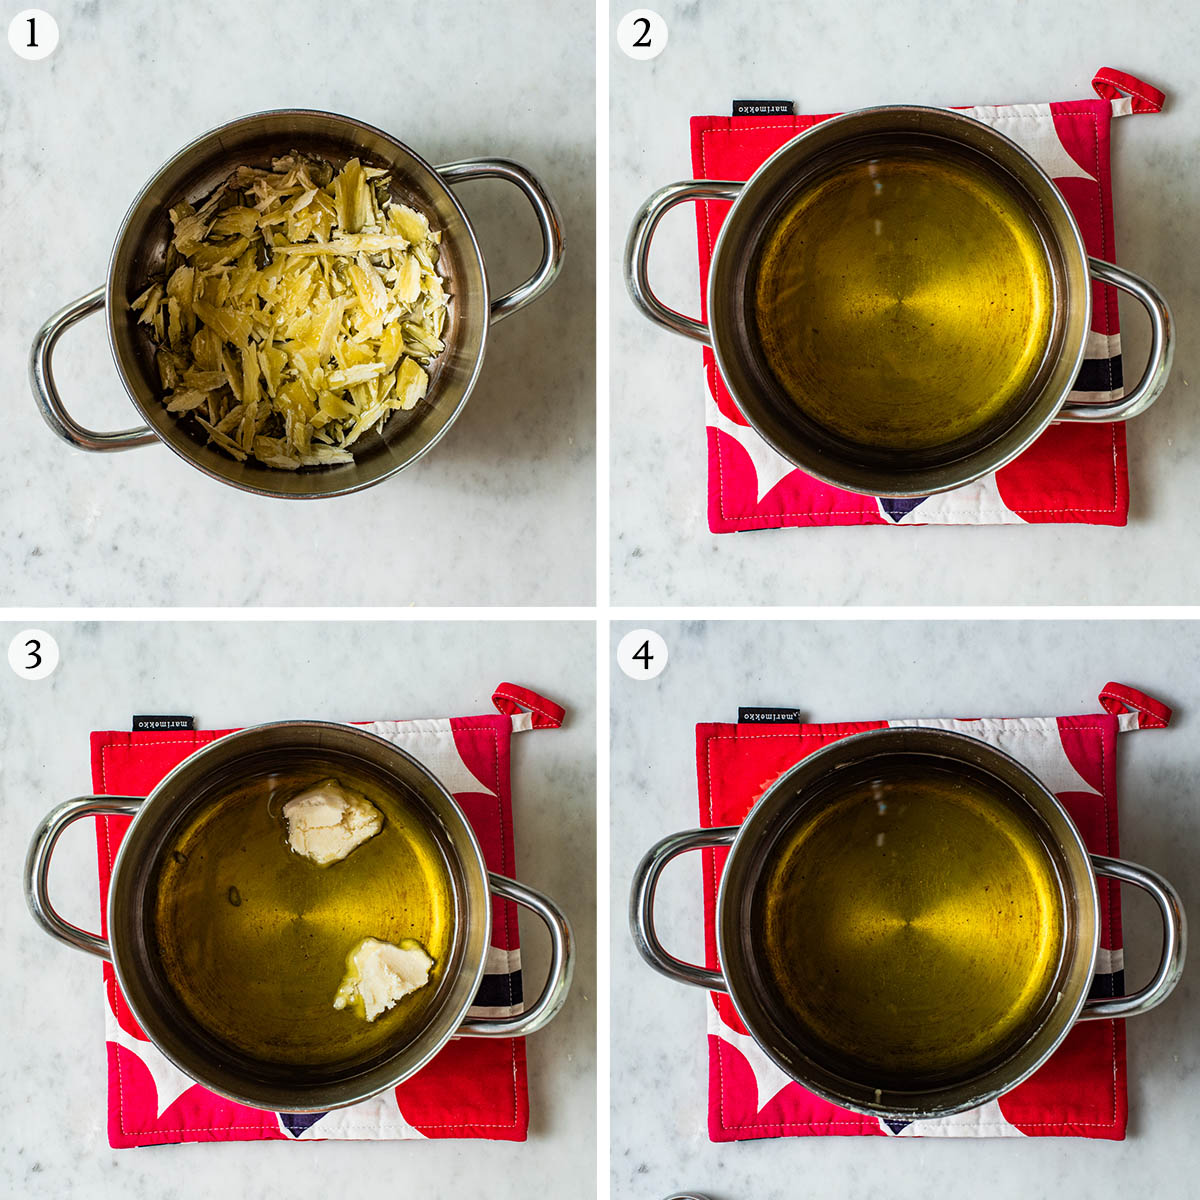
Step 1: add the beeswax and olive oil to a small pot.
Step 2: melt over low heat until all of the wax has melted.
Step 3: remove from the heat and add the shea butter.
Step 4: let it melt fully in the residual heat.
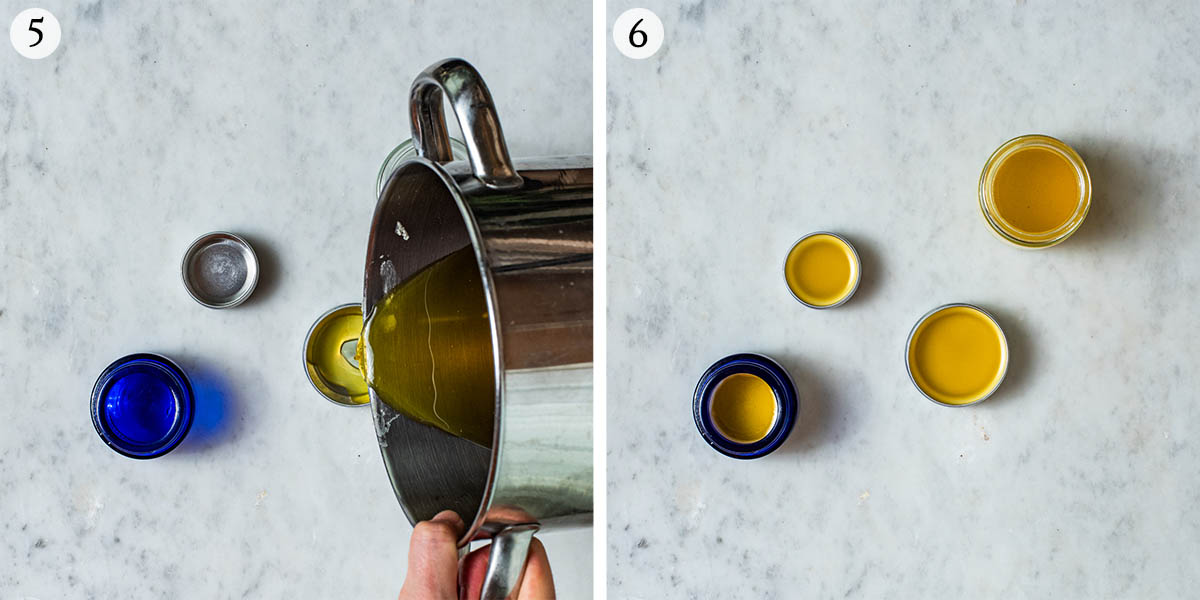
Step 5: pour into the tins or jars right away.
Step 6: let the lip balm set and cool fully before covering.
Recipe Notes
While you could substitute another oil for the beeswax, these are typically palm-oil based and not a very good environmental choice. I use local organic beeswax, which is a little pricey, but still ends up being a lot cheaper than buying an equivalent amount of beeswax lip balm from the shop.
To more easily clean the pot the ingredients are melted in, wipe it out right away with something like paper towel before the lip balm has time to harden. If you don’t use paper towel, a rag works too, but is hard to clean afterward. I usually end up keeping the pot set aside, covered, and just scrape it out to use over the course of a few days.
Adding Scent
I don’t add any essential oils to lip balm, but you can if you’d like some scent. I’m not a fan of consuming these oils and of course anything you put on your lips is going to find its way into your mouth at some point.
Essential oils require huge amounts of plant material and energy to produce, so I use them very sparingly (for things like steam inhalation when sick). If you love them, feel free to add a few drops to your oil mixture before pouring.
Cup measurements aren’t included for this recipe because they’re too variable. If the beeswax is in pellets, or grated, or chopped, it makes too much of a difference, and that doesn’t work for volume measurements. Grams and ounces are provided.
Expert Tips
- Use it as a salve: this is a very hydrating, protecting salve that can be used as a cuticle cream or to soothe extremely dry skin. We use it for dry patches on the hands in particular.
- Reuse containers: I keep little glass jars and tins to use for things like this (usually from friends) and run them through the dishwasher before use. You can buy little tins and things online and in places like health stores too.
- Use an old pot: this is terribly difficult to remove from cooking pots, so use one that you don’t mind having waxy. All the ingredients are edible so it’s not such a big deal, but you wouldn’t want to use a really fancy pot for it.
- Don’t heat the shea butter: it’s added last and left to melt in the residual heat because shea butter will become grainy when heated too much. It melts quickly.
How to Store
Storage: keep in a cool, dark place for several months. This lasts a long time, but if you’re worried about spoilage – this is a greater concern if you used older oils – it can be kept in the fridge or freezer.
More Low Waste Recipes
Homemade Deodorant for sensitive skin
Homemade Face Cream for sensitive skin
2 Ingredient Calendula Salve
If you make this Beeswax Lip Balm recipe or any other low-waste recipes on Occasionally Eggs, please take a moment to rate the recipe and leave a comment below. It’s such a help to others who want to try the recipe. For more OE, follow along on Instagram, Facebook, and Pinterest, purchase the Occasionally Eggs cookbook, or subscribe for new posts via email.
Homemade Beeswax Lip Balm
Equipment
- Small pot
- Electric scale
- Small tins or jars
Ingredients
- 50 grams (1.76 oz.) olive oil
- 50 grams (1.76 oz.) beeswax
- 20 grams (0.71 oz.) shea butter
Instructions
- Add the olive oil and beeswax to a small pot. Heat over low until the beeswax is fully melted, 5-10 minutes.50 grams (1.76 oz.) olive oil, 50 grams (1.76 oz.) beeswax
- Remove from the heat and add the shea butter. It will melt in the residual heat.20 grams (0.71 oz.) shea butter
- Pour the mixture into the tins or containers immediately. Let it set and harden before adding the lids, then store in a cool place for several months.

Very good basic recipe. It was a bit too waxy for my preference so I would just adjust the beeswax to oil ratio a bit for my liking next time.
Do you think I am able to use coconut oil instead of shea butter?
Hi Autumn, I personally find that coconut oil can be a bit drying, but it should be fine to use in terms of consistency.
Hi! I have been looking for a body cream with only these three organic ingredients (when available). Do you have anything like that? What do you think of using this recipe as a baby butter?
Thanks
Hi Lynn, I have a couple friends who use this for their babies. I have a separate lotion recipe here (it has added rosewater and cacao butter) but I use this as a salve on my hands and for any other dry skin, not just as lip balm, especially in winter time. You could increase the amount of olive oil slightly to make it easier to spread if you plan on using it more as a cream than a salve.
Hi,
is it essential to store for several months or can that part be skipped?
Hi Sienna, those are instructions for how to store it if you’re not using it immediately. The lip balm doesn’t need to be stored before use.
Thank you for generously sharing your recipe. Is this a firm enough balm for twist up tube containers, or do you recommend tins? Thank you!
Hi Rebekah, it is quite firm and I’ve used twist up tubes in the past. It does soften if kept in a warm spot (like a pocket) but is otherwise fine in tubes.
Can you add essential oils to it?
If you use food-grade essential oil, then yes. I used to add mint sometimes when I made this for markets. You don’t need much, just a couple drops.
I love this recipe, my friend made me one like this a few months ago – I used it so much and I needed a new one so I scoured the internet to find one like it. It’s so hydrating and so much better than a regular chapstick, I’m sure it’s so so so much better for the lips with avoiding chemicals and flavourings.
This couldn’t have been easier to make, and it feel wonderful on my lips & skin already. Thank you for sharing your recipe!
How many containers does this make? Looking at .5 oz containers in size.
Hi Ashlee, it makes a total of about 120 grams of lip balm.
Thank you. I know tubes are 5.5 grams each so this recipe can fill little over 21 tubes.