Another great staple recipe, it’s always a good thing to know how to roast garlic. It makes the garlic much sweeter, with a slightly creamy texture, and is easier to use for lots of people who might be sensitive to raw garlic. You can roast either whole heads or individual cloves depending on how much you need.
If you can get fresh garlic that hasn’t been cured in the sun, it’s ideal for roasting as it lacks the thin papery layers of skin. I always roast some garlic right after harvesting and it’s perfect.
Use your roasted garlic to make beetroot hummus or roasted garlic hummus, replace raw garlic in this tahini garlic sauce, or mix a head in with dairy-free mashed potatoes for a subtle garlic twist. It can be added to almost any savoury dish and often used to replace raw garlic if you’re sensitive to it or prefer a milder flavour.
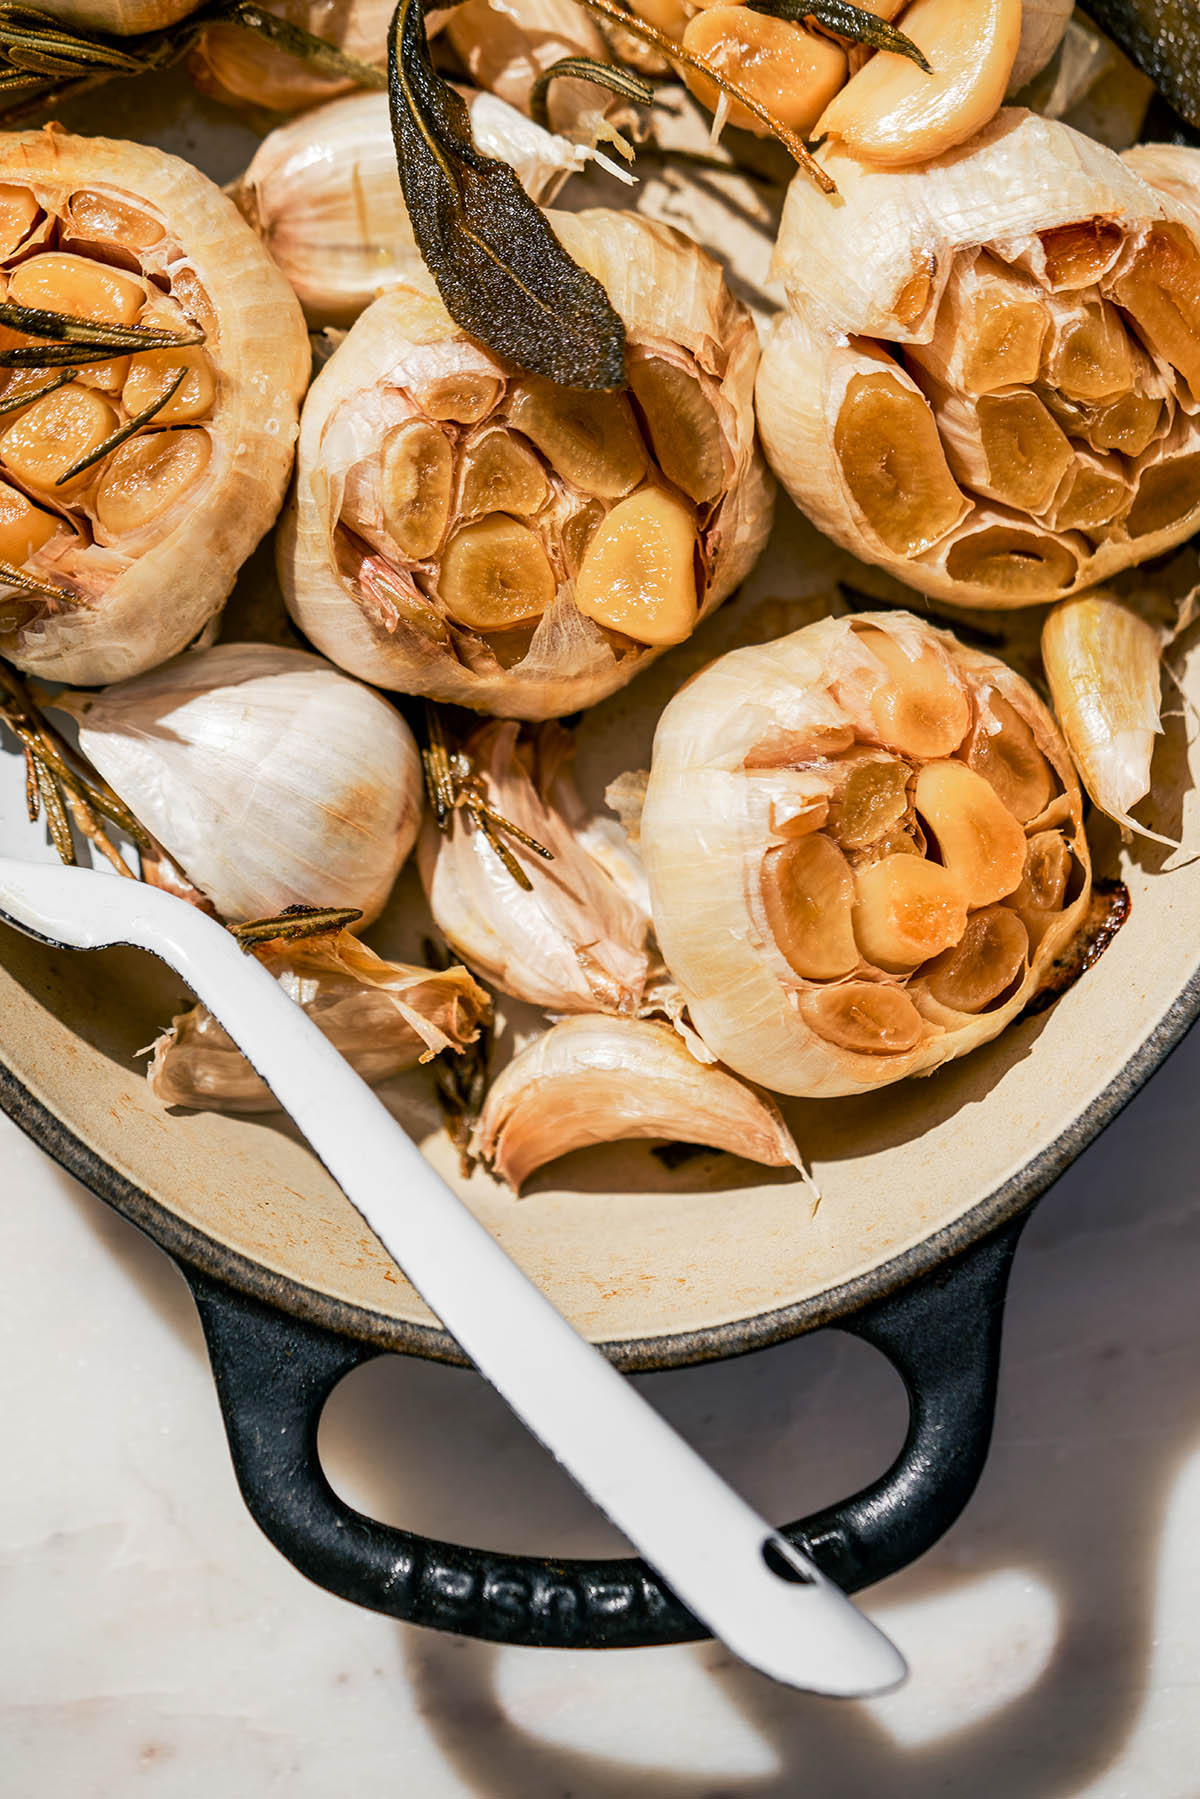
The main image for this recipe was photographed by Sophie MacKenzie.
Ingredients
Ingredient Notes and Substitutions
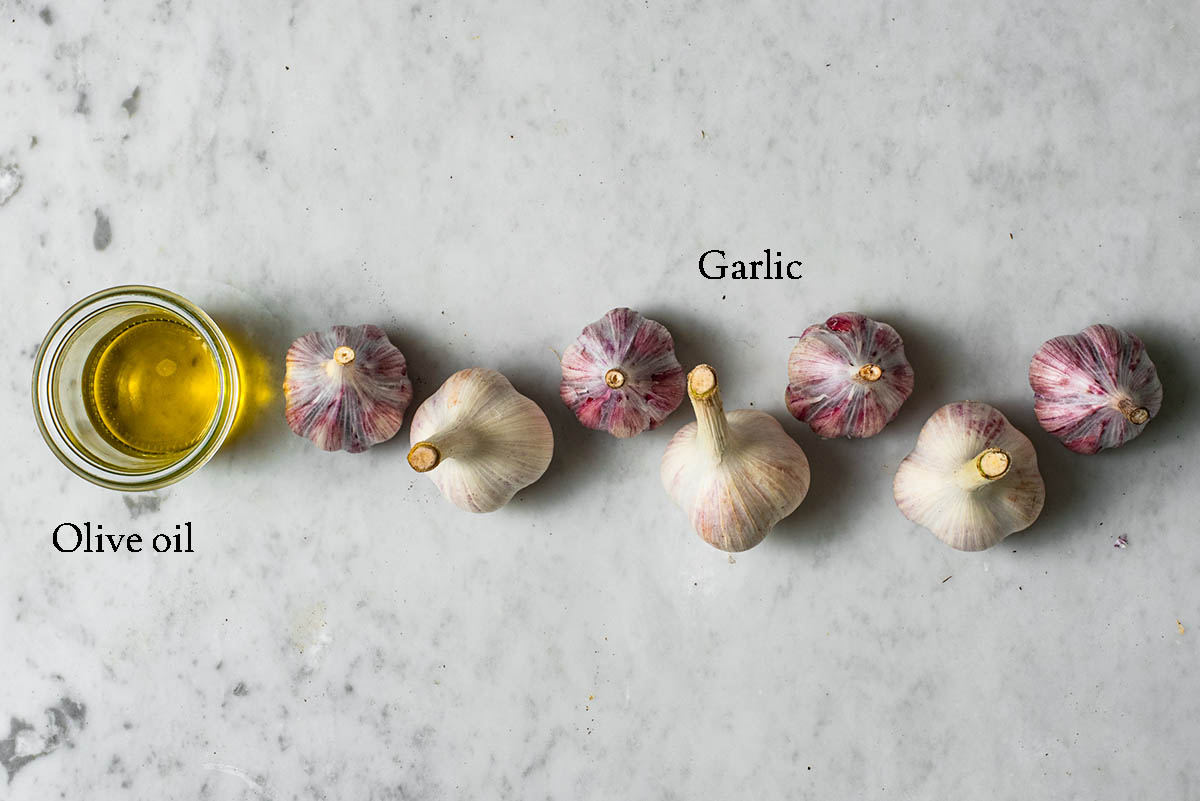
- Garlic: any type of bulb garlic can be used, of any colour, giant or standard, hardneck or softneck.
- Olive oil: I imagine you can use another type of oil if preferred.
- Add-ins: try roasting with herbs to impart some of that flavour to the garlic. Fresh rosemary and sage leaves are excellent.
Step by Step
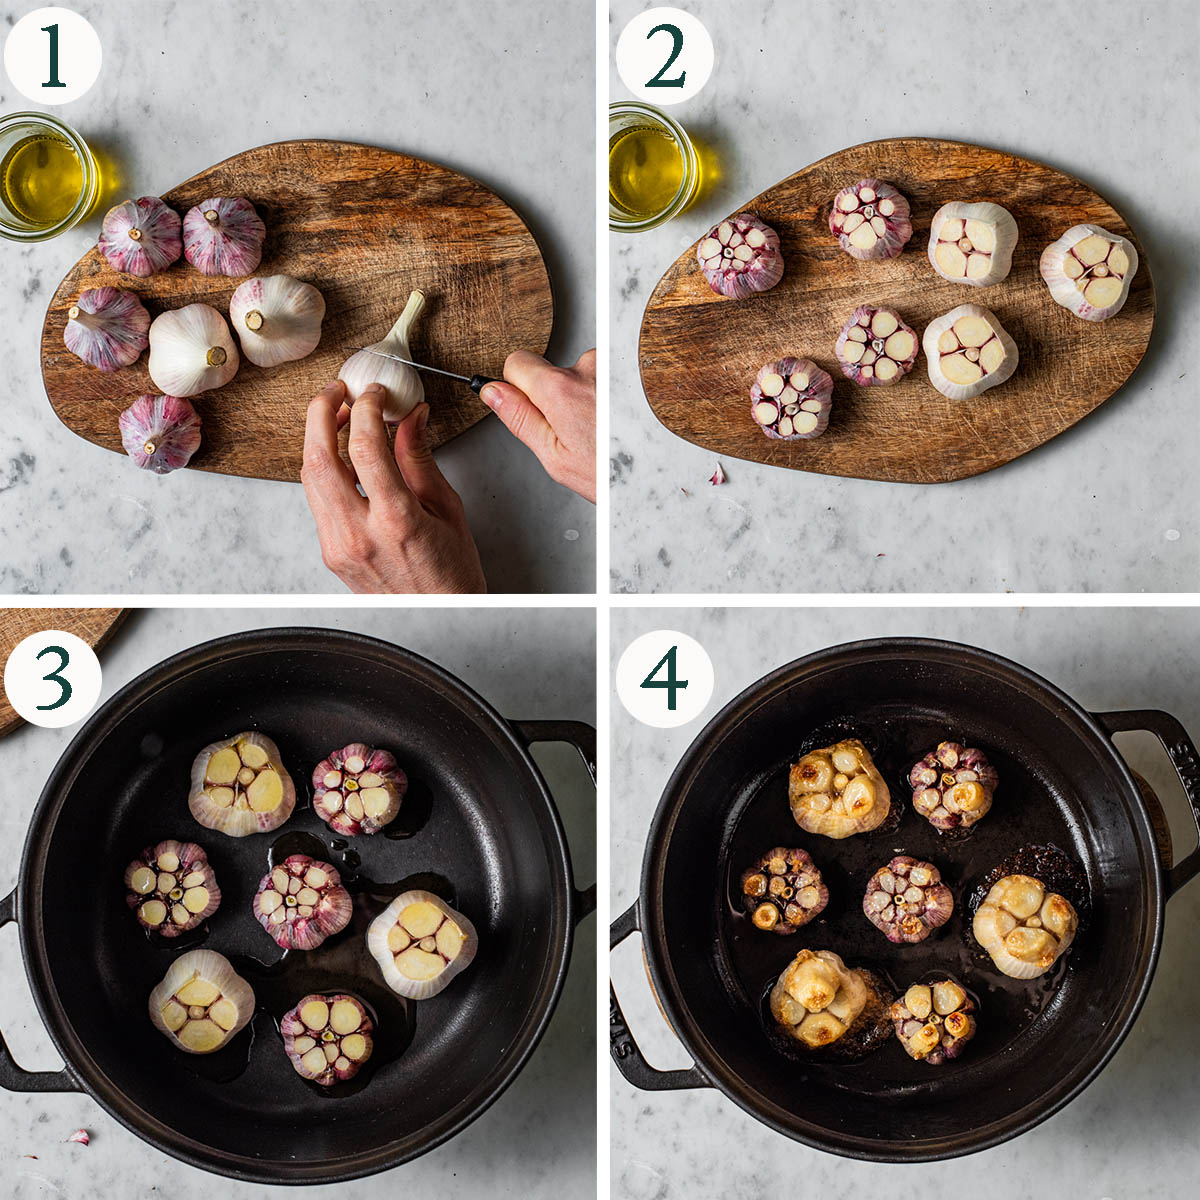
Step 1: cut the top off the garlic heads, just enough to expose the cloves inside.
Step 2: continue for all of the heads and place in a lidded baking dish.
Step 3: top each head with a little olive oil.
Step 4: roast until golden. The individual cloves may push themselves out of the casings.
Recipe Notes
You can roast individual heads wrapped up in aluminum foil, but I don’t use it, so I haven’t provided a guide on that here. A lidded baking dish works just as well and you won’t have any waste.
I don’t particularly like squeezing the roasted cloves out of the head as a lot of garlic is lost that way. Instead, I use a small knife or a skewer to pop the cloves out, pushing lightly from the base, and the clove comes out whole.
Here’s a guide on how to roast garlic in an air fryer. I’ve never used an air fryer but Kelly gives plenty of notes for it.
Cloves or Heads
If you don’t need a whole head of roasted garlic, it is possible to roast individual cloves. I often do this for tray bakes or warm salads (like this one) and it works well. Simply pop the cloves in the oven with the peel on and bake as is. There’s no need to cover for individual cloves but you can if you’d like.
For recipes that need more garlic, or if you plan on freezing it, that’s when to go for a whole head of garlic. Know that you can get that taste without using a whole head, though.
How to Store
Storage: keep the peeled cloves in a sealed container, covered with more olive oil, for up to two weeks. If you’re going to use them within about three days, you don’t need to cover with oil.
Freezing: transfer the roasted cloves (be sure to remove the skin) to an airtight container and freeze for up to three months. If preferred, blend the roasted garlic with a little olive oil – just enough to form a paste – and freeze in dollops on a parchment-lined tray. Once frozen, transfer to an airtight container and add to sauces, soups, and stews for an extra boost.
Expert Tips
- Multitask: I recommend trying to roast your garlic while you have something else going in the oven, too, as it can feel like a bit of an over-use of energy to use the whole oven for an hour for one or two heads of garlic.
- Add herbs: this is optional, but if you have woody herbs on hand, toss a handful in and roast alongside the garlic to add another layer of flavour.
- Use the oil: if you have leftover oil in the bottom of the roasting dish, don’t toss it. It’s infused with garlic now and is absolutely delicious – use it to dip bread in or use for a vinaigrette.
More Kitchen Staples
Mushroom Stock
Baked Sweet Potatoes
Vegan Gravy (without mushrooms)
Caramelised Onions
If you make this Roasted Garlic or any other vegetarian staple recipes on Occasionally Eggs, please take a moment to rate the recipe and leave a comment below. It’s such a help to others who want to try the recipe. For more OE, follow along on Instagram, Facebook, and Pinterest, purchase the Occasionally Eggs cookbook, or subscribe for new posts via email.
How to Roast Garlic
Description
Ingredients
Whole Head Method
- 4 heads garlic or as many as you'd like
- 2 tablespoons olive oil
Single Cloves Method
- 1 head garlic
- 1 tablespoon olive oil
Instructions
For Whole Heads
- Preheat the oven to 200°C (400°F) and set aside a heavy lidded baking dish.
- Cut the top ¼ off each head of garlic, making sure every clove is exposed. Place cut-side up in the baking dish and drizzle each with olive oil.2 tablespoons olive oil, 4 heads garlic
- Cover and place in the oven to roast for 50-60 minutes, until a deep golden colour. Remove from the oven and take off the lid. The garlic can cool in the baking dish or you can carefully remove the heads with tongs to cool on a cutting board.
- Once cool enough to handle, remove the garlic cloves and use as desired.
For Single Cloves
- Preheat the oven to 200°C (400°F). Break up the garlic into individual cloves, leaving the skin on, and place onto a baking sheet or baking dish.1 head garlic
- Mix with the olive oil and roast for 20-25 minutes, or until the skin is golden and has puffed up a little. Remove from the oven and, once cool enough to touch, peel the cloves and use the roasted garlic as desired.1 tablespoon olive oil
- Keep roasted garlic in a sealed container in the refrigerator, covered in extra olive oil, for up to two weeks (without oil, store for 2-3 days). It freezes well.
Nutrition
Nutrition is provided as a courtesy and is an estimate. If this information is important to you, please have it verified independently.
German Potato Salad
Avocado Pasta Salad
Chocolate Raspberry Cake
Almond Flour Chocolate Chip Cookies
About Alexandra Daum
Alexandra Daum is a professional recipe developer, food photographer, and cookbook author. She started sharing carefully tested vegetarian recipes in 2014 and has since published hundreds of recipes with seasonal ingredients and whole grains as the focus. Her work has been featured on CTV, in House & Home and Chatelaine, on popular websites like Buzzfeed and Best Health, and in countless other publications.