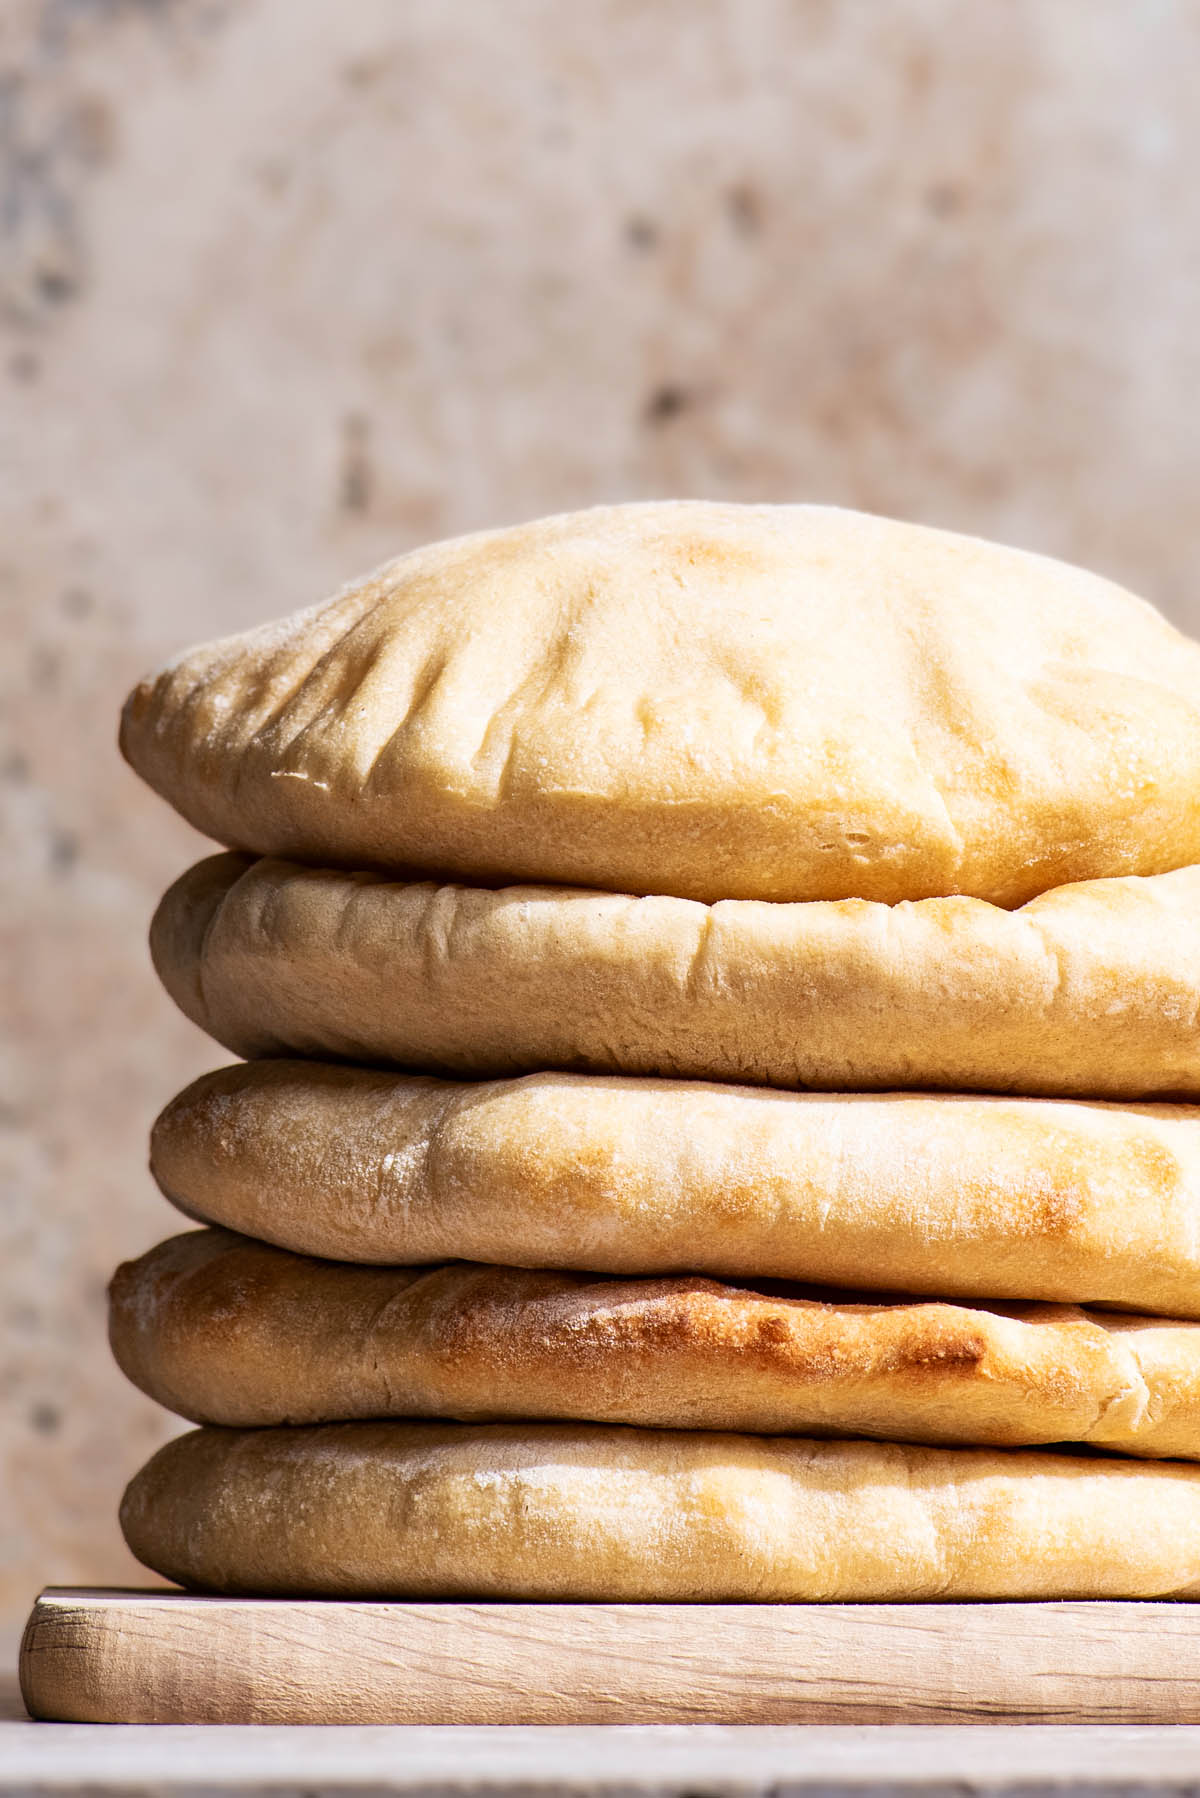
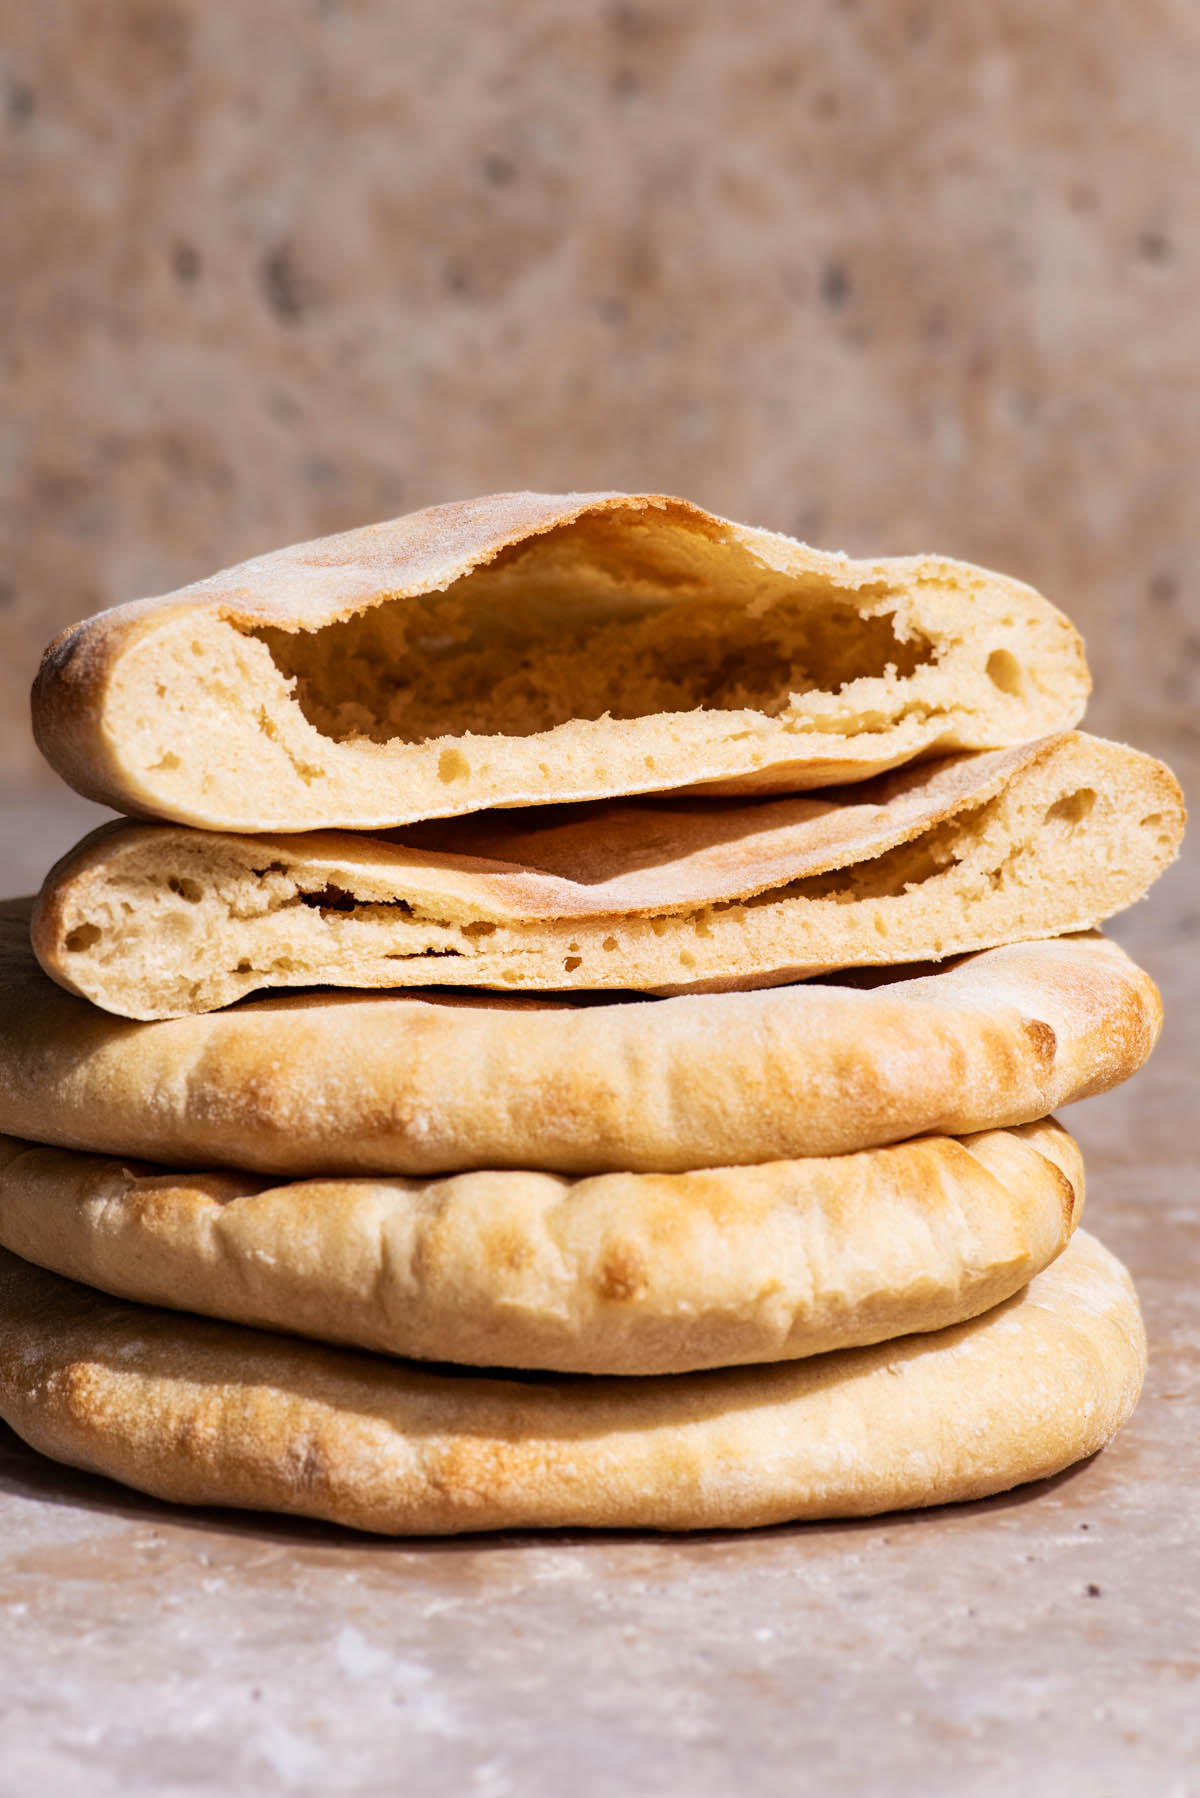
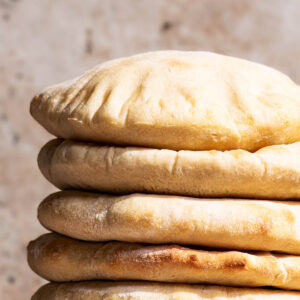
If you’ve only ever had pita bread from a package, you’re in for a treat. Homemade spelt pita bread is worlds away from the dry, tough, grocery store version – and you need just five ingredients. It’s not any harder than making pizza dough and doesn’t need special treatment to puff up, only a very hot oven.
Like most homemade bread recipes that don’t contain any added preservatives or starches, these are best the day they’re made. You can halve the recipe if it’s too much. The pitas are still tasty after a day or two, just more prone to tearing.
This is a really exciting bread to watch bake, as it’s ready so quickly. You can see it puff up in seconds. For some more spelt-based flatbread recipes, try my vegan spelt naan, easy sweet potato flatbread made without yeast, or this Swedish crispbread.
Ingredients
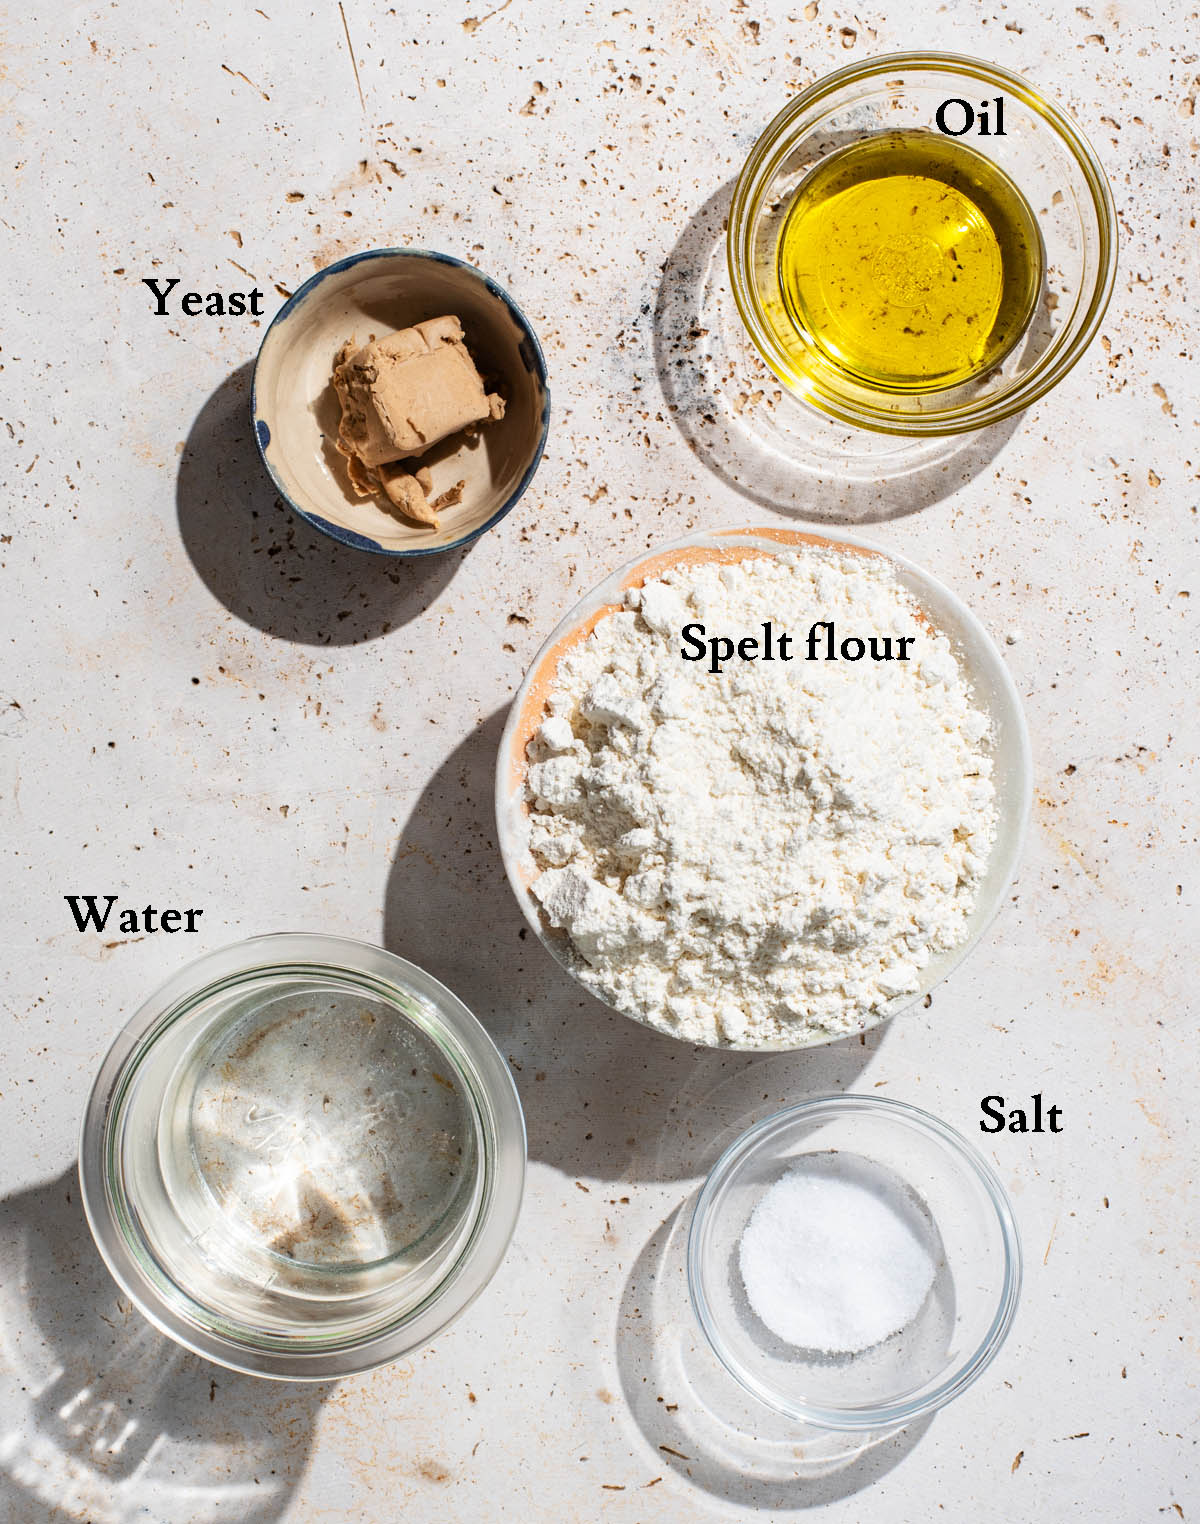
Ingredient Notes and Substitutions
- Spelt flour: pictured is all light (sifted) spelt flour, but you can do 50/50 if you’d like more whole grains. That’s what I usually do.
- Oil: I always use olive oil, but any light-tasting oil that’s liquid at room temperature will work.
- Yeast: this can be traditional yeast or fresh yeast. If you want to use instant yeast, skip the blooming step (but make sure it’s still active) and mix it right in with the flour. I have found that fresh yeast is a bit more effective here so if you can get it, choose fresh for this recipe.
Step by Step
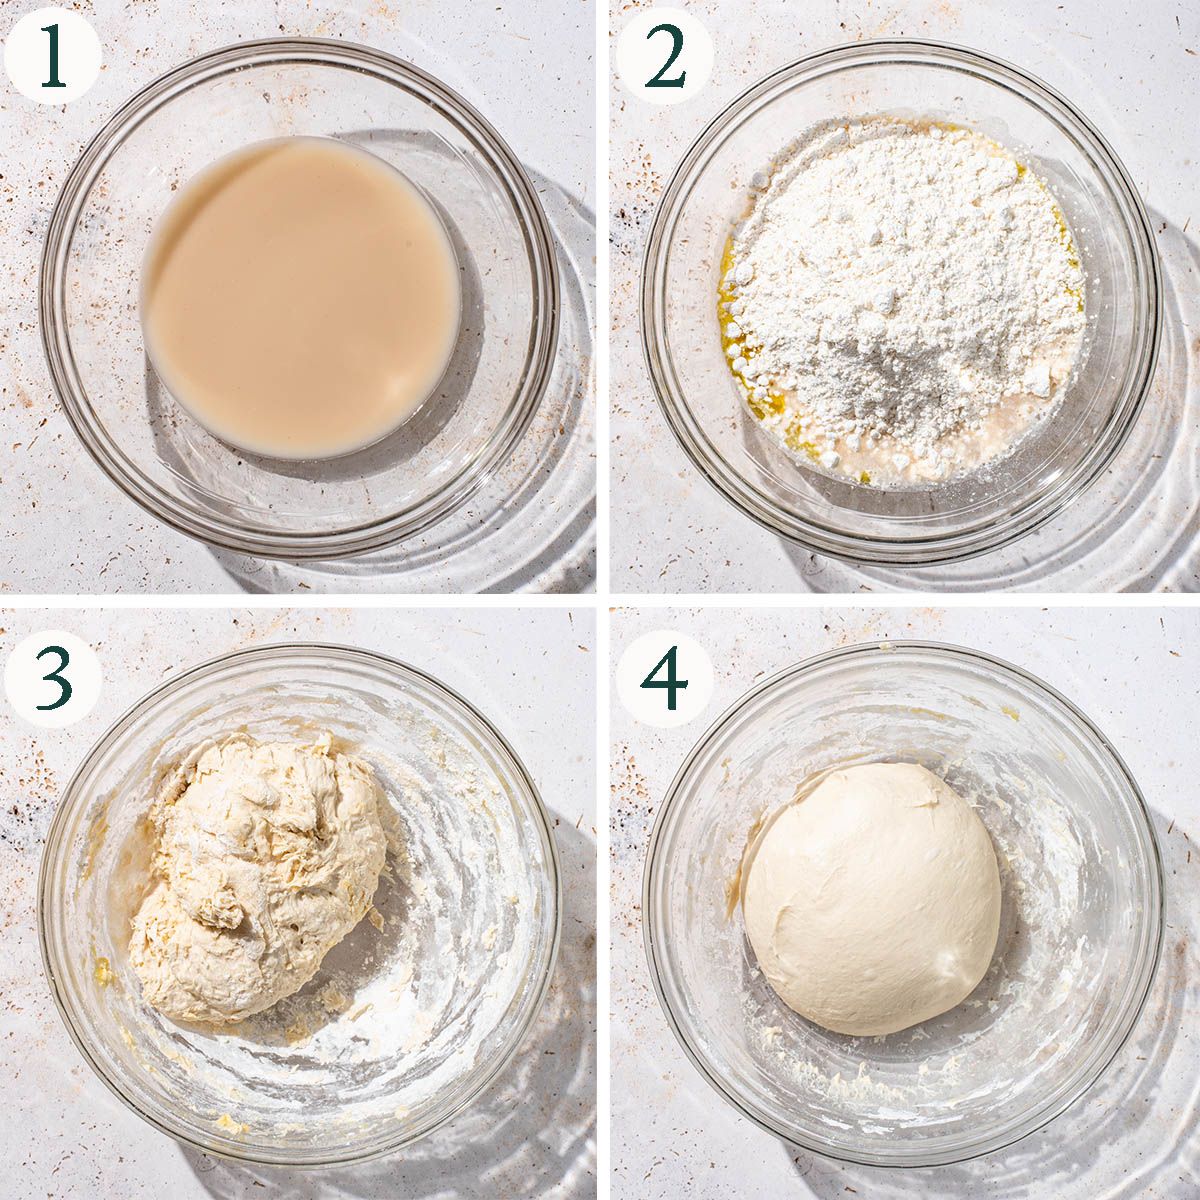
Step 1: mix the yeast and water, then set aside for the yeast to bloom.
Step 2: add the oil, flour, and salt.
Step 3: mix to combine into a shaggy dough.
Step 4: knead until soft and smooth, about four minutes with an electric mixer, or about eight minutes by hand.
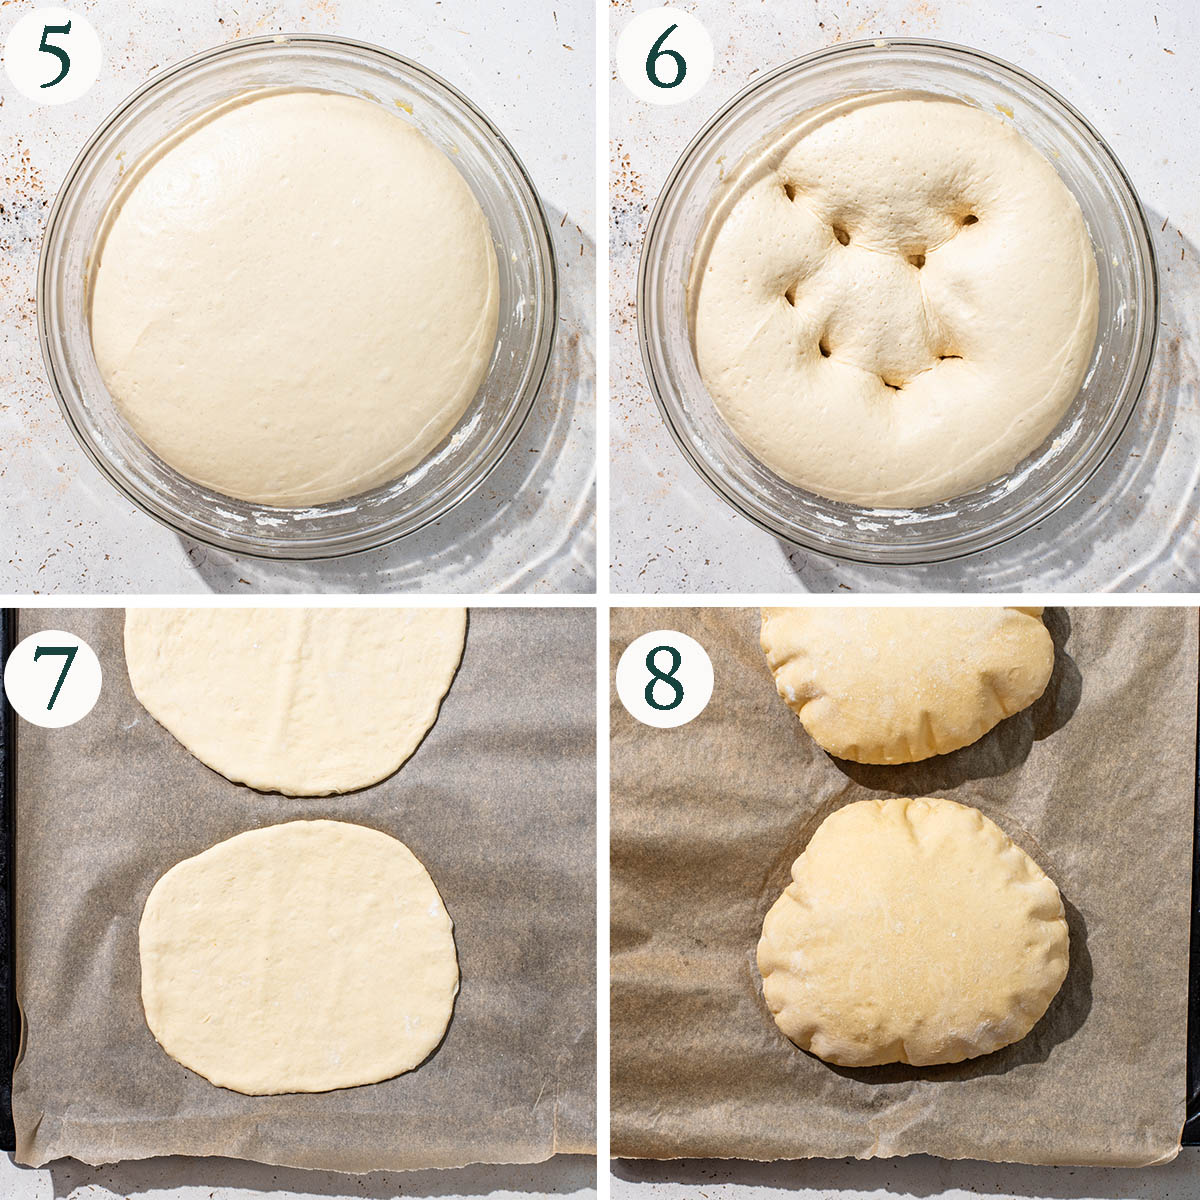
Step 5: set the dough aside to rise until doubled in size.
Step 6: punch down the dough.
Step 7: divide into eight pieces and roll out to 5mm thick.
Step 8: bake in a very hot oven in batches, 4-5 minutes per pita.
Recipe Notes
For this recipe and most of my other yeast-based bread recipes, I use an electric hand mixer to knead the dough. It’s great for most enriched doughs and only really doesn’t work for very low-hydration recipes like bagels. A decent hand mixer will be just as useful as a standing mixer for 99% of what a home-baker does, takes up much less space, and is much more affordable. I bake for a living and don’t own a standing mixer, so don’t feel like you need one! If you do have one, though, you can use it in the same way I outline below for the hand mixer.
If the breads aren’t puffing up in the oven, it’s almost definitely because the oven isn’t hot enough. You can keep track of this with an oven thermometer. In addition to the built-in oven thermometer, I have two portable ones in two different places in the oven to make sure the temperature is correct. They’re cheap and make a big difference for accurate baking if you’re often finding that your bakes aren’t turning out like the recipes say they should. Modern ovens are often off by several degrees (I had an ikea oven once that would be as much at 50°C off from what it was set to).
Some oven will have hot and cold spots. If you have two pitas in the oven and only one puffs up, I recommend baking them one at a time instead. Closer to the front is usually hotter.
Spelt requires less kneading time than standard wheat flour or bread flour. It contains less gluten and kneading too much will result in a crumbly bread. This recipe is a little more forgiving as it’s enriched, but you want a smooth, soft dough with a bit of stretch. Generally speaking you’ll never get a windowpane with spelt dough, even using stronger North American flour. See simple spelt bread.
Since we try to avoid any plastic, I don’t use plastic wrap in the kitchen (and haven’t for over a decade now – you really don’t need it, even for pastry). Covering the bowl with a tea towel and plate accomplishes the same thing and you don’t create any extra waste. If you don’t have a plate big enough to cover your bowl, a damp tea towel does the trick.
How to Store
Storage: while the pitas are best the day they’re baked, they can be stored in a sealed container at room temperature for up to three days. If they get too dry they can be oven-toasted or pan-fried with a bit of olive oil and added to a salad.
Freezing: transfer the fully cooled pita breads to an airtight container and freeze for up to two months. Thaw at room temperature. They are a bit fragile and slightly dry after freezing, but can be refreshed by spritzing with a bit of water and a few minutes in a warm oven (or low-heat frying pan, with a lid) before using.
Expert Tips
- Keep your yeast cold: fresh and dry yeast should always be kept in the refrigerator (and never above the stove). It will keep for longer and be more reliable.
- Preheat the baking sheet: this is a bit fiddly but does make a difference. Heating up the baking sheet before placing the pita on it makes for a much more reliable puff. I imagine you could use a pizza stone, but I don’t have one, so couldn’t test with it.
- Keep them wrapped: using a tea towel to wrap the pita breads in while the remaining are baking will keep them soft and pliable. The heat stays trapped within the towel, creating a bit of humidity, so they don’t dry out.
More Spelt Bread Recipes
Honey Oat Bread
Rye and Spelt Seed Bread
Spelt Flour Pizza Dough
Spelt Sourdough Bread
If you make this Spelt Pita Bread or any other bread recipes on Occasionally Eggs, please take a moment to rate the recipe and leave a comment below. It’s such a help to others who want to try the recipe. For more OE, follow along on Instagram, Facebook, and Pinterest, purchase the Occasionally Eggs cookbook, or subscribe for new posts via email.
Spelt Pita Bread
Description
Ingredients
- 300 ml warm water*
- 2 ¼ teaspoon dry yeast or ½ cube fresh (21 grams)
- 2 tablespoons olive oil
- 500 grams light spelt flour**
- 2 teaspoons sea salt
Instructions
- Add the water to a large mixing bowl and whisk in the yeast. Set aside to bloom for about 15 minutes. After resting, the yeast should be bubbly and active.300 ml warm water*, 2 ¼ teaspoon dry yeast
- Whisk in the olive oil, then add the flour and salt. Mix with a wooden spoon or spatula to form a shaggy dough.2 tablespoons olive oil, 500 grams light spelt flour**, 2 teaspoons sea salt
- Use a hand mixer fitted with the dough hooks to knead the dough for about four minutes, or knead by hand on a lightly floured surface (don't add extra flour) until soft and smooth. If kneading by hand, it should take about eight minutes.
- Form a ball with the dough and let it rise in the mixing bowl, covered with a tea towel and a large plate, until doubled in size. This will take about an hour but may need more or less time depending on the temperature of your home.
- Once the dough has risen, preheat the oven to 250°C (480°F). If your oven doesn't get that hot, set it to the highest temperature. Place a baking sheet in the oven while preheating.
- Divide the dough into eight equal pieces and form into balls. Roll two of the balls out on a lightly floured surface to rough ovals 5mm (⅕ in.) thick and place onto a sheet of parchment paper.
- Carefully take the hot baking sheet out of the oven and slide the parchment paper onto it, working quickly. Bake the pita breads for 4-5 minutes, or until very puffy and just lightly golden.
- While the first two are baking, you can roll out the next two and place them onto another sheet of parchment paper. Once the first two are baked, take the baking sheet out of the oven, carefully slide the paper off the baking sheet, and replace with the second batch. Repeat with the remaining dough (I keep using the same two sheets of parchment paper).
- Keep the baked pitas loosely wrapped in a tea towel while the rest bake.
- These are best they day they're made but will keep for a couple of days in a sealed container. After the first day they're more prone to tearing but can be toasted and used for dipping, in salads, and so on.
Notes
Nutrition
Nutrition is provided as a courtesy and is an estimate. If this information is important to you, please have it verified independently.

In the pictures with the pitas cut open- one layer do the pocket is thick and the other layer is thin. The thin layer tends to tear when filling the pocket.
How to avoid this and get evenly thick pockets so the filing doesn’t fall apart?
Hi there, this is just a fact of the pita. It doesn’t tear when it’s fresh.
This recipe was amazing. It made 8 perfect pitas
that were delicious. Thanks for the recipe!