
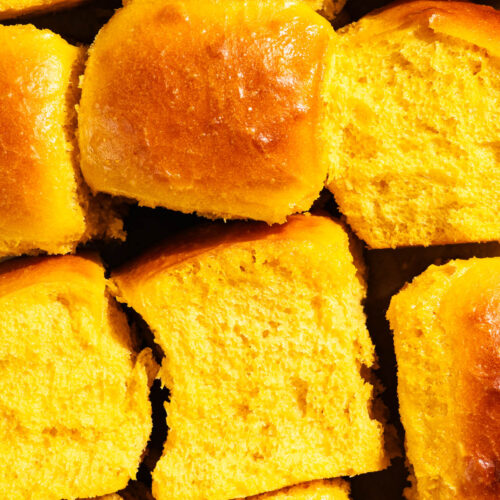
Adapted from my soft spelt rolls, these pumpkin dinner rolls are just as soft and light but with a vivid orange colour and subtly sweet pumpkin flavour. With a base of spelt flour and no eggs or butter needed, they’re also a bit different from classic dinner rolls in the best way. This makes a dozen fairly large, tall buns with a strong rise.
Recipe Rundown: Pumpkin Dinner Rolls
- Texture: very light and soft. As written the rolls are made with all light or sifted spelt flour (you can add whole grain, see below) and with the milk, honey, and pumpkin, they do make for a very pleasant texture.
- Flavour: yeasty and a little more complex than a standard roll with a fairly strong pumpkin taste. The pumpkin will come through more strongly if you use a good, in-season pumpkin or winter squash and roast it yourself for the puree.
- Difficulty: this type of dough is easy to work with, even for relative beginners, because low-gluten recipes like this are always going to be a little lower in hydration. Shaping the buns is the trickiest bit but even if you don’t nail that, the rolls will still turn out well.
Ingredients
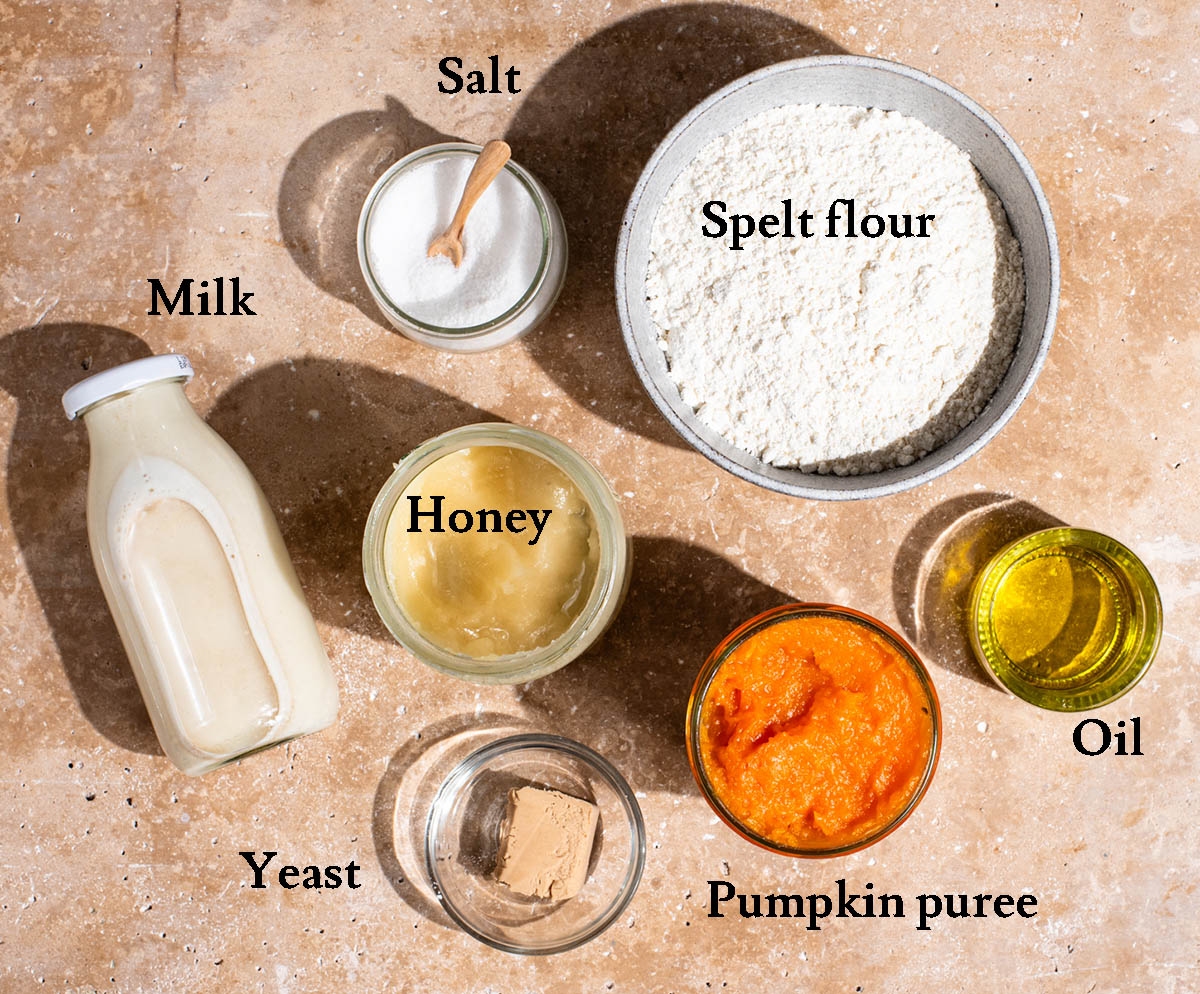
- Pumpkin puree: make your own using that link or use store-bought. Please note that as I can’t get canned puree in Europe, I have only tested this recipe with homemade. I prefer Hokkaido pumpkins for this and that’s what’s pictured. Don’t use pumpkin pie filling!
- Spelt flour: for the lightest rolls, use all light or sifted spelt flour. If you’d like to incorporate some whole grains, use up to 50% whole grain spelt flour but note that the dough is more likely to tear when shaping. If you prefer to use all-purpose flour, you can use approximately the same amount (maybe 20-30 grams more) and knead for about double the time.
- Yeast: pictured is fresh yeast, which is my preference. Active dry yeast works just as well. If using traditional, add it when instructed in the recipe. Instant yeast doesn’t need to be bloomed and can be added with the dry ingredients.
- Honey: substitute maple syrup if preferred. I haven’t tested these with sugar.
- Milk: pictured is homemade oat milk. Any unsweetened non-dairy milk (not canned coconut milk) can be used. Dairy milk is also fine and will improve the structure of the buns slightly.
- Salt: fine sea salt is ideal for bread. If you only have coarse salt, dissolve it in the liquid before adding the flour so that it’s not in large pieces in the dough. Salt impacts the gluten formation and shouldn’t be reduced.
Have extra pumpkin puree to use? Try vegan pumpkin cinnamon rolls, a spicy pumpkin pie smoothie, or gluten-free pumpkin muffins.
Step by Step Photos
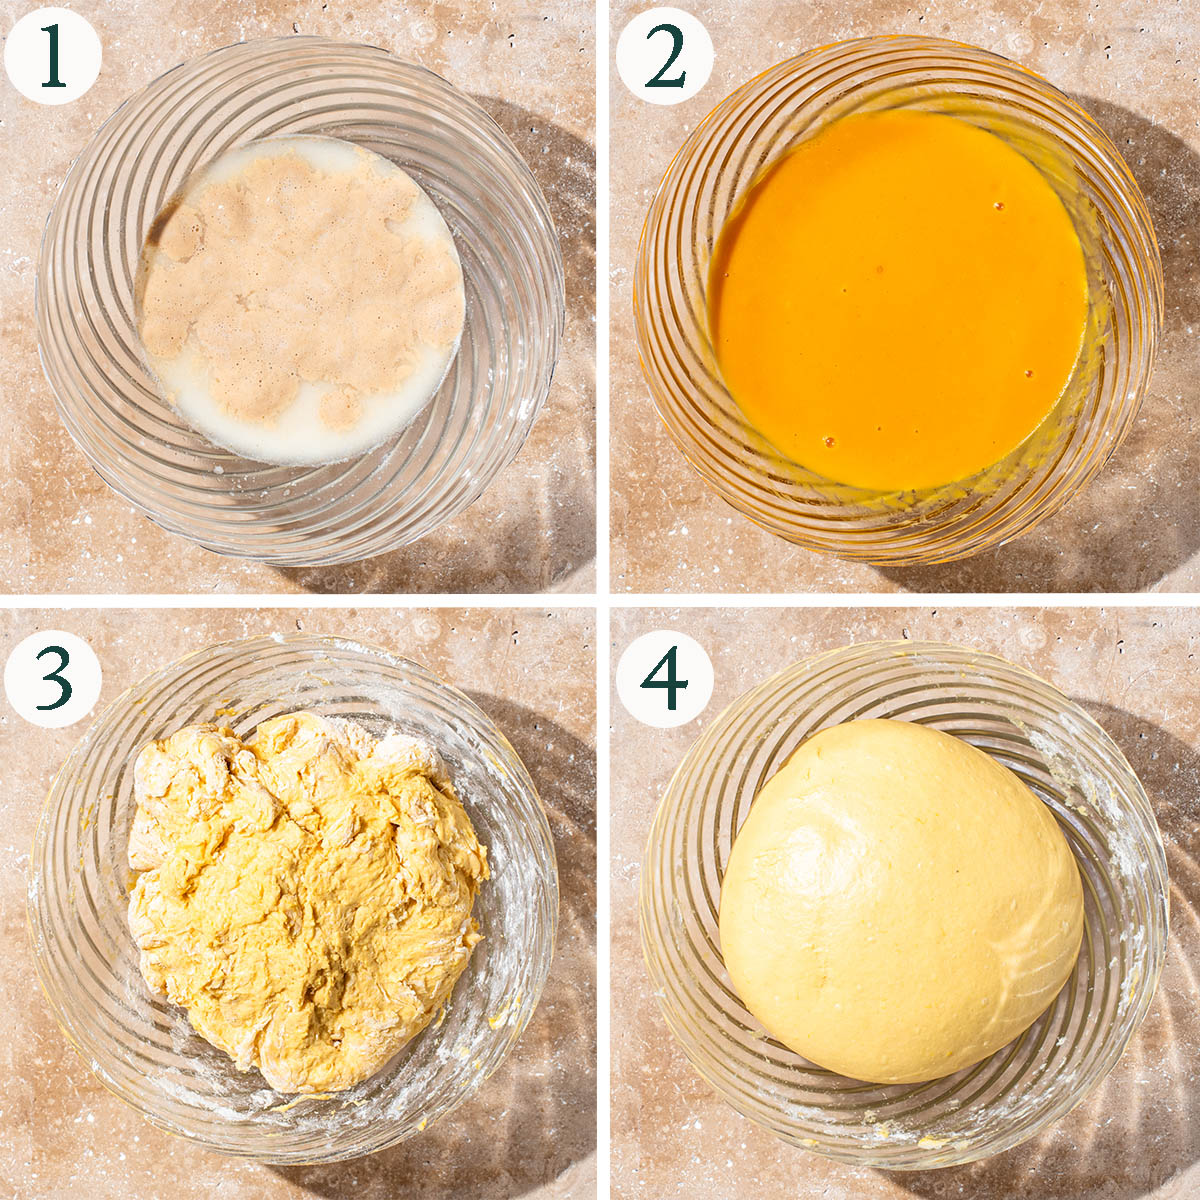
Step 1: heat the milk, then whisk in the honey. Sprinkle the yeast over and set aside to bloom.
Step 2: whisk in the pumpkin puree and oil.
Step 3: stir in the remaining ingredients to form a shaggy dough.
Step 4: knead the dough for about five minutes with an electric mixer.

Step 5: set the dough aside to rise until doubled in size.
Step 6: form 12 buns and place in a greased baking dish.
Step 7: rise again until doubled in size.
Step 8: bake until golden and brush with a little oil when the buns are still hot.
Recipe Notes
Spelt dough should always be kneaded for less time than bread made with higher protein flour (like bread flour). Over-working can result in bread that feels tough and crumbly.
If you want to add whole grain flour, I recommend reducing the amount of added flour by about 20 grams and let the dough autolyse (rest) for ten minutes before kneading. I’ve tried these with 50% whole grain spelt flour and it works well but the buns are, of course, not as soft.
Don’t give in to the urge to add more flour when kneading the dough. It will dry it out and you’ll end up with tough buns. I knead with a handheld mixer, using the dough attachments, and that always works well with relatively soft dough like this. If kneading by hand, use more of a slap method (see my spelt pizza dough video for a visual of that).
If you live somewhere very dry, I recommend covering the dough with a damp tea towel while it’s rising and setting it somewhere enclosed, like an oven. I often set shaped buns to rise in the oven for the second prove with a dish of hot water, but since this speeds up the proving time and makes timing in general less reliable, I haven’t outlined it here.
How to Store
Storage: keep in a sealed container at room temperature for up to two days. Any longer and they will start to spoil due to the added pumpkin. Refrigeration dries yeast breads out and I don’t recommend it.
Freezing: transfer fully cooled buns to an airtight container and freeze up to three months. Thaw at room temperature and refresh by spritzing with a bit of water and warming in the oven for the best texture. Freeze the same day of baking.
Expert Tips
- Check your yeast: dry yeast should always be stored in a cool, dry, dark place. I keep it refrigerated at all times. If your yeast is old or has been stored somewhere warm, test it by sprinkling some into a bit of warm water before starting this recipe to make sure it’s still active.
- Rise in a warm, not hot, place: on top of a radiator or right beside is a bad place to prove your dough – it will rise too quickly and damage the yeast activity. Choose a warm, draft-free spot, like the oven with a light on or on top of the refrigerator.
- The dough should double: think about the size of the dough and don’t focus too much on timings. Depending on the temperature and humidity in your home, the dough will rise more quickly or slowly – look for a dough that’s doubled in size and reference the step-by-step photos above.
More Spelt Bread Recipes
Honey Oat Bread
Vegan Star Bread
No-Knead Spelt Focaccia
Spelt Pita Bread
If you make this Pumpkin Dinner Rolls recipe or any other bread recipes on Occasionally Eggs, please take a moment to rate the recipe and leave a comment below. It’s such a help to others who want to try the recipe. For more OE, follow along on Instagram, Facebook, and Pinterest, purchase the Occasionally Eggs cookbook, or subscribe for new posts via email.
Pumpkin Dinner Rolls
Description
Ingredients
- 180 ml (¾ cup) non-dairy milk or dairy milk
- 20 grams (1 tablespoon) honey or maple syrup
- 2 ¼ teaspoons dry yeast or ½ cube fresh
- 250 grams (1 ⅓ cups) pumpkin puree
- 30 grams (2 tablespoons) oil I use olive – any light-tasting oil can be used
- 550 grams (~3 ½ cups) light spelt flour
- 2 teaspoons sea salt
Instructions
- Heat the milk in a small saucepan until just warm to the touch, about 35°C (95°F). Pour into a large mixing bowl and whisk in the honey. Sprinkle the yeast over top and set aside to bloom for about ten minutes.180 ml (¾ cup) non-dairy milk, 20 grams (1 tablespoon) honey or maple syrup, 2 ¼ teaspoons dry yeast
- Once the yeast has bloomed, whisk in the pumpkin puree and oil. Stir in the flour and salt to form a shaggy dough.250 grams (1 ⅓ cups) pumpkin puree, 30 grams (2 tablespoons) oil, 550 grams (~3 ½ cups) light spelt flour, 2 teaspoons sea salt
- Knead the dough until it forms a soft, smooth ball. If using an electric mixer, this should be about five minutes, or about eight minutes by hand. It should be elastic when ready but will not pass a windowpane test. Don't add more flour when kneading.
- Shape the dough into a ball and place it in the mixing bowl. Set it in a warm, draft-free place, covered tightly, until doubled in size, about one hour.
- Once the dough has risen, lightly grease a rectangular baking dish (approximately 31x21cm (~9×13 in.)). Deflate the dough and divide into 12 equal pieces.
- Rotate each ball with your hand on a clean work surface to create some surface tension on the buns, then place into the prepared baking dish. Cover with a damp tea towel and place into an enclosed space like your (cold) oven to rise again until doubled in size, about one hour.
- Preheat the oven to 190°C (375°F). Once the buns are fully risen, bake for 20-25* minutes, until golden.
- Immediately brush the tops of the buns with a little coconut oil or butter when they come out of the oven to keep the crust soft. Cool for about 20 minutes before serving.
Notes
Nutrition
Nutrition is provided as a courtesy and is an estimate. If this information is important to you, please have it verified independently.
About Alexandra Daum
Alexandra Daum is a professional recipe developer, food photographer, and cookbook author. She started sharing carefully tested vegetarian recipes in 2014 and has since published hundreds of recipes with seasonal ingredients and whole grains as the focus. Her work has been featured on CTV, in House & Home and Chatelaine, on popular websites like Buzzfeed and Best Health, and in countless other publications.