

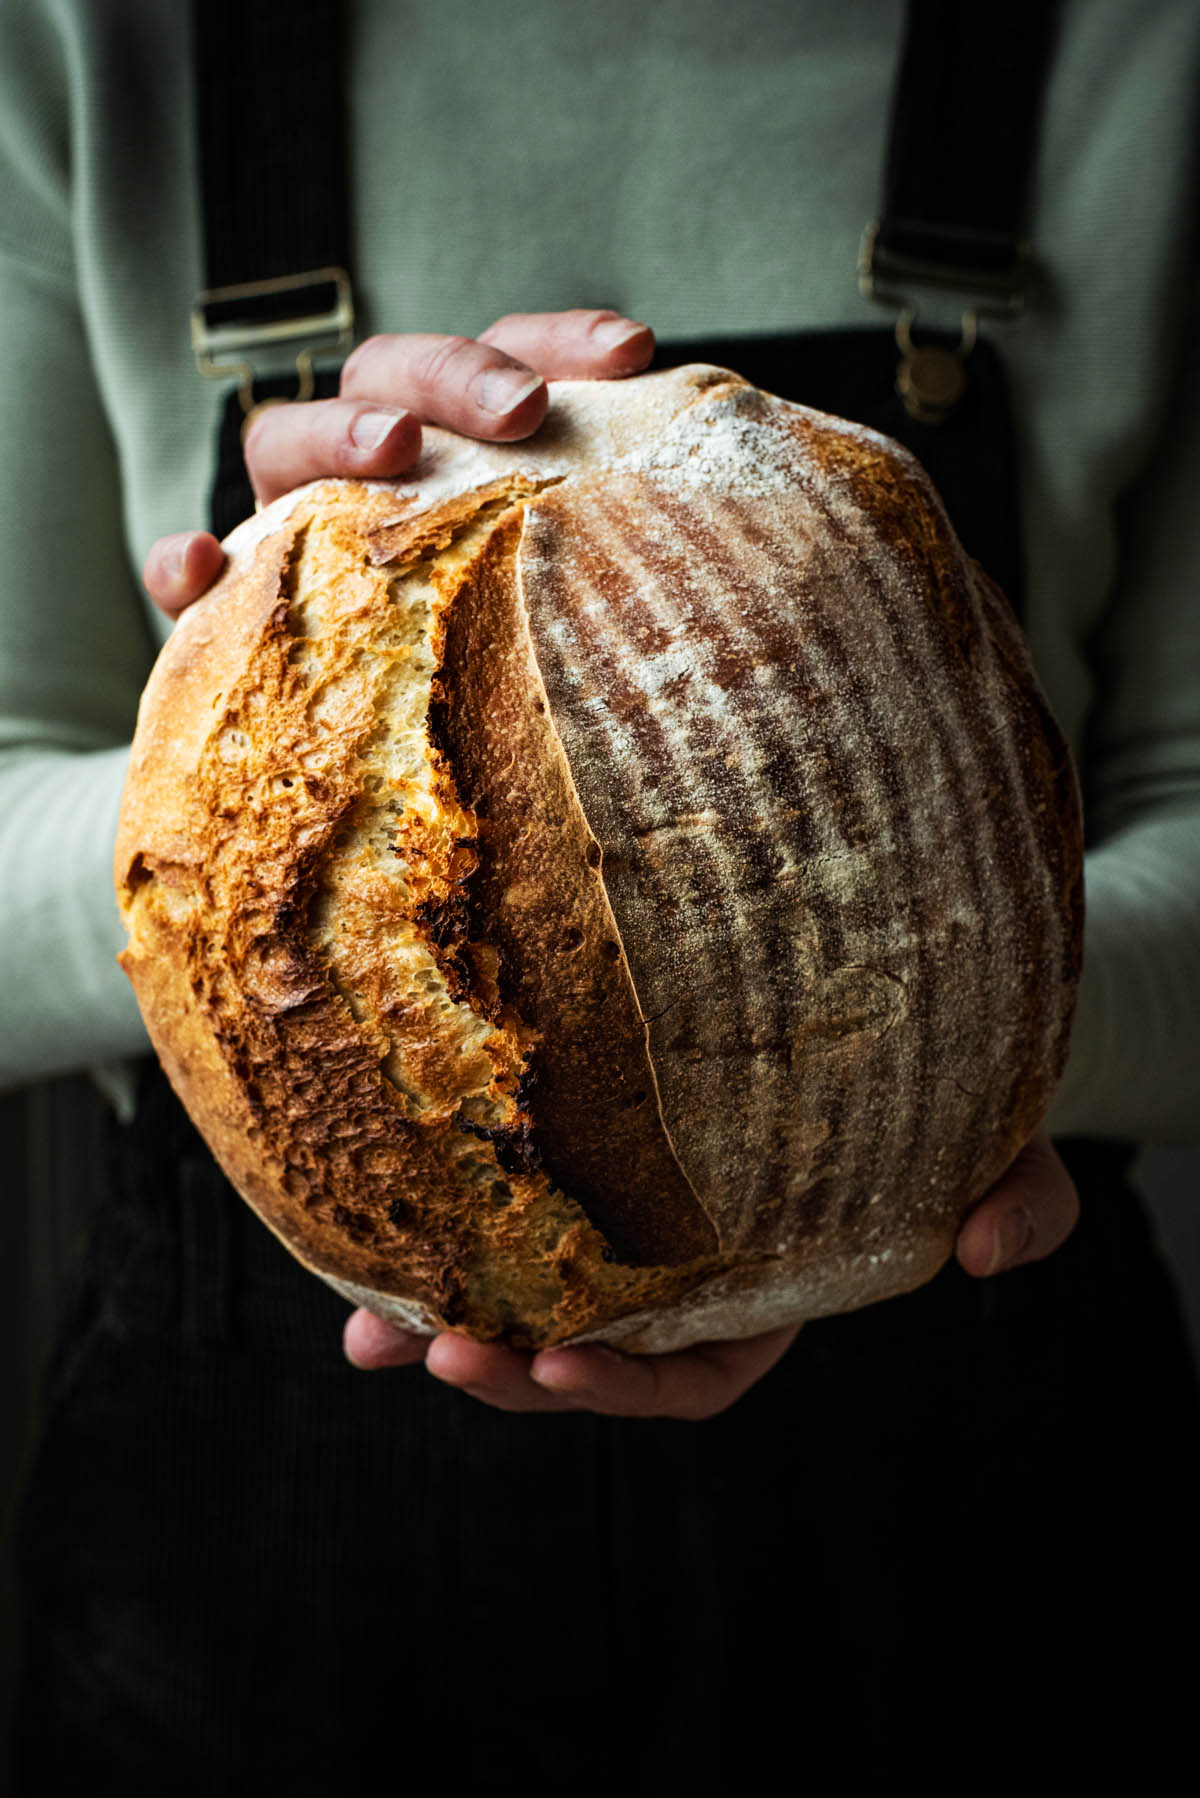
After months of testing in different ovens in Germany, the Netherlands, and Sweden, with different flour types, I’m finally sharing this foolproof fully spelt sourdough bread recipe. This is my go-to bread and I make it a couple times a week.
It’s a lower hydration dough, meaning a high ratio of flour to water. Most sourdough recipes made with bread flour seek to use the highest hydration possible for the most open crumb and greatest oven spring. Here, we have a slightly tighter crumb and less extensive oven spring, but an excellent and flavourful loaf.
This is a good daily bread that can hold up to any number of toppings. If you want a more complex, sour flavour, try this sourdough dark rye bread. For something more toothsome, try my honey oat sourdough.
There is a spelt sourdough in my book, but I hope this recipe can provide a straightforward guide for anyone looking to bake more with spelt flour.
One reader, NH, commented: “Perfect recipe, thank you! I’ve been trying to get a perfect spelt loaf and this recipe worked from the first try! The only change I made was bake covered at 270 for 20 min then 220 uncovered for 20 min.”
Another reader, Helen, said: “Love this recipe, works every time. I use 100g wholemeal spelt flour and 450g white spelt. I’m wheat intolerant with IBS and I can eat this bread with no reaction. Thank you.”
Why You Should Try This Recipe
A full spelt sourdough can be a bit tricky to find, and that’s because people expect that pillowy open crumb from sourdough loaves. There’s so much to be said for ancient grains in this oldest form of leavened bread, though, and I hope you can embrace the stronger flavours alternative flours will bring to the table. Not only that, this loaf is also:
- Shockingly easy: even for beginners, this is a truly easy sourdough to make. It’s low hydration, so much less sticky, and easy to shape as a result.
- Sourdough lasts longer: this loaf still tastes great after a week and doesn’t dry out as quickly as yeasted bread does. The crust might get a bit harder but that’s it.
- It’s a good basic bread: this is my go-to for anything from sandwiches to french toast, as it is so easy to make and use.
Ingredients
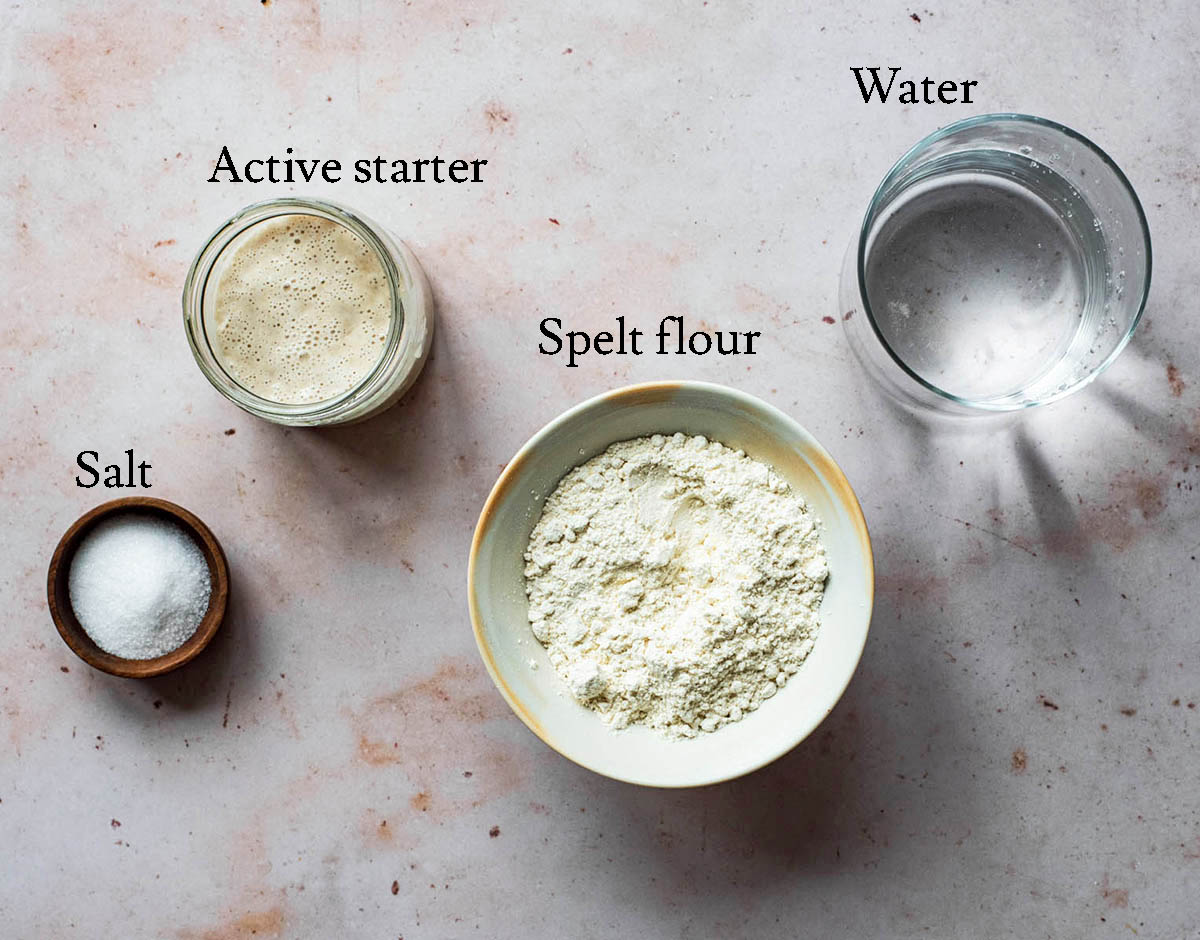
Ingredient Notes
- Spelt Flour: light or sifted the first time, and then experiment with adding whole grain. See more on this below.
- Sourdough Starter: any kind of starter can be used for this recipe, as long as it’s 100% hydration (using equal parts flour and water). Levain can also be used.
- Salt: fine grain sea salt. Don’t change the salt amount used, it’s necessary for proper gluten development.
Step by Step
1. Mix the starter: add the active starter to water in a large mixing bowl. The starter should float.
2. Add the flour: mix in the flour(s) and salt to form a shaggy dough.
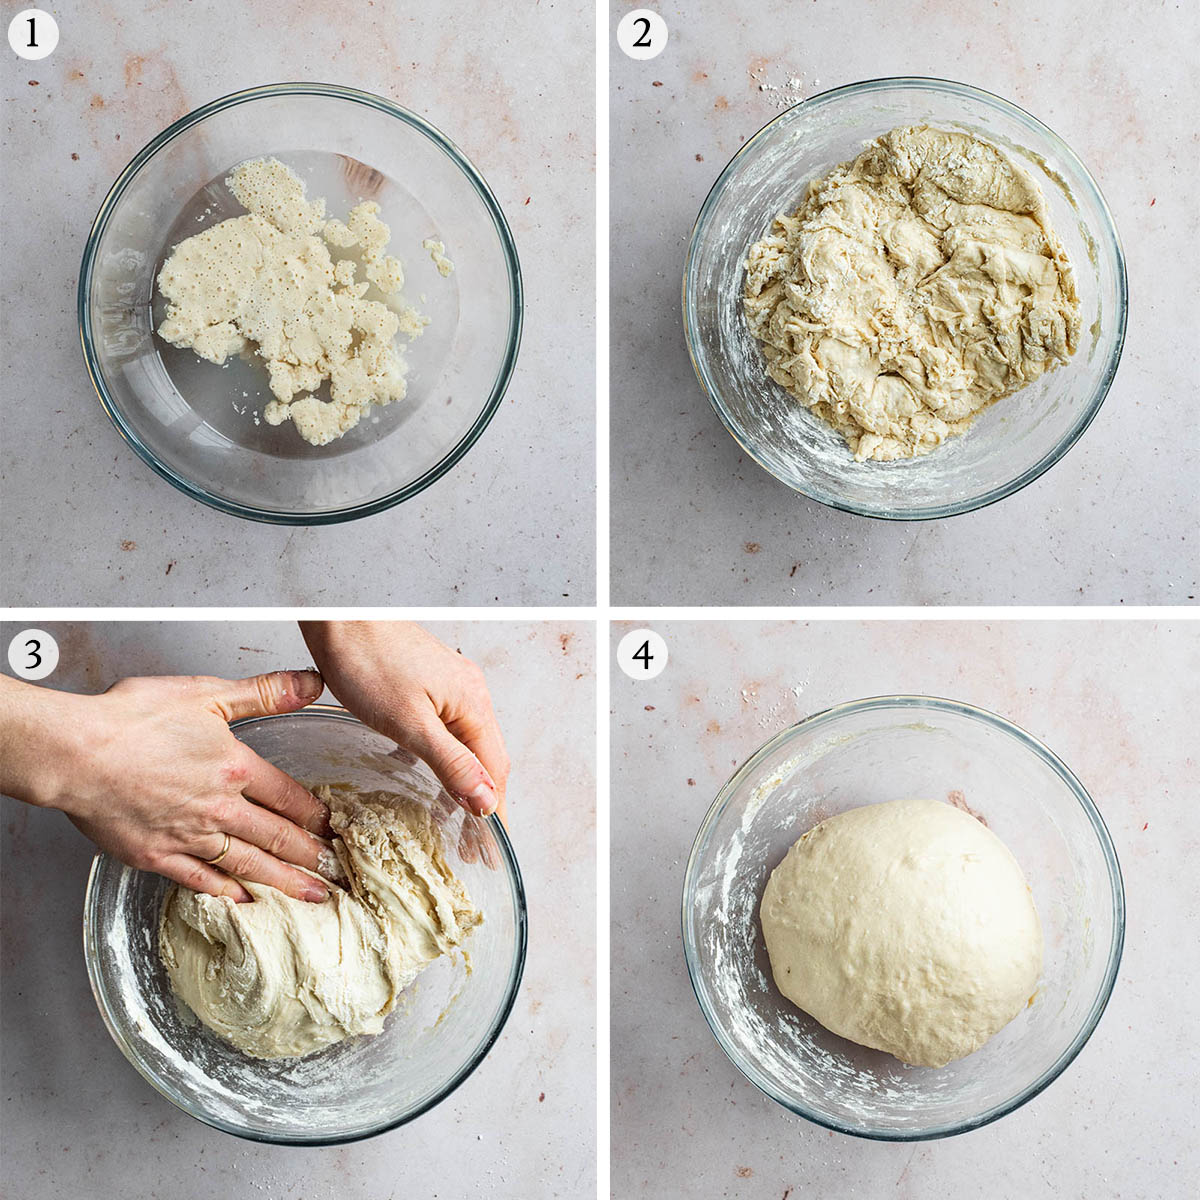
3. Stretch and fold: do three rounds of stretches and folds.
4. Shape: after folding, the dough should be smooth and rounded.
5. Form a boule: use your hands to rotate the dough into a boule or ball with surface tension.
6. Place in the basket: seam side up into a lined and floured banneton.
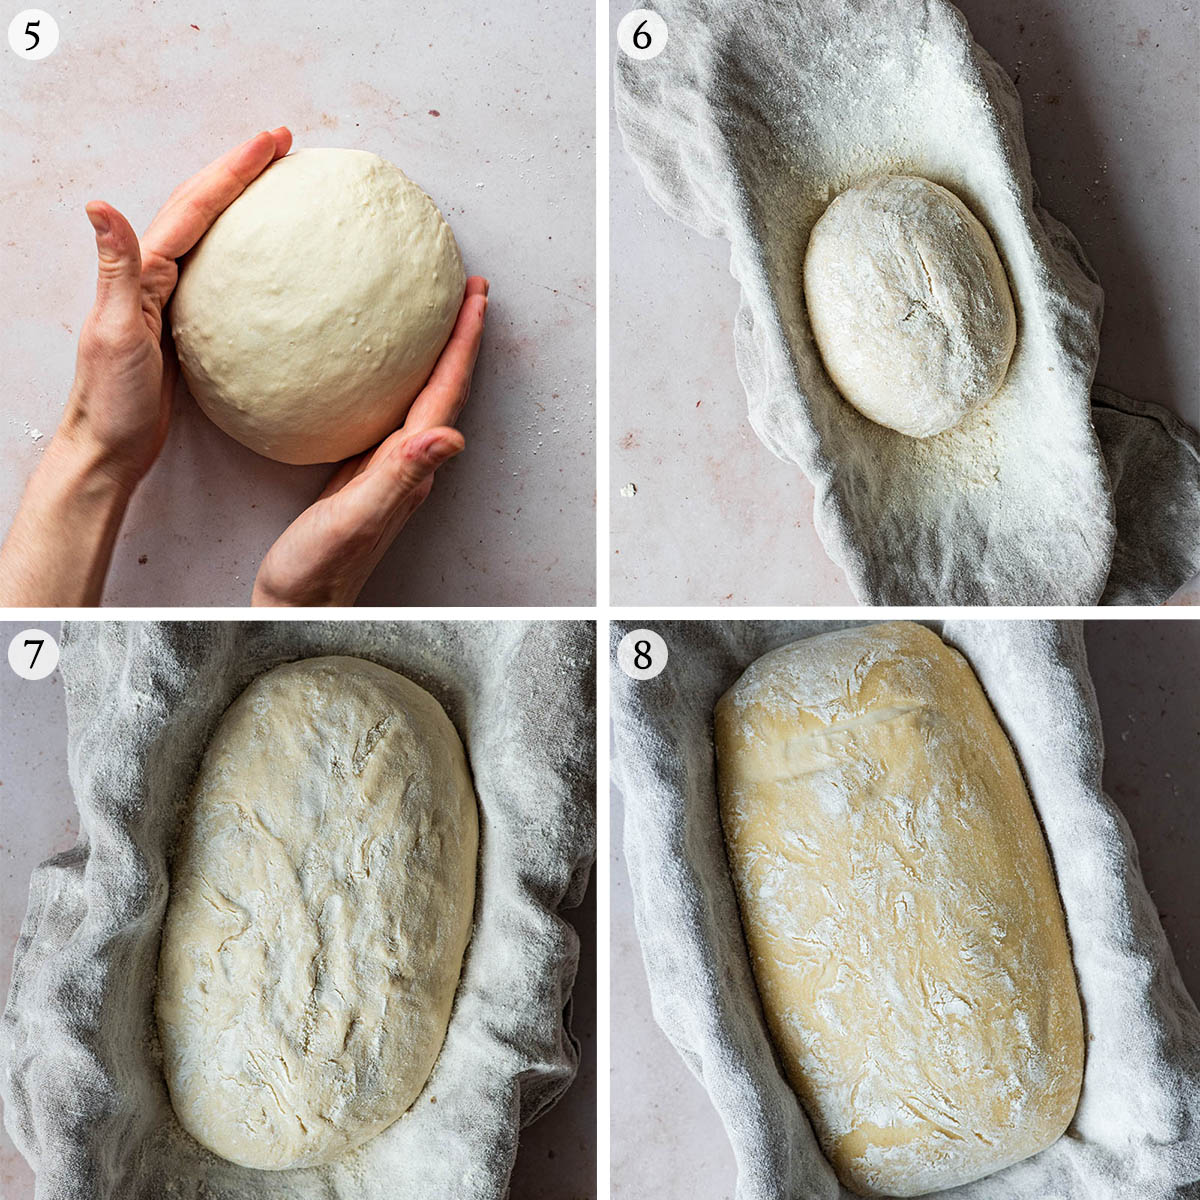
7. Rise: set aside to rise, covered, for a couple hours at room temperature.
8. Ferment: chill overnight to allow the bread to finish rising and ferment longer.
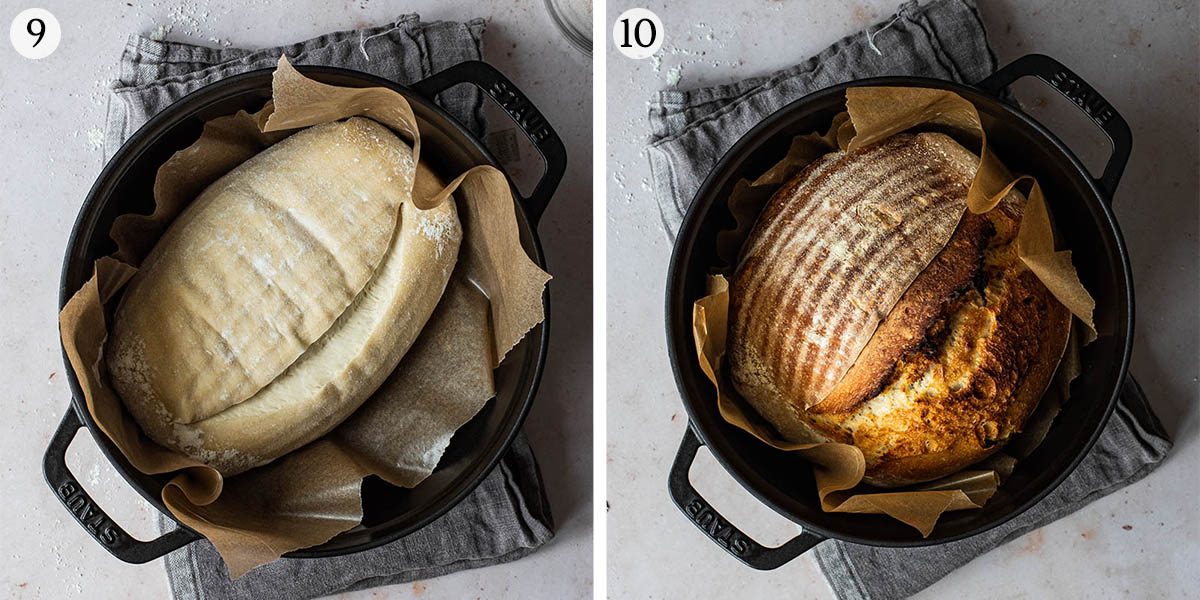
9. Score: turn the dough out onto parchment and score it. Place into the preheated pot.
10. Bake: for about 40 minutes. Cool fully before slicing.
If you can’t see the recipe video in this post, please watch it here.
Recipe Notes
If you’re unfamiliar with the terms used, please see our post on how to stretch and fold sourdough bread over at the Baked Collective.
You can use a round proving basket if preferred. I like the batard shape more for this loaf as it is fairly small and the oven spring is better in the batard form.
If your oven can’t reach the temperature required for this recipe, or you don’t have a dutch oven, you can bake the bread as a sandwich loaf. Simply shape into a log, prove in a standard loaf tin, and bake at 200°C (400°F) for 40 minutes once the refrigeration time is finished. See this honey and oat bread for a visual representation.
I did experiment with baking this from cold (not pre-heating the pot). It’s possible if you are concerned about handling the very hot dutch oven, but the end result isn’t as good.
Because this is a low hydration dough, there’s no point in shaping by rolling/pressing the dough before forming the boule. Simply turn until surface tension forms, but be careful not to break the tension.
There are no substitutions for this recipe.
Expert Tips
- Line the banneton: spelt has a tendency to stick to even the most seasoned basket. Line with a linen towel and sprinkle with flour to ensure a good release.
- Don’t over shape: this is a lower gluten bread and will tear more easily during shaping. A quick shape to make it round is enough, don’t rotate it too much.
- Room temperature first: I know it seems a bit finicky, but the short rise at room temperature is necessary for the proving to be successful. If you refrigerate immediately, the dough will be under proved. This has been extensively tested.
- Think about flour: I have only had good success for this particular bread when using a maximum of 50% whole grain flour. This can be spelt or another whole flour – in the video, I used part Graham flour (coarsely milled wheat). The first time you make this recipe, I highly recommend using all light spelt flour as it’s much easier to work with and will produce a consistently good loaf.
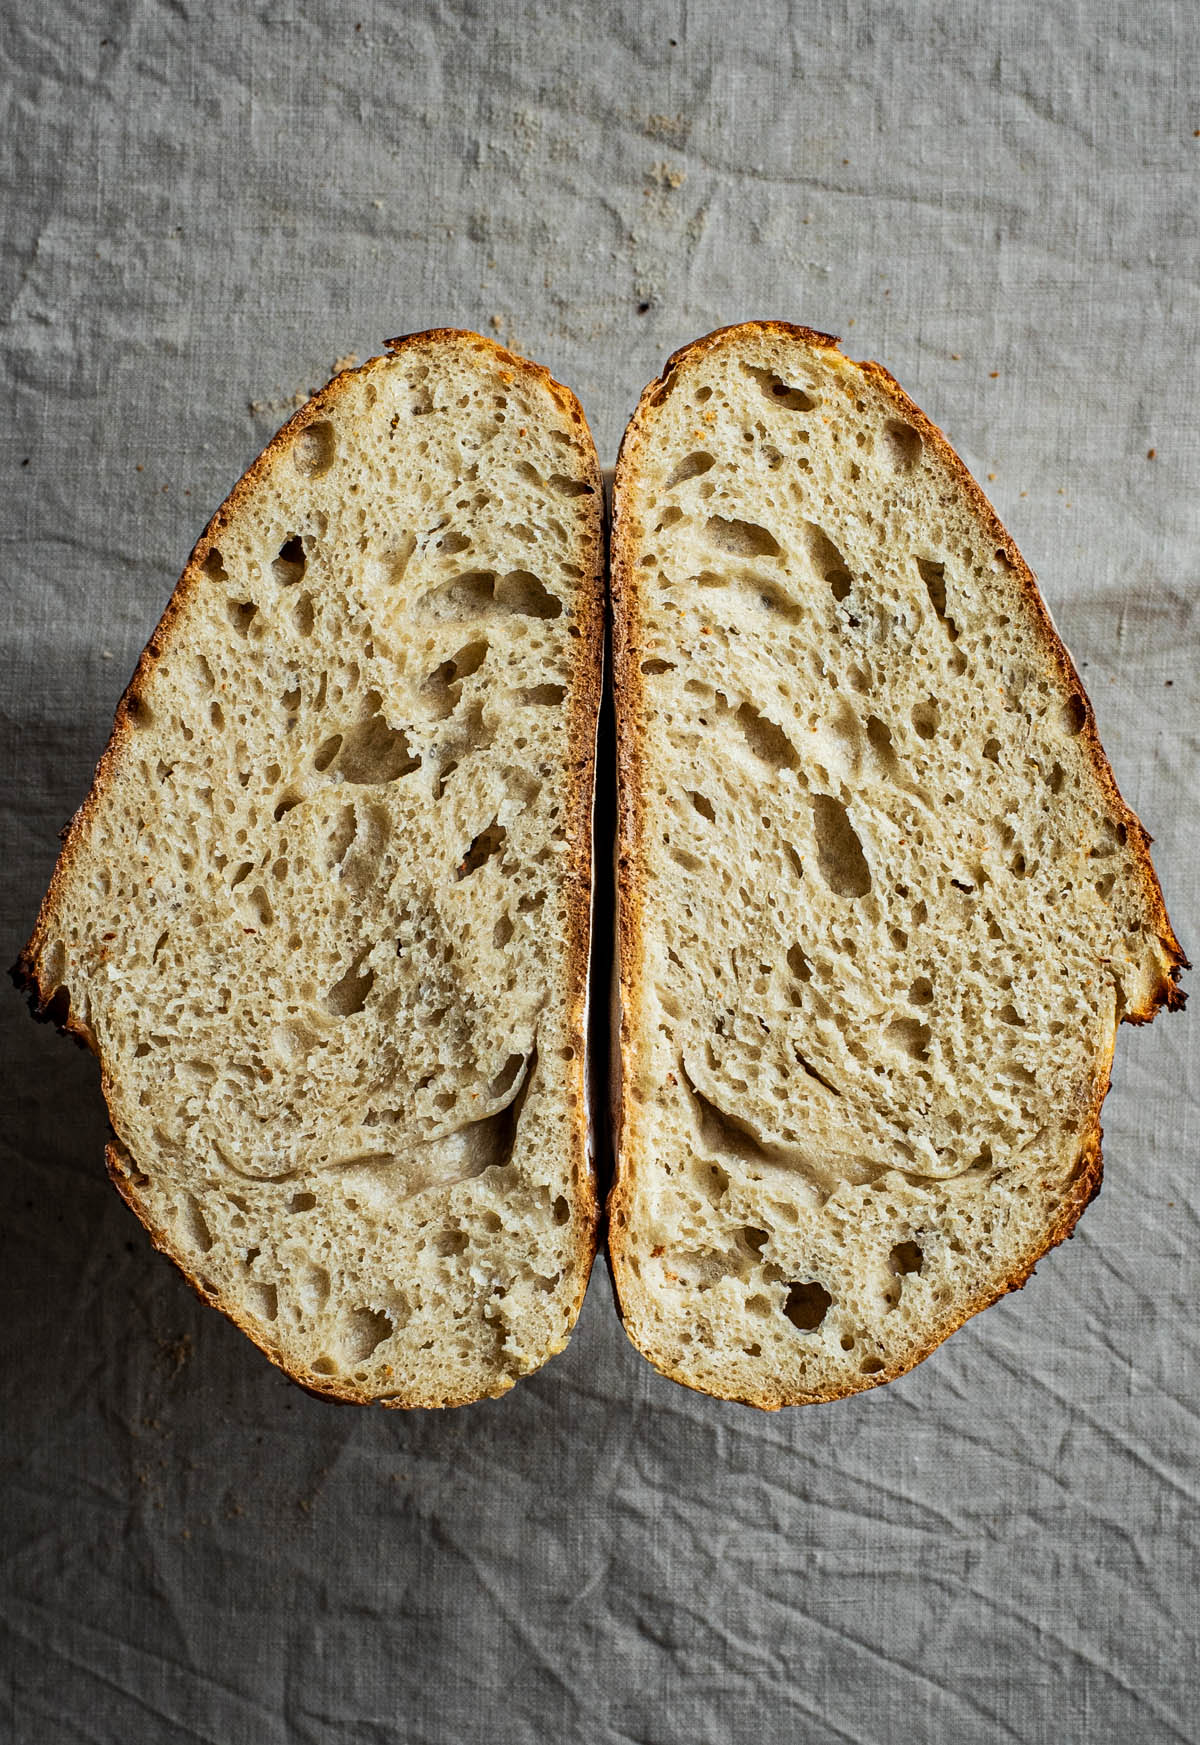
- Cool fully: all sourdough loaves should be fully cool before slicing to avoid gummy bread. This is especially true for those made with lower gluten flours like spelt.
More Spelt Flour Recipes
Spelt Pretzels
Spelt Sourdough Pizza Dough
Sourdough Rye and Spelt Crackers
Spelt Banana Bread
Most of the baking recipes (unless gluten-free) on OE are made with spelt flour – see a comprehensive collection here.
If you make this Sourdough Spelt Bread or any other bread recipes on Occasionally Eggs, please take a moment to rate the recipe and leave a comment below. It’s such a help to others who want to try the recipe. For more OE, follow along on Instagram, Facebook, and Pinterest, purchase the Occasionally Eggs cookbook, or subscribe for new posts via email.
Spelt Sourdough Bread
Description
Ingredients
- 300 grams (10.6 oz) water room temperature
- 100 grams (3.5 oz) active sourdough starter
- 550 grams (19.4 oz) light spelt flour also called sifted or white spelt
- 10 grams (0.35 oz) fine sea salt
Instructions
- Add the water and starter to a large mixing bowl and whisk to combine.300 grams (10.6 oz) water, 100 grams (3.5 oz) active sourdough starter
- Add the flour and salt to the bowl, and use a wooden spoon or spatula to mix until a shaggy dough forms. Finish mixing with your hands to fully incorporate the flour.550 grams (19.4 oz) light spelt flour, 10 grams (0.35 oz) fine sea salt
- Cover the bowl and set aside to rest for 30 minutes.
- Once the dough has rested, begin your stretches and folds. Do three rounds of stretches and folds over the course of an hour, once every 20 minutes.
- Form the dough into a ball or boule by placing it onto a clean surface and using your hands to rotate until surface tension forms.
- Line a proving basket with a tea towel and sprinkle with flour. Place the dough upside-down into the prepared basket.
- Cover and set aside to rise at room temperature for three hours. The dough should visibly rise during this time. If it hasn't, let it rise for longer at room temperature (see pictures 6 and 7 in the step-by-step section above).
- Place the dough into the refrigerator overnight, or for at least eight hours and up to 24 hours.
- Place a heat-safe dutch oven into the centre rack of your oven and preheat the oven to 240°C (465°F). The oven must be this hot and the dutch oven preheated for the bread to turn out properly.
- Turn the dough out onto a piece of parchment paper and score with a sharp knife.
- Carefully remove the dutch oven and place your loaf into it, using the parchment paper as handles to lift the bread.
- Bake for 20 minutes with the lid on, then remove the lid and reduce the temperature to 220°C (425°F) and bake for another 15-20 minutes, or until browned to your desired degree.
- Remove from the oven and cool in the pot for ten minutes before carefully removing the bread and cooling fully on a wire rack. It must be completely cool before slicing.
- I recommend storing it in the pot you've baked it in, or freezing individual slices and toasting to thaw.
Video
Notes
Nutrition
Nutrition is provided as a courtesy and is an estimate. If this information is important to you, please have it verified independently.



I have been using a variation of this recipe (converted to bakers % and slightly shifted percentages) using spelt from Ground Up Grain for the past year and it has been a favorite of many of my customers (and a favorite of mine!). Thanks for sharing it!
Do you have a same day all purpose spelt flour sourdough bread recipe?
Hi Cristina, I don’t, but if you’re a risk-taker you could try baking this one the same day. I’ve done it before, with an early start and then a room temperature ferment in the proving basket before baking right away without any refrigeration time. You get a much milder flavour but the rise is still good if your starter is strong and you’re good at checking for signs that the loaf is fully proved.
So coming back to ask if you found a good bulk fermentation time to make it same day. I tried 3 hours and that was too short and 6 hours was too long. I’m a newbie at making sourdough. I’m in an experimental mood lol
Hi Cristina, it’ll really depend on the temperature you’re working in and how strong your starter is! If three was too short and six was too long, I’d try four hours and keep a close eye on it to look for signs of the dough being fully proved and ready to bake. Try the poke method.
Hello I am using dinkeehl 1050, did you use 1050 or 630?
Thanks for your time
Carmen
Hi Carmen, I prefer dinkelmehl 630 but 1050 is also fine for this recipe.
Heyy, i am a bit confused by the revipe. You said to only use 50% of whole grain flour but then in the recipe you use 100%. Im sorry if this seems like a dumb question i just want to make sure i get it right!! Thank you.
Hi Clara, the recipe calls for sifted or light spelt flour, which isn’t whole grain – it might be called all-purpose or white spelt flour where you live. You can use up to 50% whole grain spelt but I recommend sticking with sifted spelt flour the first time you make this bread.
Hi,
Done this recipe a few times. Sometimes it comes out a little blandish. AI claims it needs a little more salt 11-12 grams according to baker’s percentages.
I see you wrote above not to change salt amounts.
Is that just not to reduce? Is it an issue to add?
Also, you seem to shape before Bulk rise? Is that deliberate?
Hi Sarata, thanks for your comment. It might depend on the salt you’re using, as some types are less ‘salty’ than others. I exclusively use fine sea salt. Coarser salts will disperse less evenly through the dough and can make the bread taste slightly bland. If it is only sometimes bland I would check the type of salt. You could add another gram or two of salt and the bread won’t change much – please keep in mind when referencing AI that I have tested this recipe and made it dozens of times vs AI collating information and assuming a general standard (computers have no taste buds, after all). Changing the salt amount is more about reduction, though, as readers often want to reduce salt intake and try to make bread without salt but don’t understand how vital it is to correct gluten formation. It is deliberate to shape before the bulk ferment and it’s a method I learned from my friend and colleague Sophie, a professionally trained sourdough baker, over at our baking site.
Hi Amy, We are making our 3rd loaf. Such an easy recipe to follow! The dough is rising to be double size and is a little dense after cooking. I am using a metal kitchen aid bowl to prove it in. Do you think the bowl who affect the rising of the dough?