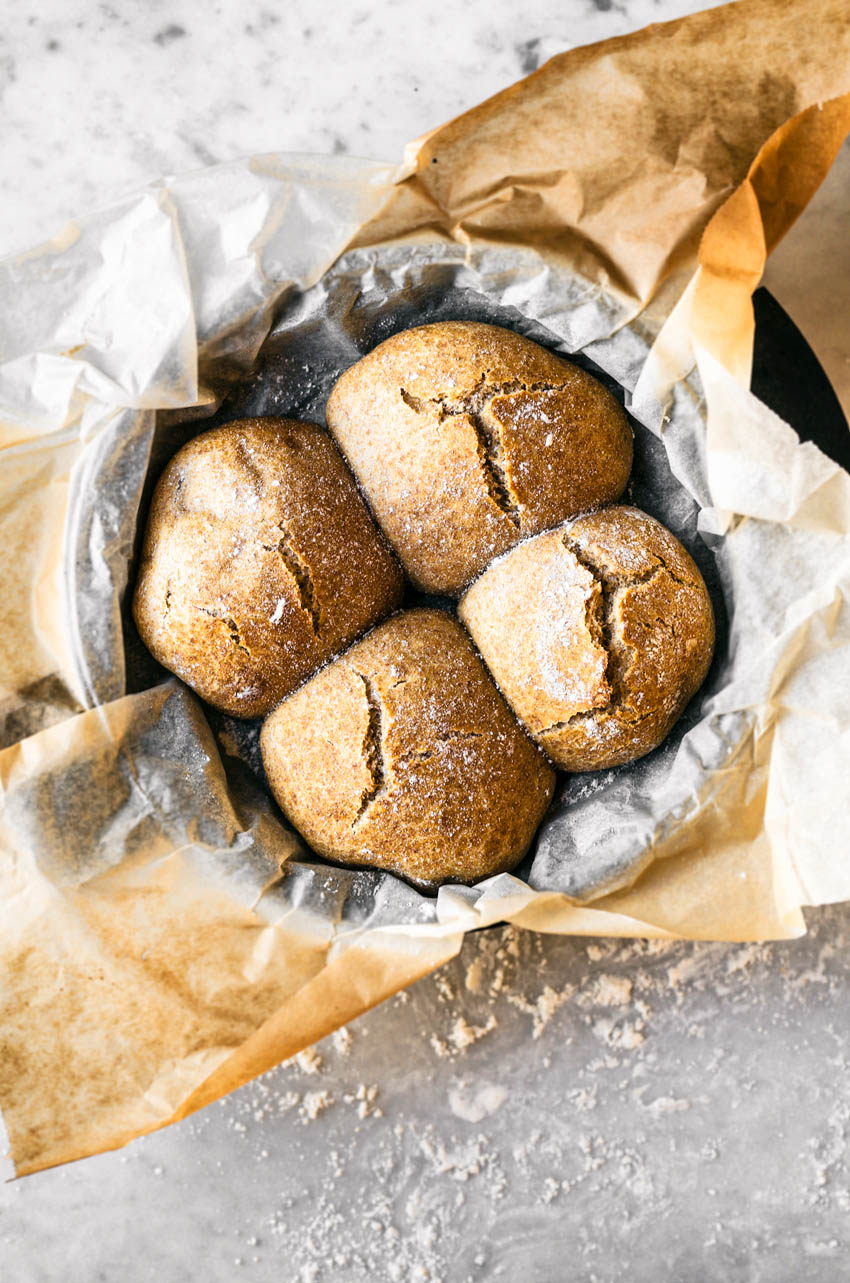
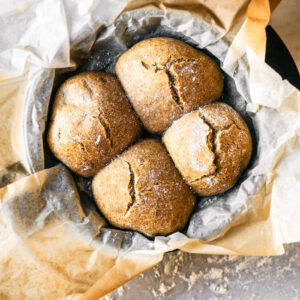
The easiest method for making buns at home, these no-knead rolls are made using an overnight method and baked in a dutch oven for crusty, light buns. While the rolls pictured are made with spelt flour, you can also use plain flour (see below).
If you aren’t quite ready to try sourdough, and kneading feels like too much work, this is a very good in-between bread recipe. There is a recipe on OE for spelt buns using a normal kneading method and more yeast if you want something a little faster.
For some more nice low-effort bread recipes (with and without yeast), try sweet potato flatbread, reader favourite simple spelt bread, or no-knead honey oat sourdough.
Ingredient Notes and Substitutions
- Spelt flour: I prefer a mix of half light and half whole grain spelt flour. It will work with all light, all whole grain, and sprouted spelt flour, or a mix of them. Substitute plain white flour or a mix of white and whole wheat if preferred.
- Yeast: this can be any type of dry yeast. If using fresh yeast, a pea-sized piece will be good.
Recipe Notes
If you forget to turn the oven down 20 minutes into the crusty roll method, don’t worry. Reducing the heat to 230 the first time is the important bit – if you leave it at 250, it’ll hinder the rising of the buns.
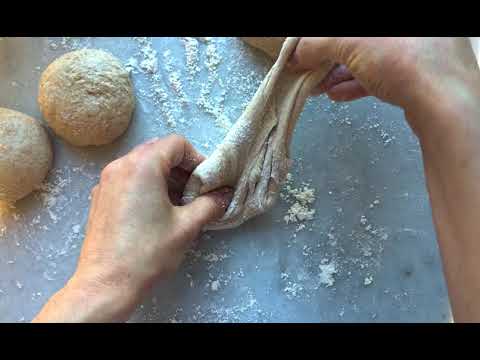
I know there can sometimes be some confusion about the shaping of dough like this, so I made a very low-fi video for this recipe! I hope it helps. It’s just about shaping the rolls so you don’t end up with a dough puddle.
Dutch Oven or Baking Sheet
There are two methods offered here for these buns. Baking them in a dutch oven, like a no knead bread, results in a crusty roll with a crispier exterior. A baking sheet and lower temperature will result in a softer overall bun, like a dinner roll. Both are delicious, but I know many of you might not have a dutch oven and I often get questions about baking no-knead loaves without one (this overnight rye bread is a good example of how to do that).
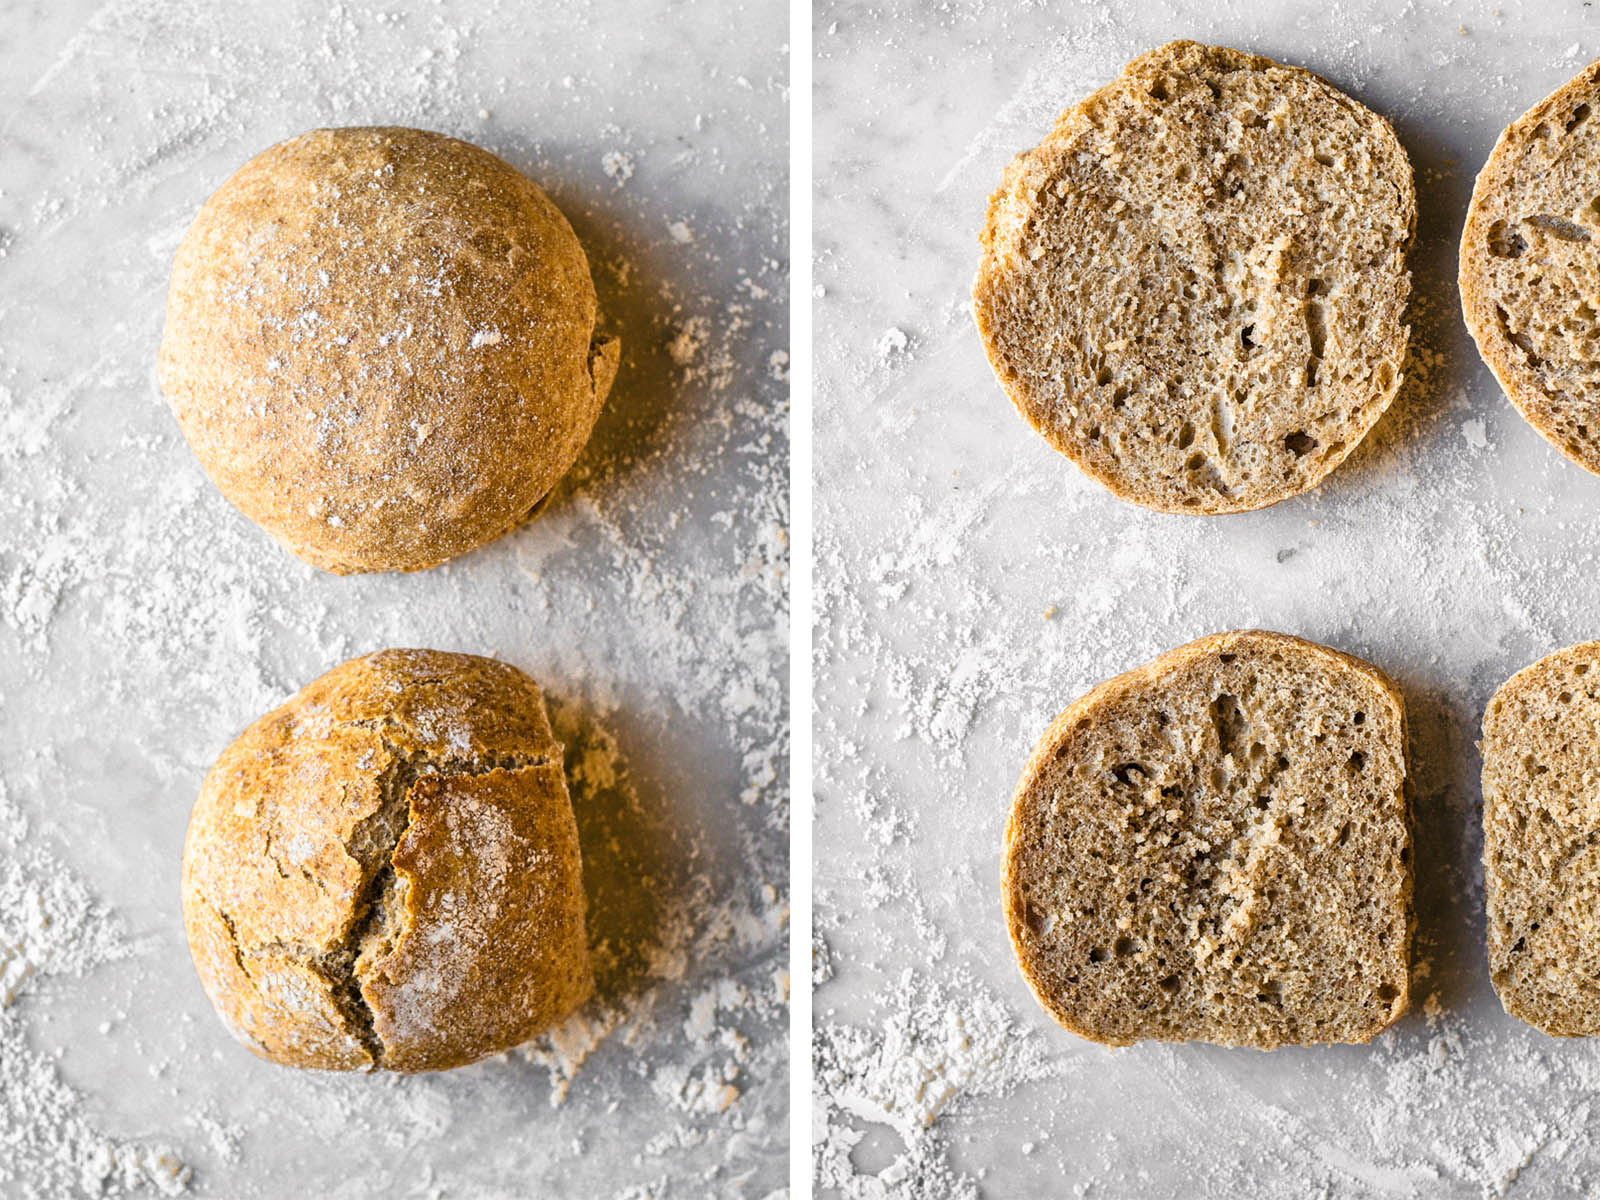
The difference between the methods is only noticeable for the outer crust, with the dutch oven version being much harder and, well, crustier, than the baking sheet version. In the image below, the top bun is baked on a sheet and the bottom bun is baked in the dutch oven.
The internal texture of the buns doesn’t differ much between methods, and both are quite light. I prefer a mix of half light spelt and half whole grain, but if you want a softer bun, choose all light. There is no fat added so these aren’t your gran’s dinner rolls or ones you’d find at a prairie diner, but they’re an excellent everyday bun, and easy enough to be just that.
How to Store
Storage: these will keep for a few days in a sealed container at room temperature, but will dry out a bit over time.
Freezing: the rolls freeze very well. Place fully cooled buns in an airtight container and freeze for up to three months.
More Spelt Bread Recipes
Spelt Flour Pizza Dough
Vegan Challah with lemon and vanilla
Honey Oat Bread
Spelt Sourdough Bread
If you make these Overnight Rolls or any other ancient grain bread recipes on Occasionally Eggs, please take a moment to rate the recipe and leave a comment below. It’s such a help to others who want to try the recipe. For more OE, follow along on Instagram, Facebook, and Pinterest, purchase the Occasionally Eggs cookbook, or subscribe for new posts via email.
No Knead Overnight Rolls
Description
Ingredients
- 480 grams (3 ¼ cup) spelt flour*
- 2 teaspoons sea salt
- ¼ teaspoon dry yeast
- 350 ml (1 ½ cup) water room temperature
Instructions
- Add all ingredients to a large bowl and mix with a wooden spoon until well combined. The dough should be shaggy and a bit wet.480 grams (3 ¼ cup) spelt flour*, 2 teaspoons sea salt, ¼ teaspoon dry yeast, 350 ml (1 ½ cup) water
- Cover the bowl with a plate and set in a warm-ish, draft free place to rise overnight (8-12 hours). It should at least double in size. Once the dough has risen, tip it out onto a generously floured surface.
- Cut the dough into eight equal pieces. Stretch and fold each piece, holding the centre with one hand as you pull half of the dough away from yourself and fold back toward the centre. Do this about six times, rotating the bun slightly with each stretch, until tension forms in the dough.
- Flip the bun fold side down and use the edges of both hands to turn the dough with small twists until a rounded bun forms with a fairly smooth top. Set the finished bun onto parchment paper to rise.
- Repeat this with each piece of dough, adding flour as needed both to the surface and your hands. See above video for additional guidance on shaping.
Method One: Crusty Rolls
- Place a large dutch oven in your oven and preheat to 250°C (480°F). Heat slightly longer than usual to allow the dish to heat through.
- While the oven is heating, shape the buns and set onto a piece of parchment paper that will fit in your dutch oven. You may have to do this in two rounds.
- Once the oven is hot, very carefully remove the dish. Place the buns, with the parchment, into the dutch oven and cover with the lid. Place into the oven and reduce the heat to 230°C (450°F). Bake covered for 20 minutes, then uncover and bake for another 10 minutes at 200°C (400°F). Repeat if needed.
- Cool the buns for 15 minutes in the dish before removing and cooling on a rack.
Method Two: Dinner Rolls
- Line a large baking sheet with parchment paper. Place the prepared buns onto the baking sheet and cover with a tea towel. Let the buns rise for another 20 minutes.
- While the buns are rising, preheat the oven to 200°C (400°F). Once the oven is hot, place the tray on the centre rack and bake the buns for 25-30 minutes, or until golden.
- Let the buns cool for 10 minutes before removing from the pan and cooling fully on a rack.
Notes
Nutrition
Nutrition is provided as a courtesy and is an estimate. If this information is important to you, please have it verified independently.

The recipe does not say how much sourdough to use – can you please advise me?
Hi Moira, this isn’t a sourdough recipe, it uses yeast. I’ve never tried making it with starter but you could try 100 grams 100% hydration active starter and see how it goes. With that being said, I do think that it would be tricky to work with using starter and omitting yeast.
Such a great recipe! The bread came out perfectly and is super tasty! This recipe is a keeper!!! Thank you! All the best,
Aline
Thank you so much for this recipe, Alexandra! I’ve been meaning to make a vegan burger from scratch for a while now, but was intimidated by the idea of baking my own burger buns. Yesterday I tried your recipe and it’s a keeper: so easy, hardly any work and super tasty. I’ll be coming back to this recipe from now on.