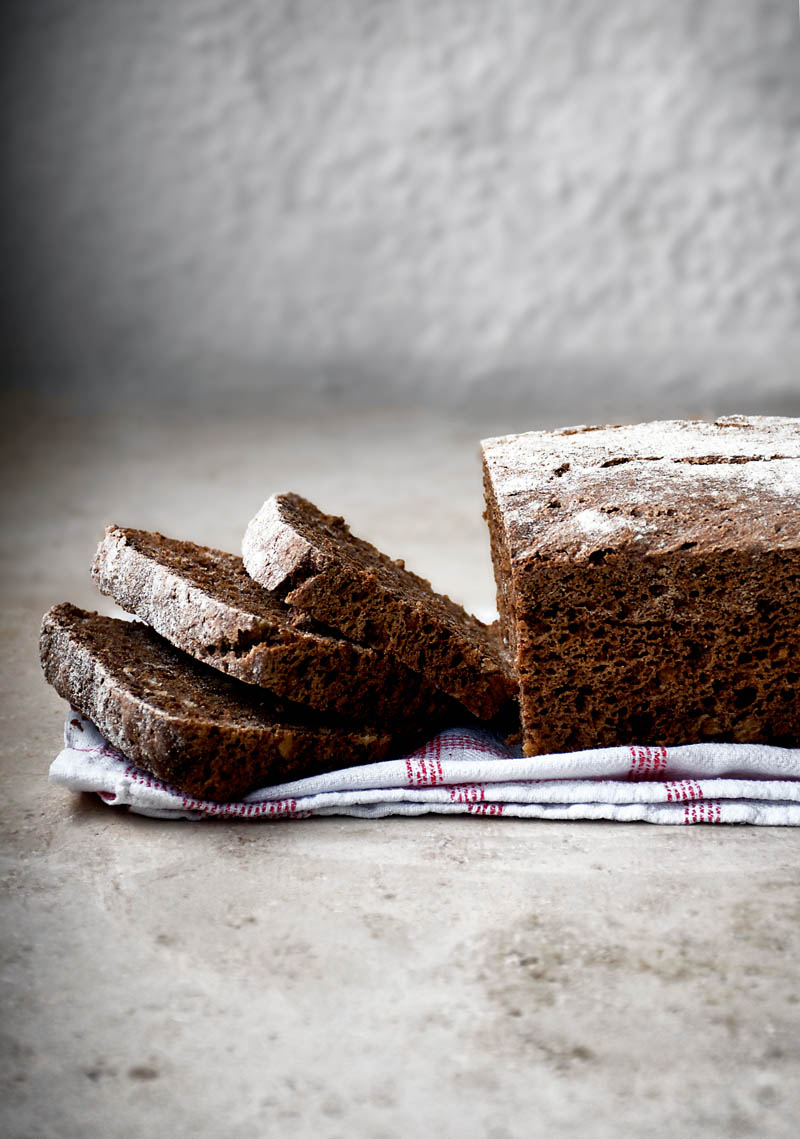
I love overnight bread. It’s much easier to make than normal homemade bread, without any kneading necessary – you just mix everything together in a bowl, let it sit overnight, and then bake it in the morning. This is a typical north German rye bread, dark and slightly sour.
The usual problem is that it’s usually baked in a dutch oven or lidded ceramic dish and involves some dough folding and sitting in a tea towel in the morning after it’s risen overnight, which I find detracts a bit from the simplicity of the method.
The dough rises a second time in the pan you bake it in, so you don’t need to worry about proper folding technique or anything like that. All you have to do is mix it the night before, dump it in a loaf pan, and bake it. No kneading, no folding, no special equipment.
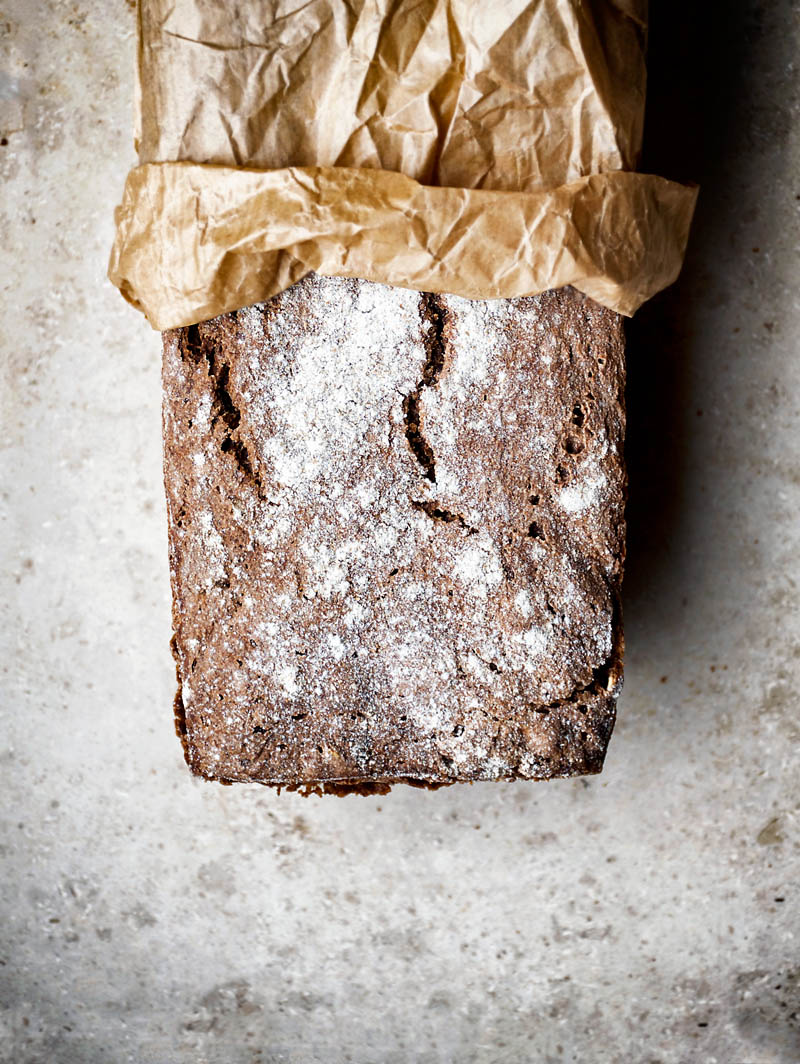
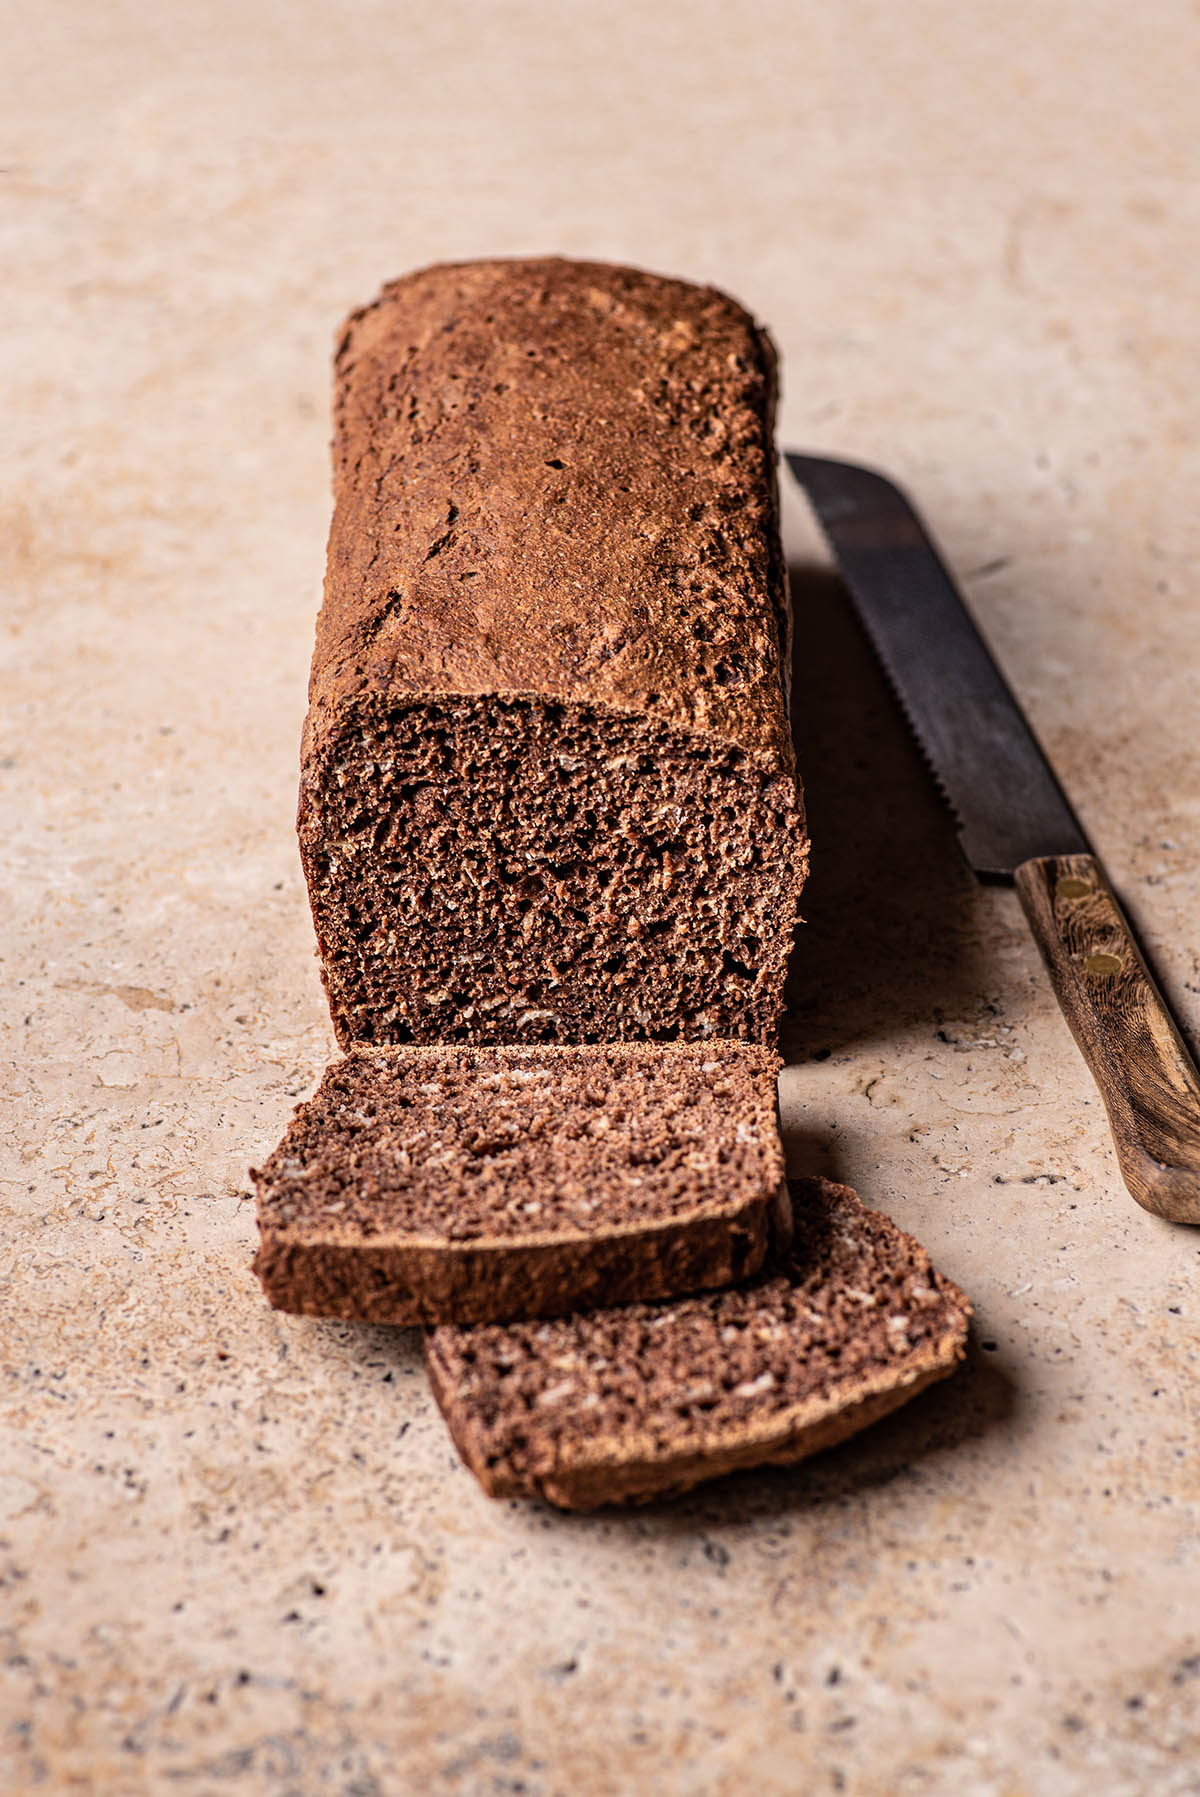
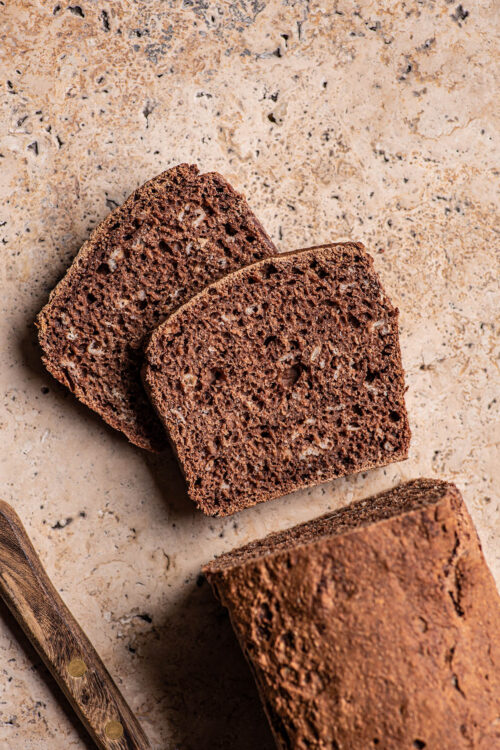
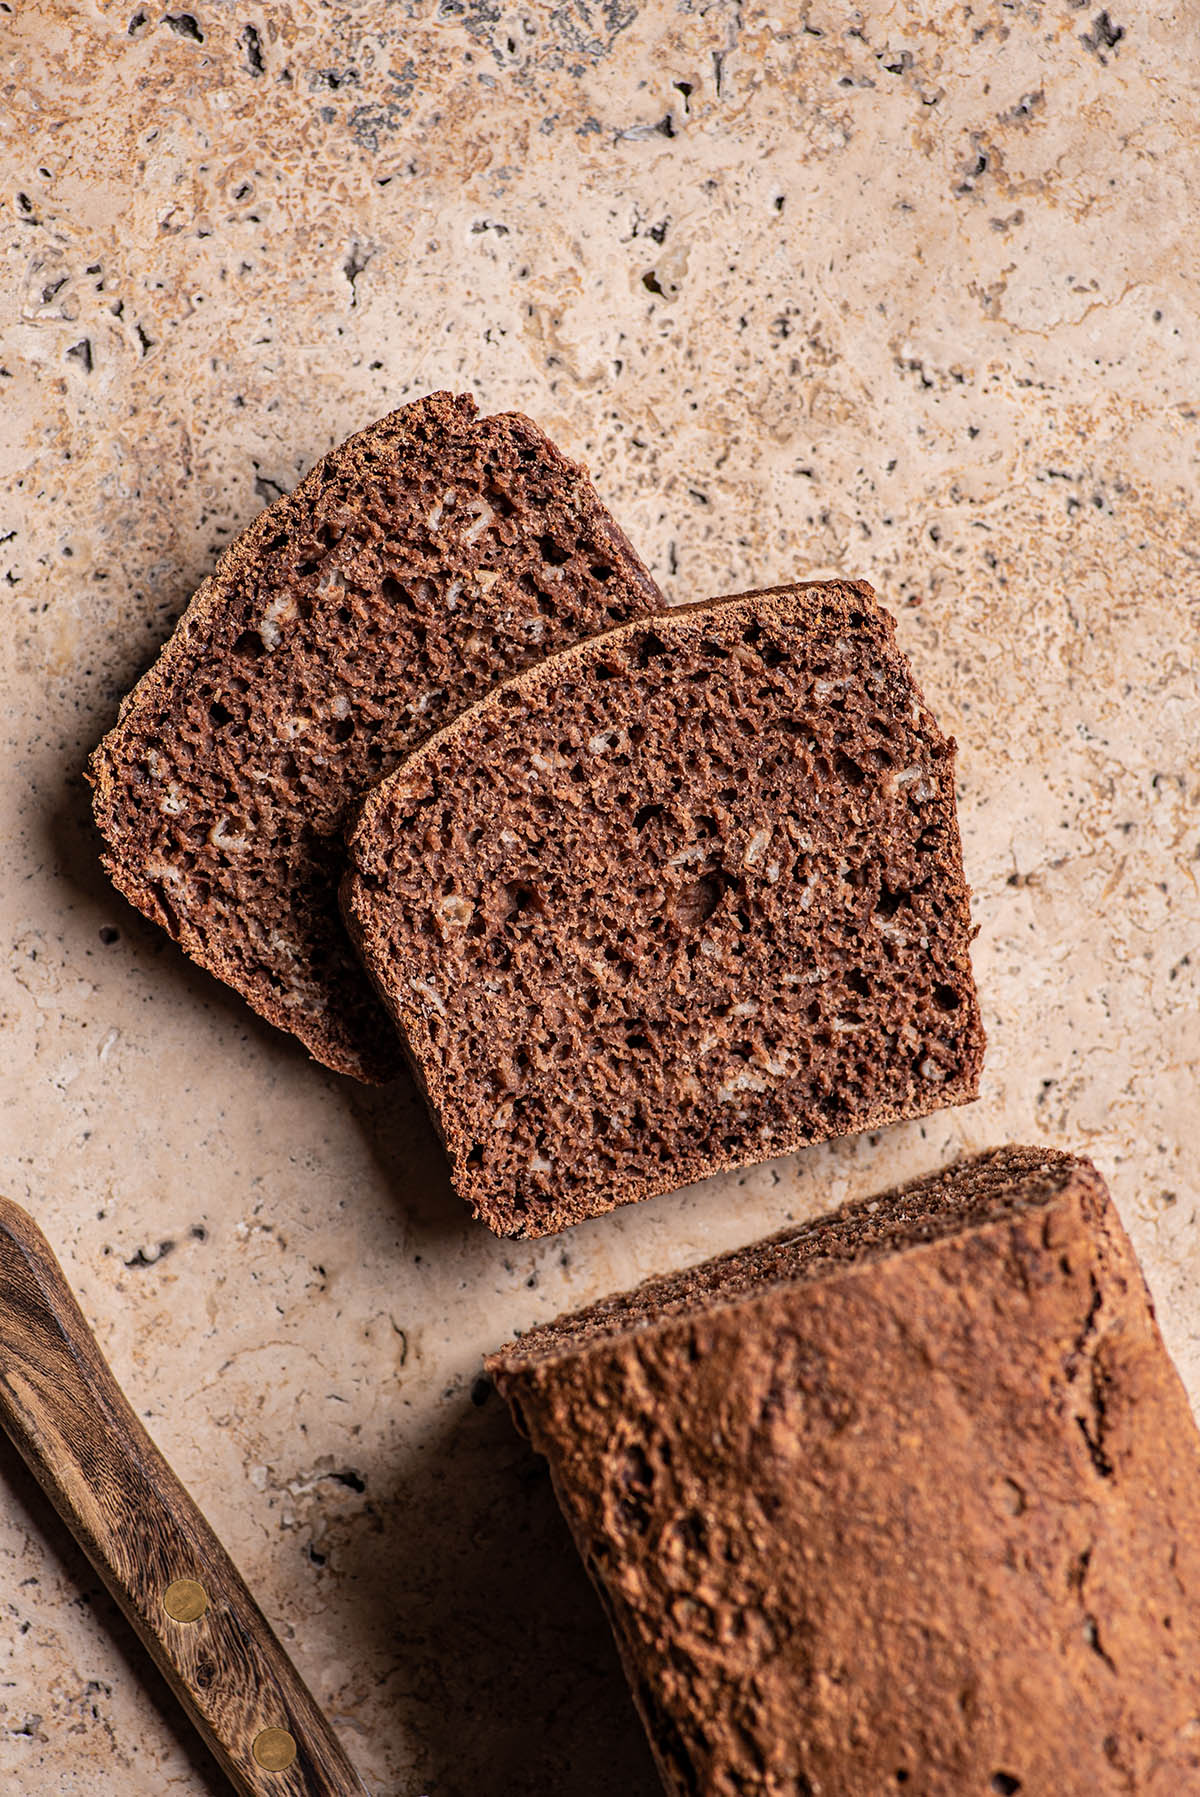
Despite the lack of work that goes into this bread, the crust is surprisingly crispy, and the inside of the loaf is soft and tender. It also lasts longer than other homemade breads, and it keeps for at least a week sitting on the counter, wrapped well.
If you like the idea of rye bread but don’t want to go all the way to a dark rye, try this overnight spelt rye bread instead, or sourdough rye bread if you prefer a natural yeast version.
Please note that the darker photos are made with regular cocoa powder and yeast, and the lighter bread is made with sourdough starter and natural cacao. The step-by-step photos are sourdough, so if you want to see the steps for the yeast method, please watch the recipe video.
Ingredients
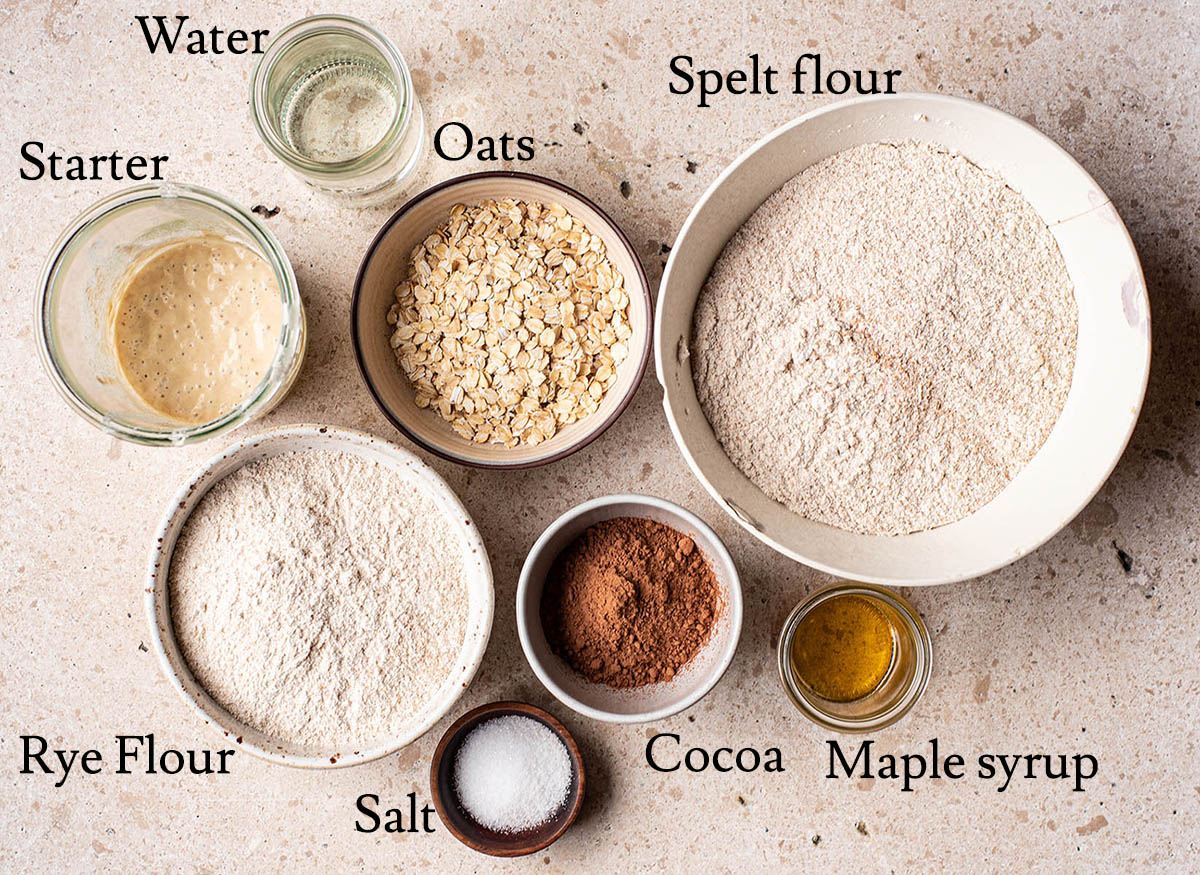
Ingredient Notes and Substitutions
- Whole grain spelt flour: if you don’t have spelt flour, all-purpose makes an excellent substitution. Whole wheat flour can be used as well, but you’ll have to reduce the flour slightly or increase the water a bit to make up for the greater absorption.
- Rye flour: sometimes called dark rye flour, this should be whole grain rye, though light (sifted) rye flour can also be used.
- Rolled oats: the oats can be left out if you prefer – I often omit them – though it is better to increase the amount of flour used by a couple spoonfuls in this case as the oats do absorb a fair amount of water.
- Cocoa powder: make sure you’re using 100% cocoa powder, not hot cocoa drink powder. There shouldn’t be anything like sugar or milk powder in it.
- Yeast (dry or fresh) or active sourdough starter: traditional yeast (not quick rise) is ideal, but it doesn’t make that much of a difference. Active starter can be any starter made with a gluten-containing flour – rye, plain flour, spelt, and so on. There’s a recipe in my cookbook for rye sourdough starter.
- Add-ins: dried fruit, seeds, and nuts can be added to the dough as well. I recommend mixing it in after the bulk rise (overnight) before placing the dough into the tin to rise a second time. Raisins, dried cranberries, and sunflower seeds are my favourite additions. You can also top the loaf with seeds, which makes for a very pretty gift.
Step by Step
See the recipe card notes for instructions on how to make this into a sourdough loaf. The step-by-step photos show the sourdough method because the video shows it made with yeast, so in the interest of maximum information, I wanted to include both.
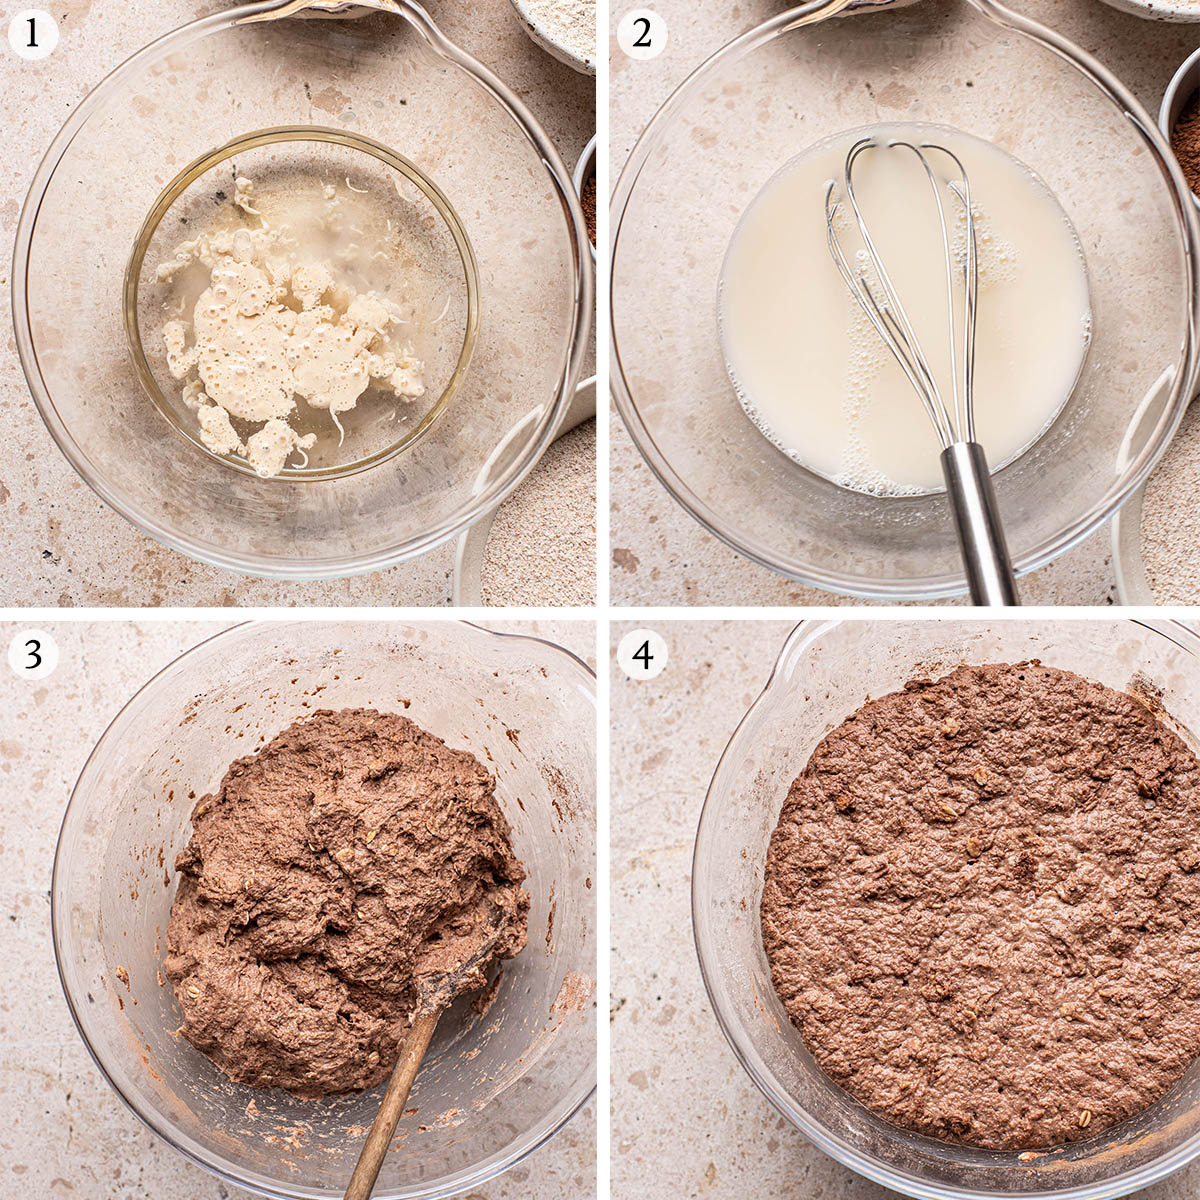
1. Add wet ingredients: add the water, maple syrup, and active starter to a large bowl. The starter should float. If using fresh yeast, add it now.
2. Mix: whisk to combine well.
3. Add dry ingredients: stir in the flours, oats, cocoa, and salt. Add the dry yeast now if using that method and stir into a shaggy dough.
4. Rise: cover with a plate, board, or tea towel, and set it into a room temperature, draft free place for about 12 hours.
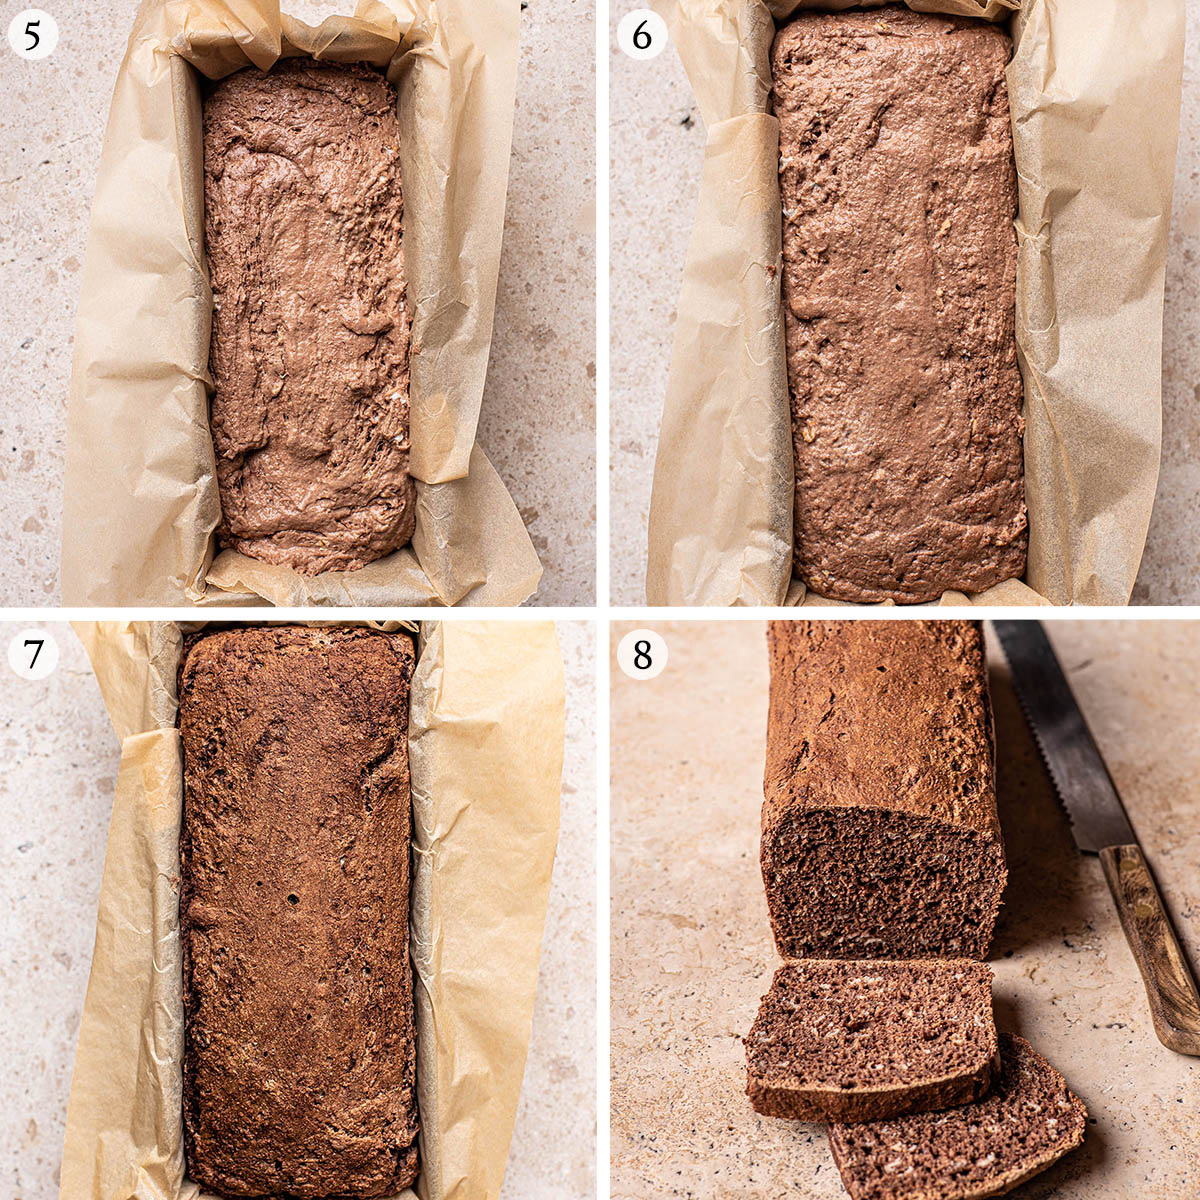
5. Transfer: once the dough as risen, place it into a well greased or parchment lined bread tin. It will lose volume here.
6. Rise: cover the loaf with a tea towel and set it into a draft-free place to rise again for a couple of hours. The dough should be expanded but not quite doubled after this time.
7. Bake: bake the loaf for about 45 minutes, or until the bread sounds hollow when it’s tapped.
8. Cool and serve: cool the bread completely – at least six hours, preferably overnight – before slicing and serving.
Recipe Notes
Like most darker whole grain breads and sourdough loaves, this one needs to rest for a significant amount of time before slicing. The recipe states to let it cool completely – that may mean several hours or even overnight. If you want really nice clean slices I recommend letting the baked loaf sit overnight in a tea towel before slicing the following day.
If you want to make this into a boule, you’ll have to introduce some stretches and folds. I recommend 4 rounds, starting directly after mixing. After the dough has risen overnight, shape it as you usually would and place it into a well floured banneton. Bake in a dutch oven 30 minutes covered and another 15-20 minutes uncovered, at 230°C (450°F).
The dark colour and traditional dark rye flavour here come from the whole grain flours and cocoa powder. It’s not quite a German black bread, which I grew up with, but this style of rye bread is also very common in northern Germany (where I lived) and Scandinavia (though it is hard to find in Gothenburg). If you feel that the cocoa will make it too bitter – though that is kind of the point – you can leave it out, no problem.
How to Store
Storage: the bread keeps well, wrapped in a tea towel, for about a week. The crust will harden slightly but the middle will still be fresh. You can also use a bread bin or sealed container, but I don’t recommend storing this in a plastic bag.
Freezing: this loaf freezes spectacularly, and I highly recommend having some in the freezer at all times. Freeze the whole loaf or pre-slice and take out individual pieces to toast, but either way it’s well worth freezing some in an airtight container.
Sign up for email updates!
Expert Tips
- Choose a good draft-free spot: I usually keep my dough in the oven with the door closed, no light needed, for the initial prove.
- Keep an eye on the dough the first time: you may need slightly less time if your starter is very active. The dough is finished the bulk proof when it’s approximately doubled in size.
- Don’t worry about overdoing it: the colour is harder to gauge because the loaf is so dark, but the outer crust should be quite hard and crisp when finished (it’s difficult to over-bake this bread).
- Serve with strong toppings: this is excellent with mirabelle jam, for example, something quite tart. We often have it with peanut butter but a sharp cheese is certainly more traditional.
- Refrigerate after shaping: if doing the sourdough method, it’s no problem to refrigerate the loaf for a few hours before baking. I recommend letting it rise at room temperature for an hour or so before refrigerating for the best results.
More Wholesome Bread Recipes
No Knead Honey and Oat Sourdough
Spelt Naan
Saffron Wreath Bread
Simple Spelt Bread
Einkorn Bread
If you make this Dark Rye Bread or any other bread recipes on Occasionally Eggs, please take a moment to rate the recipe and leave a comment below. It’s such a help to others who want to try the recipe. For more OE, follow along on Instagram, Facebook, and Pinterest, purchase the Occasionally Eggs cookbook, or subscribe for new posts via email.
Easy Overnight Dark Rye Bread
Ingredients
- 500 ml room temperature water
- 1 teaspoon maple syrup or honey
- 450 grams whole spelt flour
- 150 grams rye flour
- 60 grams rolled oats
- 25 grams cocoa powder
- 1 ½ teaspoons sea salt
- ¼ teaspoon dry yeast** or 100g active starter see notes
Instructions
- In a large mixing bowl, whisk together the water, maple syrup, and active starter or fresh yeast if using that option.
- Add the spelt, rye, oats, cocoa, and salt to the bowl. Add the dry yeast to the dry ingredients as well if that’s what you’re using. Stir with a wooden spoon to combine, mixing until no visible streaks remain.
- Cover the bowl with a lid, cutting board, or tea towel and let it sit for 12-15 hours at room temperature. It will at least double in size during this time.
- In the morning, grease* a 30 cm / 12 inch bread pan or line it with paper. Scrape the dough into the pan, and then press it down evenly (wet hands work well).
- Cover the dough with a clean dish towel. Let it rest again for 1-2 hours at room temperature.
- Heat the oven to 200°C (400°F). Once the oven is hot, place the bread on a middle rack and bake for 40-45 minutes. The crust will be hard and sound hollow when tapped once the bread is done baking.
- Remove it from the oven and place the pan on a metal rack to cool for 20-30 minutes before removing it from the pan to cool completely. The loaf will keep well for a week at room temperature, best stored in a cloth bag.
Video
Notes
* For American cup measurements, please click the pink link text above the ingredient list that says ‘American’.
Nutrition
Nutrition is provided as a courtesy and is an estimate. If this information is important to you, please have it verified independently.
This post was originally shared in October 2016. It has been updated most recently as of January 2023 with no changes to the recipe.

Brenda says
Hello I’m in the process of making the bread but I noticed this morning when I was getting ready to put dough in baking pan it was not firm to roll but sticky like I needed to add more flour. I moved on and scrapped into baking tin and let it rise for 2 hrs ,it firmed up but didn’t rise much. Should I take it out add more flour and let rise again or just bake It? HELP waiting patiently. THANKS
Alexandra Daum says
Hi Brenda, this is normal. It’s a sticky dough, that’s why you put it right into the tin and don’t try to shape it. Just bake it – there should be a pretty good oven spring, but keep in mind it’s a whole grain rye bread, and meant to be dense.
Brenda says
I love it such a quick, response! I have continued to let the bread rise in oven with light on and it is rising!! Sooo shall I let it rise til it reached top of tin or just bake?.thanks
Alexandra Daum says
Hi Brenda, I didn’t see your second comment here in time, but there is a lot of guidance within the post. Hope your bread turned out!
Bharati says
Hello and thank you for your recipe. We don’t get spelt flour in India which is where I live, so could I substitute it with wheat or bread flour? Or rye flour?
I have normal yeast and also have a dehydrated sour dough starter with instructions to add it to the flour as easily as normal yeast. I’ve done that with plain flour several times and it certainly doesn’t resemble sour dough at all.
Would appreciate your response.
Alexandra Daum says
Hi Bharati, you can substitute with regular wheat flour (see the substitutions section for more on this). It is possible to use all rye flour but will make a heavy loaf.
I find that the dehydrated starter works fine in terms of causing the loaf to rise, but doesn’t add a sourdough flavour. You will get a stronger sour flavour with this loaf even when using yeast due to the long ferment time and the natural sourness of rye flour. Hope this helps.
Cathy says
I am going to make this bread later this week. Question – have you tried increasing the hydration a bit?
Alexandra Daum says
Hi Cathy, I haven’t tried increasing the hydration – are you looking for a greater oven spring?
Melissa says
I’m trying to eat better and i wanted to make breakfasts with rye bread, supermarket had none so I decided to try and make it! Luckily both flours were available and made it that day. I have to say came out delicious, and yes a slight bitter aftertaste but great and filling!
Mine didn’t rise as well as yours but still tasted great, soft inside and crusty on outside!
Thanks!
Monica says
The color looks great and it seems very easy to make it. Can’t wait to try a bread with rye flour, which its not very common where I live.
Alexandra Daum says
Hope you like it, Monica!
Esther Howieson says
Hi ,
Thanks so much for this awesome recipe
When you say whole spelt flour which one do you use ?
I have a wholemeal spelt and a white spelt I used half of the amount each
But I was just wondering what you ment?
Love the oats in it
Happy baker happy baking
Cheer
Esther, Sydney Australia 🇦🇺
Alexandra Daum says
Hi Esther! Whole spelt is wholemeal, but white (light) spelt can always be used in its place : ) I think I am a bit inconsistent because I say whole, wholemeal, and whole grain all interchangeably! I’m very happy you like the bread!
Donna says
Made this once before and it came out divine! Thank you! Making one now for the morning can’t wait to eat!
Helen says
Made this overnight and presented it to my 90-year-old mother today. She’s Finnish so I grew up here in Australia eating black, rye, sweet and sour and whole grain breads regularly. My mother loved this bread! It’s sometimes difficult to find a truly delicious dark bread. This one has a lovely texture – soft yet dense enough to be satisfying. Thanks! I’ll be making this again.
Buj says
I made this bread twice. And so far so good for being new to this. I followed your directions to keep it in a tea towel. I don’t see how that is possible. The bread becomes as hard as a rock after a few days. I tried doubling up the tea towels. Same issue. The air is not too dry here, even though it’s winter. Maybe I’m doing something wrong?
Alexandra Daum says
Hi there – you can store the bread in other ways, too, if you find that it’s getting too hard. Wrap it in a bag, use beeswax wrap, keep it in the oven or another enclosed space. Just find something that works for you : )
Joan Picone says
I’ve been ( desperately trying to find a good dark rye. I saw this on Baked the Blog. I didn’t try it right away, because I was skeptical. I’ve tried so many and this looked too easy! I’m an accomplished baker and make sourdough bread all the time. I tried both starter and yeast and saw no difference. I used some pickle juice in place of the water and malt in place of the honey.
I will never look for another recipe. OMG IT IS BEYOND PERFECT ! I’m now signed up for your email so I can try everything!
My husband thanks you ( his favorite new bread) as do I !
4waystoyummy says
I am making this rye bread tonight. I wondered if I could sub cocoa for cacao? Wish me luck.
Alexandra says
Hi there – you can with no real difference to the bread. I use cocoa because it’s cheaper than cacao.
Dayna Schirmer says
I replaced the spelt with 2 c bread flour & 1 cup whole wheat. I also added a handful of sunflower seeds & pumpkin seeds into the mix and on top. I LOVE this recipe and will use it again and again. So healthy & flavorful being slightly crusty outside and moist inside. Beautiful, hassle free & healthy. Keepin this one. THANK YOU!
Chantal says
So You used cups, not weighed, in your substitution?
I am looking to replace or omit the Oats altogether.. I can go with spelt, whole wheat and bread flour. what combo do you recommend ? Thanks
Gail in Coquitlam says
Just enjoyed a slice with a generous amount of cool butter and am very pleased with the results! I am inspired to dig some smoked salmon out of the freezer to go with it. While this style of bread may not appeal to all bakers, those of Scandinavian descent may find that it is ‘just like in the old country.’ A wonderful bread for a winter afternoon.
annie says
I just read all your wonderful questions and Replies!! Thank you!!
I have a very mundane question that is holding me up!!
Could you please say If i can use ,,,,Instant Yeast ,,,,,,in this recipe!!
If so, How Much ⁉️
I don’t know what you mean by “ Fresh Yeast” ,or ,,,,,,,,if Instant Yeast would qualify???
I’m 82 and Covid has sent me back to Baking after many years of avoiding this delight.😉
Alexandra says
Hello Annie, how lovely to hear from you! It’s wonderful that you’ve started to bake again, such a nice hobby. You can certainly use instant yeast in this recipe, in the same amount as regular (traditional) yeast. Since you’re not ‘activating’ the yeast as you might with a normal loaf – the resting for 15 minutes with warm water and a little sugar – you may use either traditional or instant here. I hope that helps!
Fresh yeast is what’s more common in Germany and some other parts of Europe and what’s often used in bakeries in North America, but it’s hard to get in the store (at least in Canada!) and is just cubes instead of little granules.
Please let me know how this recipe goes for you, good luck!
Rei says
I baked this bread and made my first comment, positive, in September 2020. I have baked another dozen or so loaves since with sourdough starter and add ins like walnuts dates and hazelnut cherry. Perfection every time. A very easy and forgiving recipe. Simply the best.
Marianne says
Just waiting for my second rise now … I have a question about oven temp. I am assuming the 200C is fan forced oven setting? Thanks
Alexandra says
Sorry Marianne, I think I’m a bit late responding. Modern ovens don’t have the same issue with the 10C or so temperature difference between forced and regular – I do fan forced but I have a separate temperature gauge in my oven to make sure it’s actually at the temperature listed in the recipe. Hope that helps!
Patricia Swanson says
Hello. I have been “studying” this recipe for a while today. Before I make it for the first time, I have a few questions. I use a really high quality Pullman pan that is 13” by 4”. I have been baking a very seedy sourdough rye in it using the lid for the first 30 minutes, The starting temp is 500F for 15 minutes, then, 450F for 15, then lid off at 325 for 45 minutes. The pan is buttered and floured ahead. The loaf comes out easily and cleanly. Would you think that this recipe would do well using that same process? I do plan to add dried fruit pieces and pecans to the dough before the final rise time. Thank you in advance for your help.
Alexandra says
Hi Patricia! I would suggest, yes, using the same process that you describe if using a Pullman pan. You may not need the full 45 minutes at the end, but if you are adding additional fruit/nuts it may indeed be required. You should get a great oven spring with that method.
Suz says
Excellent directions , turned out picture perfect and the family loves it . I must say this recipe will definitely stay in our household for many years to come. Some of our family members are already asking for the recipe, thank you so very much for sharing! ❤️
Rei says
You’re a gem, Alexandra! This is not just a case of different flours of different regions….I’m baking in Sydney, Australia….g’day. Totally taking your suggestion to use a damp towel.
I now know why too…the lump…as I said…following your instructions to a “t”…well so started out with the liquid then dump the flours/dry stuff on top…what a dill (Aussie slang not the pickle)!
Take care, stay safe and keep on baking.
Alexandra says
Aha some bigger differences then! I think some little changes will make for an easier to work with dough then : ) Thanks so much, and you too!
Rei says
You had me at “easy”. The bread is SOOOOO good!!!
I followed recipe to a “t” and was not at all “shaggy” but a dry lump. Being anal, I have already read through ALL the comments, in case there are tips and tricks and saw someone mentioned having same issue and added some water. Did that and still a big lump that I had to use my hand, but smelt gorgeous as I use cacao, not cocoa.
A dry, somewhat hard skin formed after the first rise and it didn’t rise much. Folded the dry skin into the lump, try to mix it around a bit and continued as per instructions.
Came out DELISH!!!!! Had it plain so not to mar the taste. There’s a faint sweetness and somehow conjured a taste that got me thinking of my next loaf…..will add dates and walnuts, reminiscent of the coffee, date and walnut bread I once had. Ooo, just salivating thinking about it now. Thank you so much for sharing this recipe.
Alexandra says
Hi Rei! I’m glad you made some alterations and continued with the bread – flours differ so much between regions that it’s always a good idea to use your intuition with the amount of liquid you need. Re: the skin forming on the rise, try using a damp tea towel plus a plate to cover the bowl and it should prevent that. Both of these might also be related to the relative humidity in your home so it’s a good idea to consider that as well. I’m so happy that you liked the end result and walnut date sounds excellent!